Daryl and Robyn’s Excellent Adventure – Day 1

Wow, make sure you get a large coffee and pull up a chair, you are all in for a real fiber treat.  I did some real damage to my Master Card, but this was sooooo much fun.  I’ll try to keep the words to a minimum, and let the pictures speak for themselves (Hah! like that’s going to happen…)

koiDay 1, Seattle:  I got up early (I’m still on East Coast time) and made my morning tea.  I heard gurgling water and went to investigate.  This is Harlow.  Robyn has names for all her fish.

seattleRobyn lives in a small town on the other side of Puget Sound, and it is necessary to take a ferry into Seattle.  This is a lovely skyline, but I will say, I am pretty unimpressed, I live right outside Manhattan, now that’s a skyline.  But it was beautiful approaching it on the water, and I enjoyed the lovely long ferry ride where Robyn and I discussed some possible joint creative ventures.

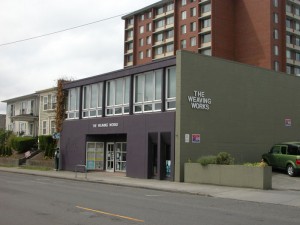
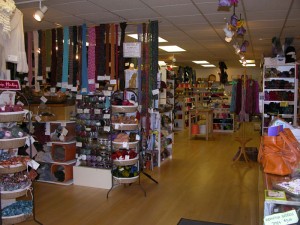
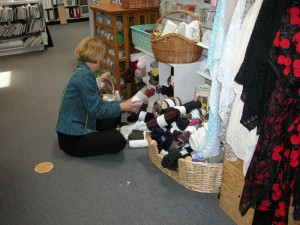
weavingworksOur first stop on our excellent adventure was Weaving Works, a very popular knitting/weaving store, I’ve taught there in the past, and Carol Jorstead is an absolute delight.weavingworks2

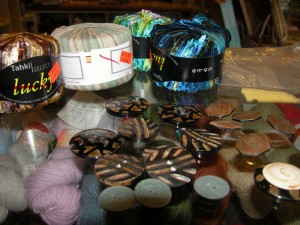
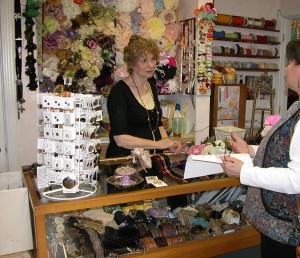
When you first walk in the door, you just stop and inhale deeply.  A feast of color and texture, and you just want to dive right in.  Since we plan a number of fiber stops on our excellent adventure, I noted the books I wanted to have in my collection, for my wish list, and checked out the sale bins.  I picked up four balls of  “tapey things”, ribbon yarn, and then spied the buttons.  I’m running low in my stash, so this was a perfect opportunity to refill.

purchaseNo, I didn’t buy all the yarn under the glass counter top, just the buttons and the balls of “tapey things”.

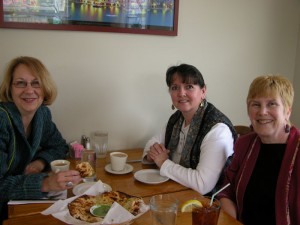
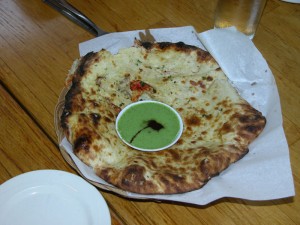
We met up with another favorite weaving buddy,cedars Dorothy Day, who is actually an amazing dyer, with a PhD in Chemistry.  It is amazing how educated weavers/dyers can be.  We had lunch in one of Robyn’s favorite haunts, a middle eastern restaurant called Cedars.  We had an appetizer of the house “nan”, a middle eastern flatbread.cedarsnan

And of course we all had the chai tea latte.

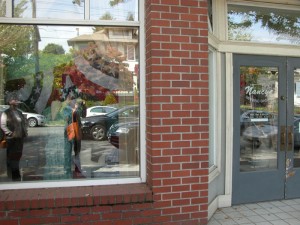
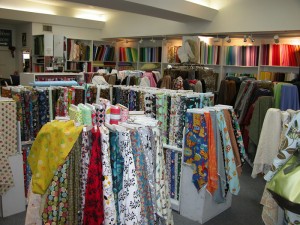
Next stop on the excellent adventure was Nancy’s Sewing Basket, also in Seattle.nancy1

For the second time today, I walked in and inhaled and smelled the fiber!

nancy2

I will admit, I get pretty overwhelmed in places like this,  where to even begin.  Each fabric was prettier than the next, so what do I do?  I jump right into the remnants.  I love remnants, the decision on how much to buy is basically made for you.  They are a bargain, and it narrows down the choices significantly.  remnants2

So here I am, sitting in the middle of piles of linens, wools, silks, rayons, cottons.  I picked out some pieces that I thought had great potential for dyeing and for discharging.

remnantsThen Robyn took me to the back of the store and the “Ribbon Room”!

susanHere is Susan of “The Ribbon Room”, a back room in Nancy’s Sewing Basket that is just filled to brimming with all sorts of vintage ribbons and flowers and trims.

Feast your eyes!

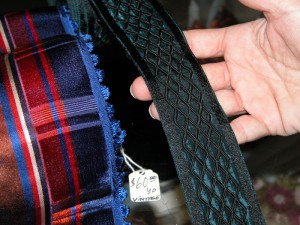
ribbonroom1Some Edwardian trims.

ribbonroom2

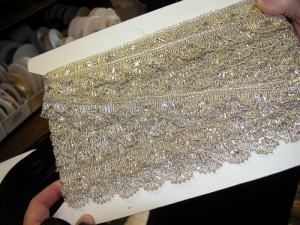
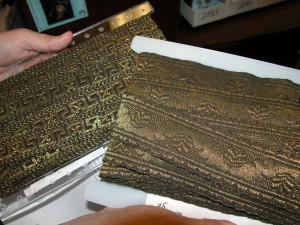
On the right, vintage trims made from fine metals.

ribbonroom3On the left, vintage trim made from Aluminum.

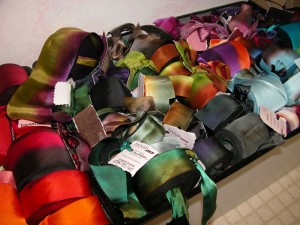
ribbonroom4Gorgeous trays of hand dyed silk ribbons.

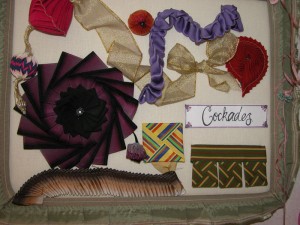
cockadesAnd all around the room were these beautiful framed vignettes of Cockades, folded ribbon accents.  There were classes available as well.

eraser

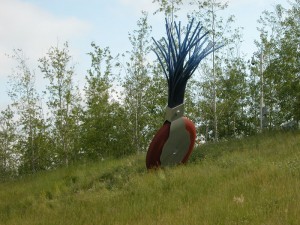
Driving back to the ferry, I was struck by how much random artwork appeared in the oddest places in Seattle.  On the hillside along one of the highways, was this grade school eraser!

We had a lovely trip home on the ferry, and stopped in Bremerton for the First Friday Art Walk, I’ve been to things like this in other towns around the country, all the gallerys and museums in an area are open late one night a month, with openings, and “potent” refreshments, and Robyn and I hit a couple of interesting galleries, and then found the vintage clothing store, ish.

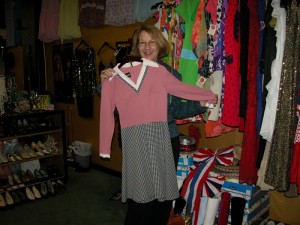
ish2We found a Marsha Brady dress.

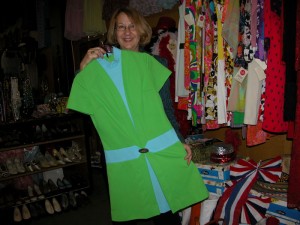
ish3And this lovely combo from the 70’s.  I remember wearing something like this in High School.

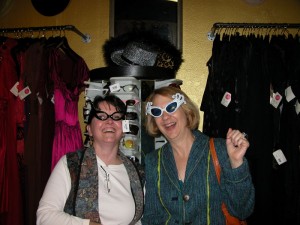
ish4And then we found the rack of shades.

We ended our excellent adventure with delicious sandwiches in the lounge of the Boat Shed, nestled on Puget Sound under the bridge, margaritas, friendship, and lots of fiber purchases, it doesn’t get any better than that!boatshed

Tomorrow, we head to Portland, Oregon!

Placemat Exchanged!

Grab your coffee, this is going to be a long one!

Wow, what a meeting!  Bri and I attended last night’s last Jockey Hollow Weavers’ meeting for the year.  We start up again in the fall.  We had a lot to accomplish.  There was the stash sale, unload what you no longer want.  There are a number of retiring members of the group, who are de-acquisitioning and moving to smaller digs in a far away location.  Since we have a number of new weavers with paltry stashes, this is always a good thing.  Equipment, yarns, books, and back issues of weaving magazines, all find good homes.

Next there was the Pot-Luck.  Weavers are always terrific cooks.  The food was excellent.  The only group who edges out the handweavers for first place in the pot-luck catagory are the lace makers.  I’m not sure why this is, but suffice it to say, no one went home hungry!

Of course there was the entertaining show and tell, we had the supplemental warp workshop scarves to show off, and we have a couple of outside of the box creative fiber members who never cease to impress me with their energy and creativity.  One member crocheted a spiral rug from plastic grocery bags, and started making curtains by randomly stitching colorful halves of zippers in a haphazard way on a bedsheet.  I love show and tell!

But the highlight was of course, the placemat exchange.  It is always a bit disappointing when not everyone finishes on time, and we had one in the group of 16 who dropped out at the last minute, and one of the guild members graciously stepped in to try and weave her set over the summer.  But no matter, I’m amazed at how many of the participants were new weavers, including my daughter, who wove a set of overshot placemats, this being only their 3rd or 4th project ever.  I’m so excited to see the passion these new weavers throw out into the group, infusing it with youth and creativity, and enthusiasm.  It is sad to see older members retiring and moving away, but happily there is some new fresh talent to keep the guild going.
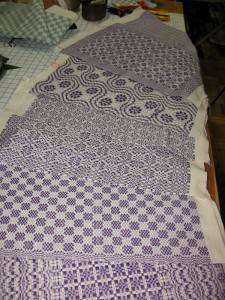
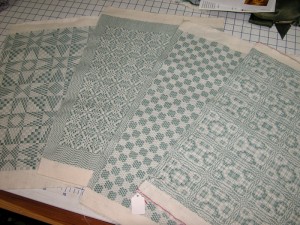
bri_placematsd_placematsSo here are the results.  Bri was able to get seven of her eight purple placemats, and they are beautiful.  They still need to be washed and hemmed, but she is so excited.  The eighth one is as I understand, on the loom as I write.

I only came home with four, but two more will be exchanged at Monday’s meeting of the Frances Irwin Guild, members of that guild graciously jumped in to give us two groups of 16.  One member dropped out at the last minute, and her mats, picked up by another member, and the mats from the other member who wasn’t finished in time, will be delivered in September.  What a beautiful collection of overshot patterns!

We had a special guest at the meeting, Alison Giachetti, who is a partner in the new Weavolution, a web gathering place for handweavers, which is scheduled to launch next week.  I did some brief alpha testing, and posted some project notes on the site for my Frosted Florals dress, and talked to Alison briefly about moderating a handwoven clothing forum on Weavolution, but that won’t happen immediately.  There is a lot of buzz about this, so stay tuned…

Coffee Break!  Lots to cover today before I leave for Seattle….

I spent the day yesterday tying up loose ends.  I got two pieces of work accepted to the Fiber Celebrated 2009 exhibition, at the Center of  Southwest Studies Gallery at Fort Lewis College, Durango, CO.  The show opens July 27th and runs through September 20, 2009.  So yesterday was the paperwork day, artist statements, technical information, all that had to be back fairly quickly.  I struggled with the artist statement.  The limit was 70 words.  Can you imagine?  I can’t say anything in 70 words.  🙂  My average blog posts are over 1000 words.  I’m already at 647 words in this blog alone!  And I had a lot to say about these two seemingly unrelated pieces of artwork.  So, I’ll just use my blog to tell the story that I couldn’t say in 70 words.
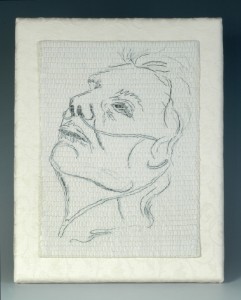
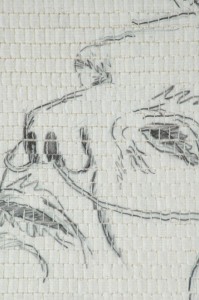
watchingdeathcomewatchingdeathcomedetailThe first piece is one of my small artworks, woven in an inlay style, with strips of silk cut from a digital print on treated fabric.  I’ve blogged about this technique in past posts, just search ‘Big Sister’, and you should find the technical stuff.  I want to talk more about the inspiration.

Many of us have had the privilege of staying with someone, holding their hand, keeping the vigil as we wait for their soul to depart from their old frail, used up body.  In 2006, I had the privilege of the long vigil watching and waiting for my mother in law to pass.  I adored this woman.  She was one of my fiber mentors, and I wrote a piece about our relationship, which you can read, titled Circle of Life.  I was so moved by the grace and beauty of a dying woman, the angle of her head on the pillow, eyes half open, yet not seeing.  I sketched her profile on a small notebook I keep in my purse.  Later I scanned in the sketch, and printed it on silk, cutting the silk apart and reweaving it back together, a metaphor for her life, connecting each row of her profile, until she was whole again.  I titled the piece, Watching Death Come.
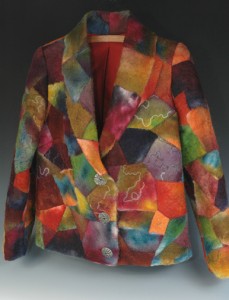
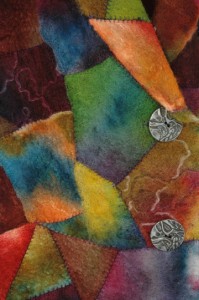
steppingstonesteppingstonesdetail The second piece, which seems unrelated, (I entered both the nonfunctional 2D and the Wearables catagories), is actually an extension of Watching Death Come.  After the death of a loved one, there is the awesome and overwhelming job of disposing of a lifetime of collected treasures, household goods, the cleaning up of one’s life.  My mother in law lived to be 99 years old.  It was a long life and she had a stash!

I did my best to merge her fiber stuff with mine, but she was primarily a spinner, and lacemaker, so I have more lace pillows than I know what to do with, as I rarely make lace anymore (can you imagine no time?).  And everytime I opened another box with a Romney Fleece inside (her sheep breed of choice as a spinner), I groaned.  I do spin, and have two wheels, which I also mentioned in a previous blog, but I’ll never get through all these fleeces and don’t really have the desire to…

Enter felting.  Boy is this a great way to use up wool.  OK, I know Romney isn’t the sheep breed of choice among the felters, but it was free, and it was my mother in law’s.  So, I began to carefully card the washed fleeces into individual gallon ziploc bags, layering the thin carded strips of wool.  I wish I had taken photos of this process, it was such a scream felting on my kitchen counter, but alas, I hadn’t started blogging yet, so that didn’t occur to me.  I added hot soapy water to each bag and started the felting process, first rubbing, and then rolling, occasionally heating up the wool in the microwave to aide the felting process.  Since everything was sealed in a ziploc bag, there was no mess.  🙂

I eventually ended up with something like 18 8″ x 10″ rectangles,  in white, of lovely felted Romney.  I took my glass 9 X 12 baker, and put each rectangle in one at a time, sprinkling some powdered Cushing Dyes, random colors, I just grabbed a packet and started sprinkling (yes I was using a filtration mask, outside when I did this), added some salt to the felt which was still wet and soapy from the ziploc bag, and covered it in plastic wrap, venting a corner.

I microwaved it in 2 minute increments, and honestly, I can’t remember how long I did this, I just sort of did it by feel, maybe a total of three 2 minute sets, turning the baker each time, until I thought it sufficiently cooked.  Once I had this riot of colorful felt rectangles dyed, I cut them apart into random shapes and called Bri into the room, who is a master puzzle maker, future geneticist, who sees patterns where no one else does.  I had all the garment sections cut from a fusible knit interfacing, laying out across the table, and let Bri start assembling the pieces in whatever way she liked.

After trimming and fusing the pieces to the backing, I carefully stitched the butted together edges of the cut felt, with a decorative feather stitch on my machine, and where the natural edge of the felt occurred, I used my Janome Expressions needle felting machine to needle felt the overlap.

Then I assembled the jacket, adding a creative buttonhole, and some buttons.  I call the piece Stepping Stones.  Each component in our life, each experience, builds on the next and paves the way for the next part of our lives.  We are all a series of chapters, and no one chapter should be the one that completely defines us.  My mother in law was a lot of things to me and the people who loved her.  She is missed every day, but her stash lives on!

Finally, I shipped out another one of my pieces to Peters Valley Craft Center, for their summer faculty show.  I am scheduled to teach a Fiber Boot Camp, basic fiber techniques, great for those wanting to get into fiber as a medium, learn some of the techniques we all know and love, spinning, felting, kumihimo braiding, tapestry, and inkle loomsurviving_words weaving.  This is a great class for art teachers who want to bring fiber to the classroom.  I’ve taught it a number of times now, last year I had a full class.  I’m not sure if the class is running at this point, the economy has taken its toll on a number of art centers, but the class is suppose to run over the 4th of July weekend, and when it does, I really enjoy being out at the Valley.  They offer a number of fiber workshops, in all disciplines, as well as wood, blacksmithing, metals, clay, photography and related topics.  I’ve supported the Valley for years, and am always happy to send them a faculty piece for the exhibit.surviving_words_detail
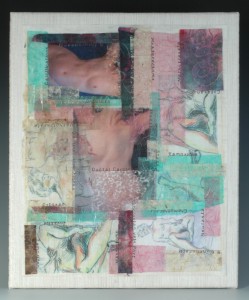
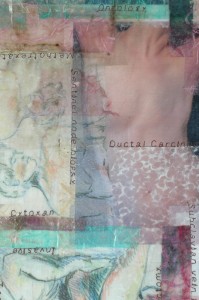
So the piece I sent is a collage titled Surviving Words. This is a very personal piece, I collaged together images printed on silk, with themes of breast cancer, I am a survivor, and that chapter in my life, though behind me, and by no means the one that completely defines who I am, is still an important one and only now, are the themes from that chapter showing up in my work.  I glued all the collage components down with gel medium, and once dried, I went back in and stitched all those horrid medical words that defined my life for a year.  It is a celebratory piece, colorful, yet feminine, and I hope it is well received in the exhibit.

Whew, thanks for reading this if you made it to the end.  I think this is my longest post.  I’m off to pack, and hope to blog along the way during my quick mini vacation to Seattle.  Happy weaving, sewing, or whatever it is that gets you up in the morning!

Placemats Finished!

First, let me welcome all the ASG members who have just joined my blog,  following all of my creative escapades.  There has been a flurry of subscriptions for email notices for when I post a new blog, and many of them have signed on after my blog was mentioned in an ASG (American Sewing Guild) posting.  Thanks Marcia Russell from northern California for the mention.  Marcia has written for the ASG publication “Notions”.  For all of you out there who are new to my blog, you may be interested in a podcast I did for Weavecast, about a year and a half ago, though Weavecast is a podcast for handweavers, it crosses over into so many other fiber communities it is worth noting.  I was episode 26, “Sew Your Weaving“, and I approached the podcast, not as a weaver, but more as someone who has sewn for most of her life, and has a lot to share about the body and the spirit and the sewing machine.

After much angst, and frustration, we are finally finished!  A bit of background, for those who are new to my blog.  Exchanges are a fun part of weaving guilds, and they come in many different forms.  Last year, one of my weaving guilds, Jockey Hollow Weavers, which meets the first Wednesday night of the month in Mendham, NJ (Morris County) does an “Exchange” each year, starting it in September, and finishing up in June.  Last year, we did a crackle exchange, crackle is a weave structure, everyone did samples of a specific design in a Crackle structure, and at the end, participants had a notebook of all different designs.

My then 15 year old daughter had just joined the guild, and was anxious to participate.  No matter that she hadn’t really ever woven before, actually correct that, she hadn’t ever set up her own loom before.  There is a difference.  So, being 15, and not knowing how to plan ahead, leaving everything to the last minute, she learned how to wind a warp and set up an 8 shaft crackle the weekend before the exchange was due.  That was last June.  In all fairness, she pulled it off, wove the samples beautifully, and delivered them finished and mounted, and stood before the group explaining her draft and how this was her first warp all on her own.  Everyone, including her mother, was very proud.

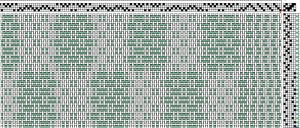
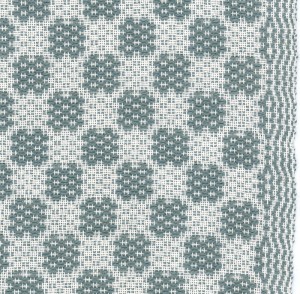
Fast forward to September.  My 15 year old enthusiastically raised her hand when a poll was taken to find out who was interested in a  Placemat Exchange for the 2008-2009 guild year.  The theme was “Overshot”, all mats had to be woven in an overshot pattern.  Each participant gave the other participants 2 ounces of 5/2 perle cotton in their pattern color, and all of us chipped in and bought large quantities of 10/2 perle cotton in white for the background.  As it worked out, there were more than eight participants, but not enough for 16 (two groups of eight), so we invited a few members of an adjacent guild, and ended up with two groups of 8 each.  My daughter joined one of the groups, and I joined the other.  So my daughter, Brianna, started the set up, gently prodded by me, during her Winter break last December, and has muddled along, weaving when she could, hampered by school activities, broken warp beams, broken threads, and a major threading error, which she painstakingly took out and re-threaded because in weaving, there is nothing else to do but take it out and re-do it.draft

Bri and I selected the pattern “Dog Tracks” which was from an 18th century weave structure class I took with Barbara Miller in 2000 at Convergence Cincinnati.  I liked the name since Bri works on Saturdays at a local kennel and her clothing looks a lot like muddy dog tracks when she comes home at night.

So those that have been following my blog since lancaster_dogtracksside1January, know I’ve posted a running score, and for the most part, we were steadily neck and neck, I’d weave a mat, and Bri would weave a mat, until Bri got so busy with a major school competitive event (that involved a lot of glitter) that she fell behind.  She was about 10″ from the end of the last placemat, and the warp beam broke again.  I was able to fix it, and Bri finally finished the last mat on Saturday morning, but discovered a mistake about 5 inches back and had to get to the High School for the final production of this all consuming event, so like the kind mother that I am, and wanting to get this bloody thing finished so I could weave all the samples that went along with the drafts for the placemats, I unwove the 5 inches, corrected the mistake,  and finished the mat.  I spent the day today, weaving about fifteen 5″ x 5″ samples, and printing all the drafts for the samples, which will go along with the mat.  The point of an exchange is to have lots of different patterns, having just the finished mats would never satisfy your average weaver, we have to know how it was done.  So there will be a notebook of all the patterns along with all the finished mats.  Each participant will have, if all goes well, 8 different overshot design placemats, all in their pattern color.  Bri chose purple, and I chose a lovely soft celadon green.

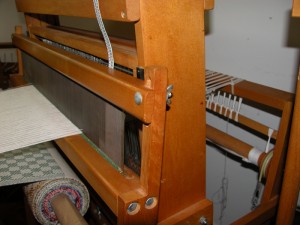
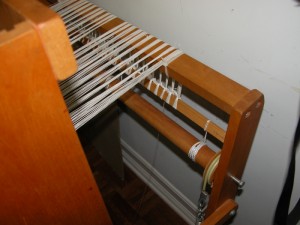
knotstexsolvEvery weaver loves to see the knots coming up over the back of the warp beam, this means you’re almost there.  After 12 yards of fine cotton warp, and almost six months of time and gentle prodding of a now 16 year old, this was a welcome sight.  There are two photographs here, the next swing of the beater after I shot the image on the left, the apron rod which holds the knots at the end of the warp, broke clean off the cords holding it to the loom.  The problems I’ve had with this poor loom….  So I turned the loom around, sat down on the floor, my favorite position with this loom, and changed the apron cords to Texsolv, which I’m really hoping will hold for awhile.  Most weavers know about Texsolv, and it is available on rolls through most weaving suppliers.  Not cheap, but it does the job from treadle tie cords to apron cords and heddles better than anything else on the market.

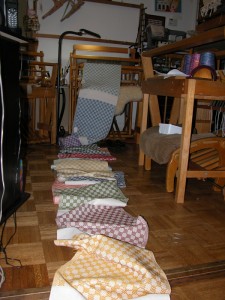
placematsThis is such a cool shot!  I am so excited.  Winding off six months of work to really step back and look at it gives me such satisfaction for a job well done.

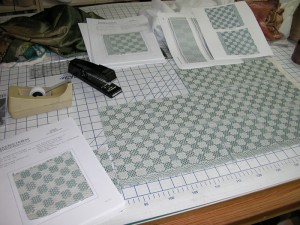
I spent the next couple hours, stitching carefully between the mats and cuttingpaperwork them apart, and doing all the paperwork and samples for the drafts (Photo right).   So now we have a huge stack of placemats ready to take to the meeting on Wednesday night.  The next two days will be a whirlwind of getting things done before my mini vacation.  Yep, I’m heading out west!

Continental has a promotion allowing me to fly for double Elite qualifying miles, a great bonus when you are trying to maintain Elite status.  So I decided to hop on a plane on Thursday and head to the other side of the country, specifically Seattle, just for a weekend, to hang with my special fiber buddy Robyn Spady.  We are planning a weekend of fiber adventures, wine, and friendship.  And I get bonus miles too!  Such a deal…

Sandstone Layers Jacket Continued…

I spent the day knee deep in paperwork, it felt good to plow through the pile.  I took care of lots of small things, crossed off things on my to-do list.  That always cheers me.  The weather improved steadily throughout the day, leaving behind all the grey cold dreary rain.  The gardens are spectacular!  I am going to wage war this weekend on a particular ground hog who has figured out how to wedge his fat little body under my vegetable garden fence, once again eating all the lettuces.  I feel like Mr. McGregor!

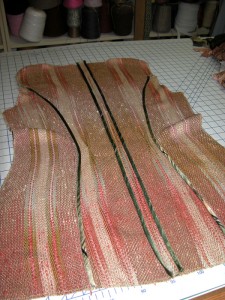
I did get to make a bit of progress on the jacket however.  So I took lots of pictures!  I’m rather enjoying such detailed documentation of the process I’m going through for each of the garments I’ve done since I started blogging.  I would like to pull together all the written ‘threads’ for each garment and put them into a single document, but that’s going to take some time.

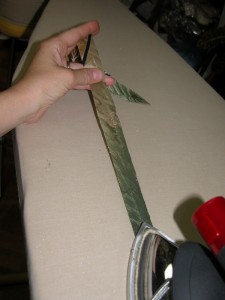
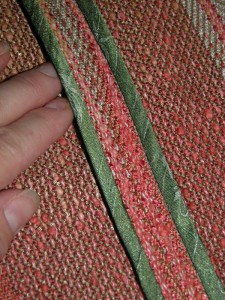
One of the difficulties I’m having is the slippery poly sari I’m using for the bias strips, torques when I apply it.  It is an occasional phenomenon that happens, I’m not exactly sure why, sometimes my students have their binding biastorque, but what I do know is that it seems to happen more with finer more slippery fabrics.  I’m taken off a few strips, and reapplied them.  I found that it is helping to take out some of the stretch of the bias strips first, with an iron, actually, that seems to help a lot.  So I carefully press each of the strips, pulling out some of the extra bias stretch.binding1

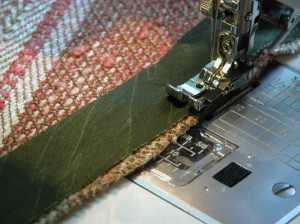
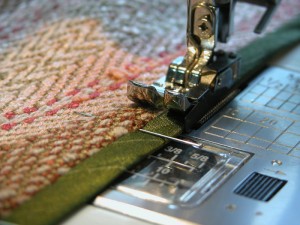
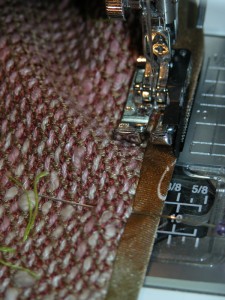
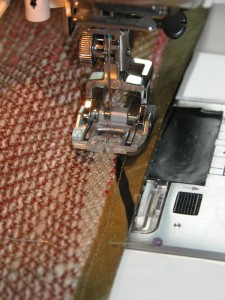
I found the the quarter inch edge foot, that came with my Janome 6600 machine, is a great tool for putting on accurate binding strips.  I set the binding back about an 1/8th” from the cut edge, to reduce bulk.

Two blogs ago, I showed a Hong Kong tutorial, so refer to that for all the steps, I just wanted to show here how I am adapting the materials and tools I have to work with for this project.

binding2binding3Once I wrap the binding around the edge of the garment, press and pin, I use the same foot to allow me to effortlessly and accurately stitch in the ditch.  I love this foot!

Once I attached the binding on the edges that will be sewn together for a seam, I put them right sides together, and using seama small piece of black electrical tape as a seam guide (mom taught me that trick back in the 60’s, I still use it!) I stitched the seam.  I am using my built in dual feed/even feed/walking foot, which is one of the greatest tools ever invented for a handweaver.  It evenly feeds both layers of fabric, so they don’t shift while sewing.  Although mine is built into the machine, you can purchase a separate walking foot attachment for most sewing machines, check with your dealer or try Nancy’s Notions.

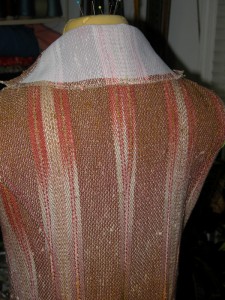
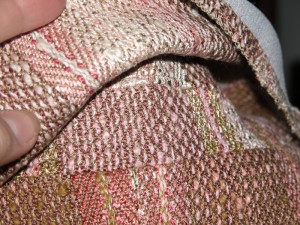
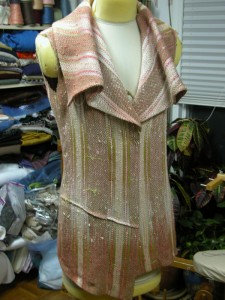
back1I constructed the undercollar, a big sweeping kind of thing, with a small collar stand attached to the back neck.  I learned this old tailoring trick, also back in the 60’s, and used it here to help the stand of the collar literally stand up straight.  I stitched parallel lines of stitching in rainbow fashion, following the curve of the collar stand, it is hard to see in the photograph, but there are small parallel lines of horizontal stitching all along the stand, about 3/16″ undercollarapart.  This gives so much better support to the stand of the collar, so it won’t collapse into the neck.

I’m loving the texture of this jacket, there is a lot of detail still to come.  I’m a little worried that the jacket will be so busy, with all the surface texture, and details, but only time will tell.

stitch_collarI stitched the upper collar/facing pieces together, finishing off the inside edge with another Hong Kong finish, and attached that to the garment front/under collar.  Another trick I learned in tailoring 101, was shifting the upper collar away from the under collar about 3/16″ to 1/4″ while stitching them together if both  were cut from the same pattern piece.  If the under collar isn’t slightly smaller than the upper collar, then it will roll out from the upper collar when worn and never lay smooth.  Some tailored jacket patterns actually provide a slightly smaller undercollar pattern jacketpiece, but in this case, they were cut from the same pattern.  So I shifted them when I sewed, and the upper collar fits much better.

I still have an enormous amount of work to do, lots of couching, and handwork, the pockets, belt tabs, sleeves, buttonholes, etc.  I’m planning to do handworked buttonholes, so stay tuned for that.  I’m enjoying this whole process of course, I’m always calm and centered when I’m in front of a sewing machine.

And the good news is the loom is fixed, and Bri can finish the last placemat, which is a good thing since they are due next Wednesday night.  And I am about 10 slides into the Website Success presentation.  I’m doing so much research and learning so much.  This is like writing a term paper for school!  And of course, the more I learn, the more I realize I don’t know…

The sewing machine is so much safer….

Wednesday Already?

Where did the last few days go?  A blur of holiday gatherings, family fun, outdoor gardening, and playing catch-up!

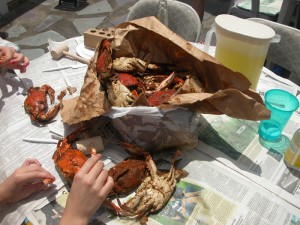
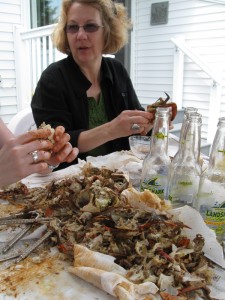
First, the crab fest.  This is for all of you out there who have never experienced a good old fashioned Maryland Crab Fest.  My mother’s entire family is from Maryland, and we grew up, attending family weddings and funerals, always followed by the crab fest.  It was an event!  I have fond memories of my Aunt Joy and my mom chasing crabs all over the kitchen trying to stuff them in a pot with Old Bay Seasoning  to get them steamed.  My sister, who now provides the crabs, buys them by the bushel, from a local merchant who steams them while you wait.

getting_started

the_mess

So here we are getting started!  Dump the crabs on a table covered with newspapers and dig in!

working_hard

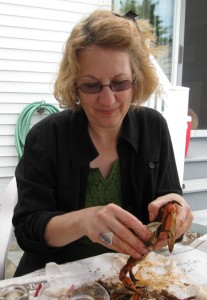
And here I am working hard!  Note:  I did NOT drink all that beer, and OK, it was a bad hair day, but I was “down” the shore, salt air and breezes, and hair isn’t important in a crab fest, you definitely don’t want it hanging in your face!

I managed to clean up my out of control studio, and catch up on many many emails, and follow up on some much needed correspondence.  The inbox on my desk is overflowing (my inbox for my email is out of control, but that’s another story), but that’s normal for the end of the month, as Friday is my bill paying day, all the paperwork for the month gets sorted and filed, and dealt with!  I hate bill paying days, but must admit, it is nice to see my inbox with nothing in it for about 24 hours.

I’m making slow progress on the jacket, sidetracked by some fun creative adventures, yesterday morning I judged the Middle School Invention Contest, along with some old friends of mine, retired teachers, and had a blast interviewing these 5th-8th grade would be inventors.  There are some pretty talented, outside of the box thinkers coming up in the world!

My neighbor’s daughter, who is graduating from HS, and going on to college for the arts, is interested in learning about garment construction, and engineering garments for the body.  I’m thrilled, since quite often I hear, “I love to design clothing, but don’t have a clue how to sew…”  As a matter of fact, that’s one of the biggest issues on the new Bravo TV replacement show for Project Runway, The Fashion Show.  Most of these designers can’t seem to sew.  One actually was quoted as saying, “I have people for that”.  Anyway, this lovely 18 year old neighbor, has attempted garments from non traditional materials for her AP Sculpture class, and does actually recognize the wisdom of having a bit of a background in garment construction and engineering.  It isn’t enough to know how to use a sewing machine.  Garment Construction is a bit like architecture, except the covering for the body has to move and perform and fit the structure (body) underneath in a way that a wall of windows and steel doesn’t.  Same idea, different application.  So my 18 year old neighbor spent some time in my studio yesterday afternoon learning some of the basics.

hong-konginside_backI’m playing around with the ways the Sandstone Layers Jacket needs to be finished, I’m happy with the Hong Kong seam finish for seams that are pressed out flat and open, like the center back seam.

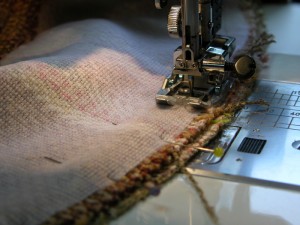
The side back seams are handled like a welt seam, where one layer of seam allowance is trimmed back, and the remainder of the two seam allowances are pressed to one side, finished off, and topstitched.  Except in this case, I used a partial Hong Kong finish to keep the look consistent, pressed to one side (so I actually had to do the Kong Kong finish upside down on the side back seams), and couched from the front.  Topstitching gets lost in a handwoven fabric, any tweedy fabric for that matter.  So I make more of a statement by using my cording or couching foot to feed a thicker yarn, preferably one of the weaving yarns used in the original fabric, and stitch a shallow zig-zag from the front to keep it in place.   I couched embroidery floss on the Arctic Sky Jacket if you remember.

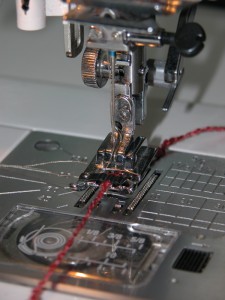
couching_footThe couching foot shown here is on my Janome 6600 Professional.  I love this machine!

couching1And here is the finished seam from the  front!

It is cold and rainy here in the north east, so that leaves me with less garden guilt and more studio guilt!