Sandstone Layers Jacket Continued…

I spent the day knee deep in paperwork, it felt good to plow through the pile.  I took care of lots of small things, crossed off things on my to-do list.  That always cheers me.  The weather improved steadily throughout the day, leaving behind all the grey cold dreary rain.  The gardens are spectacular!  I am going to wage war this weekend on a particular ground hog who has figured out how to wedge his fat little body under my vegetable garden fence, once again eating all the lettuces.  I feel like Mr. McGregor!

I did get to make a bit of progress on the jacket however.  So I took lots of pictures!  I’m rather enjoying such detailed documentation of the process I’m going through for each of the garments I’ve done since I started blogging.  I would like to pull together all the written ‘threads’ for each garment and put them into a single document, but that’s going to take some time.

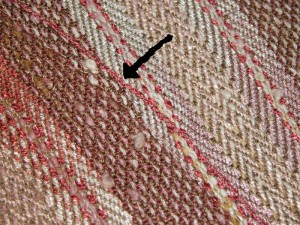
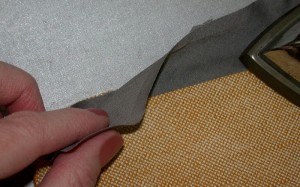
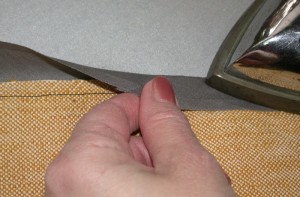
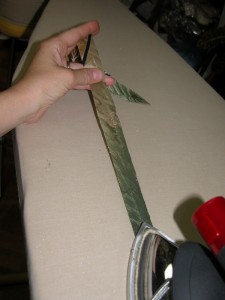
One of the difficulties I’m having is the slippery poly sari I’m using for the bias strips, torques when I apply it.  It is an occasional phenomenon that happens, I’m not exactly sure why, sometimes my students have their binding biastorque, but what I do know is that it seems to happen more with finer more slippery fabrics.  I’m taken off a few strips, and reapplied them.  I found that it is helping to take out some of the stretch of the bias strips first, with an iron, actually, that seems to help a lot.  So I carefully press each of the strips, pulling out some of the extra bias stretch.binding1
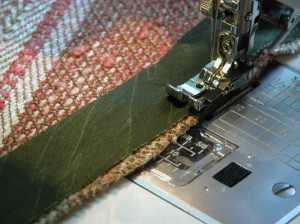
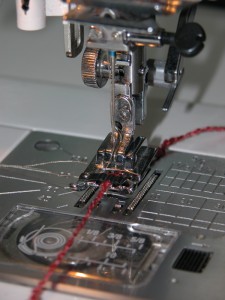
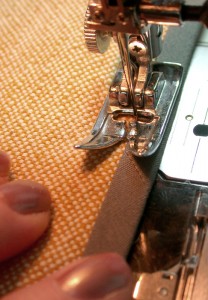
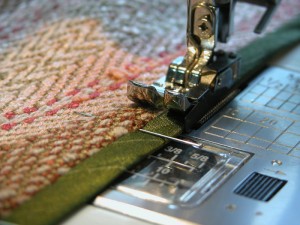
I found the the quarter inch edge foot, that came with my Janome 6600 machine, is a great tool for putting on accurate binding strips.  I set the binding back about an 1/8th” from the cut edge, to reduce bulk.

Two blogs ago, I showed a Hong Kong tutorial, so refer to that for all the steps, I just wanted to show here how I am adapting the materials and tools I have to work with for this project.
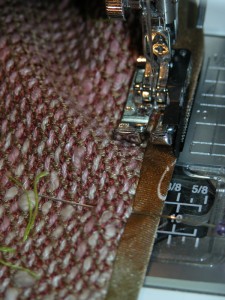
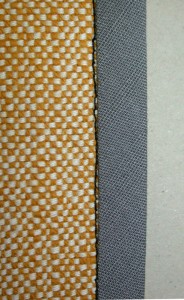
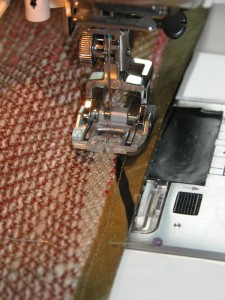
binding2binding3Once I wrap the binding around the edge of the garment, press and pin, I use the same foot to allow me to effortlessly and accurately stitch in the ditch.  I love this foot!

Once I attached the binding on the edges that will be sewn together for a seam, I put them right sides together, and using seama small piece of black electrical tape as a seam guide (mom taught me that trick back in the 60’s, I still use it!) I stitched the seam.  I am using my built in dual feed/even feed/walking foot, which is one of the greatest tools ever invented for a handweaver.  It evenly feeds both layers of fabric, so they don’t shift while sewing.  Although mine is built into the machine, you can purchase a separate walking foot attachment for most sewing machines, check with your dealer or try Nancy’s Notions.
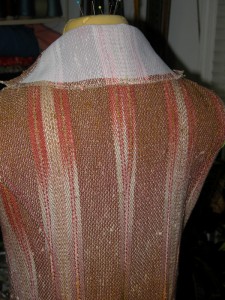
back1I constructed the undercollar, a big sweeping kind of thing, with a small collar stand attached to the back neck.  I learned this old tailoring trick, also back in the 60’s, and used it here to help the stand of the collar literally stand up straight.  I stitched parallel lines of stitching in rainbow fashion, following the curve of the collar stand, it is hard to see in the photograph, but there are small parallel lines of horizontal stitching all along the stand, about 3/16″ undercollarapart.  This gives so much better support to the stand of the collar, so it won’t collapse into the neck.
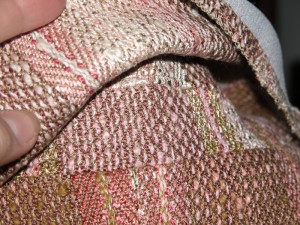
I’m loving the texture of this jacket, there is a lot of detail still to come.  I’m a little worried that the jacket will be so busy, with all the surface texture, and details, but only time will tell.
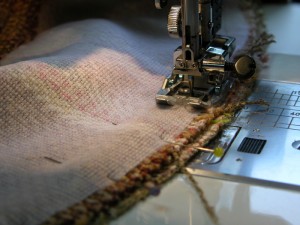
stitch_collarI stitched the upper collar/facing pieces together, finishing off the inside edge with another Hong Kong finish, and attached that to the garment front/under collar.  Another trick I learned in tailoring 101, was shifting the upper collar away from the under collar about 3/16″ to 1/4″ while stitching them together if both  were cut from the same pattern piece.  If the under collar isn’t slightly smaller than the upper collar, then it will roll out from the upper collar when worn and never lay smooth.  Some tailored jacket patterns actually provide a slightly smaller undercollar pattern jacketpiece, but in this case, they were cut from the same pattern.  So I shifted them when I sewed, and the upper collar fits much better.
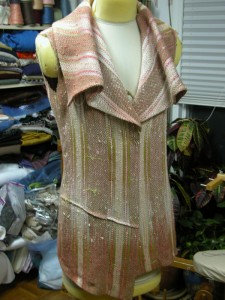
I still have an enormous amount of work to do, lots of couching, and handwork, the pockets, belt tabs, sleeves, buttonholes, etc.  I’m planning to do handworked buttonholes, so stay tuned for that.  I’m enjoying this whole process of course, I’m always calm and centered when I’m in front of a sewing machine.

And the good news is the loom is fixed, and Bri can finish the last placemat, which is a good thing since they are due next Wednesday night.  And I am about 10 slides into the Website Success presentation.  I’m doing so much research and learning so much.  This is like writing a term paper for school!  And of course, the more I learn, the more I realize I don’t know…

The sewing machine is so much safer….

Wednesday Already?

Where did the last few days go?  A blur of holiday gatherings, family fun, outdoor gardening, and playing catch-up!

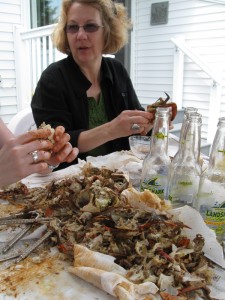
First, the crab fest.  This is for all of you out there who have never experienced a good old fashioned Maryland Crab Fest.  My mother’s entire family is from Maryland, and we grew up, attending family weddings and funerals, always followed by the crab fest.  It was an event!  I have fond memories of my Aunt Joy and my mom chasing crabs all over the kitchen trying to stuff them in a pot with Old Bay Seasoning  to get them steamed.  My sister, who now provides the crabs, buys them by the bushel, from a local merchant who steams them while you wait.

getting_started

the_mess

So here we are getting started!  Dump the crabs on a table covered with newspapers and dig in!

working_hard

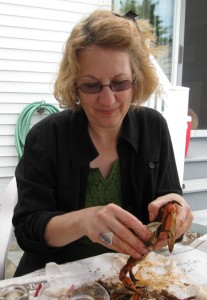
And here I am working hard!  Note:  I did NOT drink all that beer, and OK, it was a bad hair day, but I was “down” the shore, salt air and breezes, and hair isn’t important in a crab fest, you definitely don’t want it hanging in your face!

I managed to clean up my out of control studio, and catch up on many many emails, and follow up on some much needed correspondence.  The inbox on my desk is overflowing (my inbox for my email is out of control, but that’s another story), but that’s normal for the end of the month, as Friday is my bill paying day, all the paperwork for the month gets sorted and filed, and dealt with!  I hate bill paying days, but must admit, it is nice to see my inbox with nothing in it for about 24 hours.

I’m making slow progress on the jacket, sidetracked by some fun creative adventures, yesterday morning I judged the Middle School Invention Contest, along with some old friends of mine, retired teachers, and had a blast interviewing these 5th-8th grade would be inventors.  There are some pretty talented, outside of the box thinkers coming up in the world!

My neighbor’s daughter, who is graduating from HS, and going on to college for the arts, is interested in learning about garment construction, and engineering garments for the body.  I’m thrilled, since quite often I hear, “I love to design clothing, but don’t have a clue how to sew…”  As a matter of fact, that’s one of the biggest issues on the new Bravo TV replacement show for Project Runway, The Fashion Show.  Most of these designers can’t seem to sew.  One actually was quoted as saying, “I have people for that”.  Anyway, this lovely 18 year old neighbor, has attempted garments from non traditional materials for her AP Sculpture class, and does actually recognize the wisdom of having a bit of a background in garment construction and engineering.  It isn’t enough to know how to use a sewing machine.  Garment Construction is a bit like architecture, except the covering for the body has to move and perform and fit the structure (body) underneath in a way that a wall of windows and steel doesn’t.  Same idea, different application.  So my 18 year old neighbor spent some time in my studio yesterday afternoon learning some of the basics.

hong-konginside_backI’m playing around with the ways the Sandstone Layers Jacket needs to be finished, I’m happy with the Hong Kong seam finish for seams that are pressed out flat and open, like the center back seam.

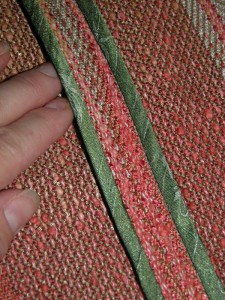
The side back seams are handled like a welt seam, where one layer of seam allowance is trimmed back, and the remainder of the two seam allowances are pressed to one side, finished off, and topstitched.  Except in this case, I used a partial Hong Kong finish to keep the look consistent, pressed to one side (so I actually had to do the Kong Kong finish upside down on the side back seams), and couched from the front.  Topstitching gets lost in a handwoven fabric, any tweedy fabric for that matter.  So I make more of a statement by using my cording or couching foot to feed a thicker yarn, preferably one of the weaving yarns used in the original fabric, and stitch a shallow zig-zag from the front to keep it in place.   I couched embroidery floss on the Arctic Sky Jacket if you remember.

couching_footThe couching foot shown here is on my Janome 6600 Professional.  I love this machine!

couching1And here is the finished seam from the  front!

It is cold and rainy here in the north east, so that leaves me with less garden guilt and more studio guilt!

The Hong Kong Seam Finish

By popular request, I am posting a tutorial on how to do the Hong Kong seam finish.  If you have my monograph on Seam and Edge Finishes, you already have these directions along with all kinds of other ideas for seam finishes and ways to finish the edges of vests and jackets.  (OK, that was a shameless commercial plug for my monograph…)  If you buy the monograph and also purchase the companion monograph on Closures, you will save $5. and even more on postage since the computer thinks it is one item…

If you have ever taken a jacket class with me, you know what a Hong Kong seam finish is, your jacket is full of them on the inside, and you have the directions in your handout!

Before I get to the tutorial, thanks everyone, for all the birthday wishes, emailed cards, and kind words.  It does my heart good to hear when a weaver gets back to the loom or even better, takes the proverbial leap into yardage!  And for the sewers out there, who haven’t discovered the joy of weaving your own fabric to sew…  Well, you don’t know what you’re missing! 🙂b-1

OK, here is the Hong Kong seam finish!  I love it on an unlined jacket, so professional!

b-3First you’ll need bias strips, you can purchase them, or cut your own.  There is a tutorial for cutting your own bias strips quickly, in my seams monograph. I used a 2″ strip here.  If you don’t know what “bias” means, post a comment! I’ll go into more detail!

With right sides together, place the bias strip on the garment section, with the cut edges even.  Stitch 1/4″ to 3/8″ from the cut edge.  I use the presser foot as a guide. Just be consistent!

b-4

Press the bias strip away from the fabric.

b-5

Press the bias strip towards the wrong side of the fabric, making sure it wraps tightly around the cut edge of the garment section.  This is really important, it must wrap tightly around the cut edge!b-6

Pin securely to keep bias from shifting.

b-7

From the right side of the garment section, stitch in the ditch close to the binding.  Use a color thread to match the garment fabric. (I used black for the tutorial)

b-8

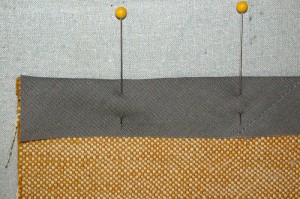
The completed seam “finish”. Note, this is done on the edge of the garment section, before sewing the seam.  You would repeat this step for the other half of the garment, and then sew the seams together.  See first photo!

b-9

You might want to trim the excess binding from the back so it doesn’t get caught when you sew the seam.

Happy Sewing!  And have a great Memorial Day Weekend, we are heading to the shore for a day this weekend, to celebrate the anniversary of scattering my dad’s ashes (he was a Korean War Veteran), and to have what would have been his most favorite meal, an old fashioned Maryland Crab Fest!  (My dad’s birthday would have been on Monday, just three days after mine!) My Maryland sister, the architect, is bringing a bushel of Crabs, my other sister is bringing the beer, and I am bringing fruit to cut up, though I think that was just to give me something to bring, in an old fashioned Maryland Crab Fest, you don’t need anything but crabs and beer, and people around you that you love!  And a lots of rolls of paper towels!

Special Day!

Happy Birthday to Me!  I am 54 today.  It is a lovely day, warm and sunny, slight breeze, I had my breakfast on the deck.  I spent a couple hours this morning vacuuming all the whirligigs off the decks, my girlfriends are coming tonight with sushi and their recorders, and we will all play Baroque trios and eat sushi, and drink Margaritas and life doesn’t get any better than that.  And I spent about a half hour catching up on all the drama of my son’s 19 year old life, feeling really grateful I am 54.  It was lovely to just spend some time listening to his tales of adventure…

I have spent almost 50 of my 54 years living in NJ.  Although I was born in PA, I’d say I pretty much qualify as a Jersey Girl.  Summers down the shore, the pine barrens, and Bruce…  Up until last July, I’d never been to a Bruce Springsteen concert, (he is so New Jersey), as a matter of fact, I’d never been to any rock concert except for a lone Beach Boys concert in High School.  So, last night, I went to my third Bruce Springsteen concert in 9 months.  This one was totally unexpected, when we purchased the tickets for the show last month in Philadelphia, we were originally trying to get tickets for last night’s performance at the Meadowlands.  You may have read about the Ticket Master brouhaha, which is why we ended up in Philadelphia, but after registering a complaint with the state Attorney General, my step sister went into a pool of complainers and through a lottery ended up with two tickets for last night’s performance.

bruce1bruce2OK, I’m not a rock fan, or a Springsteen groupie, I don’t even know any of the words to any of his songs.  But this was an amazing performance.  We were sitting actually behind the stage, in the 26th row, we were so close we could see the sweat flying.  The behind the scenes guitar swaps, sometimes mid-song, and the tuning crew behing the stage, were fascinating, and the drummer, was the 18 year old prodigy son of Max Weinburg, the E Street Band’s regular drummer who is also the drummer for Conan O’Brien and he was tied up on the west Coast doing a taping of the Tonight Show with Conan O’Brien.  Jay Weinburg, the son, was unbelievable to watch, and we could see the massive band-aids on his fingers.  He never missed a beat, and the playfulness of the band with this youthful member was electrifying.

Onto my creative adventures.

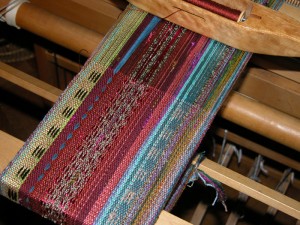
scarves1First of all, I got the scarf warp on, pretty effortlessly with the AVL warping wheel.  And I started to weave one of the scarves.  It doesn’t have the same color clarity of the scarf from Barbara’s warp, but it is definitely more playful and random than I am use to doing.  At least there is a warp on the loom, and I can sit and weave when I’m in the mood!

Speaking of weaving…

Placemat Exchange Score: Mom 8 / Bri 7 1/2…

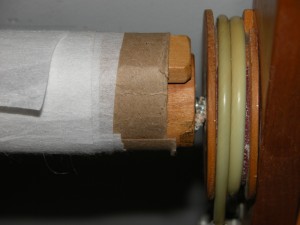
We are so  close, but poor Bri, she has about 8 more inches to go on the last placemat and…brake

Yep, that’s right, the friction brake drum sheared right off the back beam again.  Oh crap!  So, I have to figure out a second repair, that will get us through the last eight inches of the placemat exchange, and then I’m retiring that beam, and I’ll switch back to the original sectional beam that came with the loom.  It is a bigger ’round, and much sturdier built beam, and I never had a problem with it the whole 25 years I owned the loom.  This standard warp beam is a complete other story…

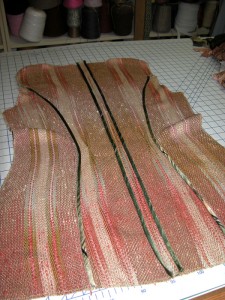
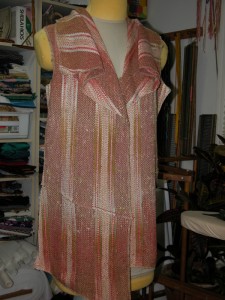
sandstone_layersAnd I’m making slow progress on the Sandstone Layers Jacket.  I have the fronts up on the form, there is a funky pleat across the lower right front, which I’m still not sure I like, I’ll wait until pockets and belt looms are on before making my final call, and I’m pretty close to deciding on the seam finish for the center back seam.  I’m liking the Hong Kong finish, the rest of the seams get topstitched, but not this one.sandstone_layers_detail

So, it is lunch time, and I’ll putter today, enjoying my special day, I’ve had all sorts of texts, invitations, and phone calls from friends and family who are very near and dear to my heart.  Thanks all for your happy best wishes for the day!

And for Something Completely Different…

Well, I accomplished a lot today, none of the things I was actually suppose to do,  I got distracted…

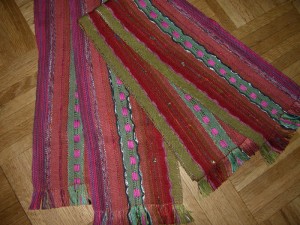
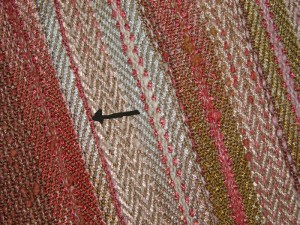
I did get the scholarship applications judged, that was a tough one, all the students were equally qualified.  I’m glad I wasn’t the only judge.  And I did spent a few hours getting all the work caught up for my guild programs for next year.  But that was yesterday.  You see, last Friday night, my church had a service auction, and I donated one of the scarves I made in Barbara Herbster’s class the week before,scarves and to my great surprise, there was some furious bidding, and the scarf actually sold for $135.  I talked to the woman who bought it afterward and she told me she was prepared to go to $200.  So thanks Barbara, for a beautiful warp, but it really got me thinking…  And thinking…. And thinking…

Sidebar:  I did craft fairs from 1979 – 1989.  I’ve been there, and done that.  I have such a distaste for the whole affair, total burn out.  I enjoyed the people, and the lifestyle, for awhile, but making stuff, lots of stuff, to sell, putting a price tag on creativity, trying to figure out the market, spending every weekend of your life sitting in your booth selling your soul, well, let’s just say that I swore, no matter what happened in the future, I’d never, ever do a craft fair again….  And I also said, I’d never, ever, ever sell my work again, put a price tag on it, and some of that is sort of understandable because what I do best is clothing, and once I make a garment now, I’m largely done with it, and it is nearly impossible to reproduce what I make, even if someone where to pay me handsomely for it.  Making handwoven clothing in production is no picnic, which is what I did for 10 years, I bought huge amounts of yarn wholesale, put on no less than 30 yards at a time, (weaving  it off in one day),  spent huge amounts of money on booth fees, spent ridiculous hours making stuff to sell, filling orders, running a business, and everything else that goes along with that lifestyle.  I had no life.

However, I was so enchanted with the scarves I made in Barbara’s class, mostly because she opened up a new way to look at color and blending, and using small amounts of whatever is on  the shelf to make it work, which Barbara really does do best, and I got to thinking, really thinking…

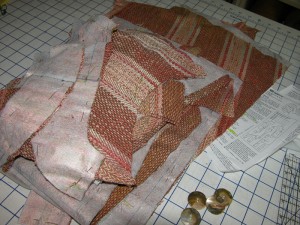
sandstone_cutoutSo I basically got the jacket cut out, because it was laying across my floor and I couldn’t walk in my studio until I got it cut out and off the floor.  I got all the tailor’s tacks in, and played around with interfacing.  I also experimented with seam finishes and couchingtopstitching.  I tried couching with a novelty warp yarn, and it really does define the seams.  And I’m hoping it is pretty flexible.

But the whole time, I’m thinking, thinking…

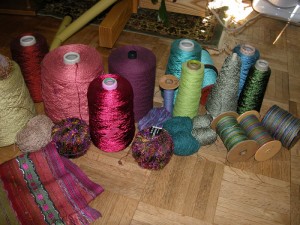
So, I finally gave up, and started poking around the studio, pulling yarns and skeins, and cones, and bits of stuff, because you really don’t need much here, to put on a warp for another round of scarves.yarn Oh boy was this fun…

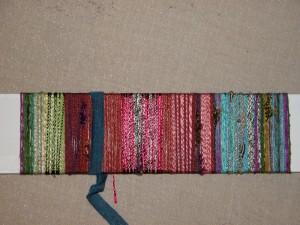
So I stared at the pile for awhile, and played around with a draft, and wrapped a card to see if I could get a clue how this would look.  Barbara just grabs yarn and starts winding.  I’m not nearly that confident, but I can see how after awhile, this would be a great way to warp, and I can see doing this for yardage…

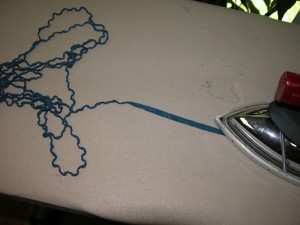
I had a number of variegated yarns, and some novelties, but the wrapone thing I didn’t have was any of the flat tape yarns that Barbara used for the supplemental warp.  I didn’t want to duplicate the scarf I did in Barbara’s class, after all, that was her design, but I liked the idea of having supplemental warps in some key places, and I actually found a small swatch of a knitted tape, which I carefully unknitted tapeand washed, and then painstakingly pressed to get it to return to its flattened state.  I had about 14 yards, which would work for this warp.

I’m also intrigued by the possibility of combining doup leno with this technique, to provide even more surface texture, but I’ll experiment with that down the road…  At this point, it is about getting something on the loom…

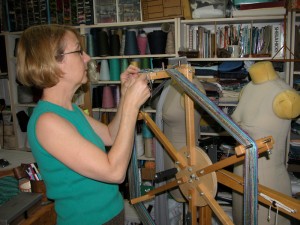
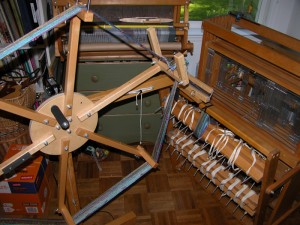
So, I grabbed my AVL warping wheel, I figured this would be a avl_wheelperfect use for it, because I’d be unloading it onto a sectional beam.  So I could wind the warps as I had them on the card, and then every two inches, dump the warp under tension right onto the warp beam.  I love this tool, it is a shame it is so expensive.  I bought mine at a long ago Convergence when AVL first introduced it, at about half the price it is now.  I remember waiting 9 months for it to come…

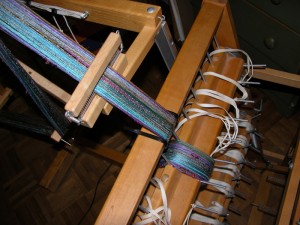
beamingOnce I finished winding two inches, I carried the wheel over to the loom, and slipped the end of the 9 yard warp over the back beam and hitched it to the cord for the section I  wanted to wind on the warp beam.beaming_2

I love this tool!

So, I have 2″ beamed in my 6″ scarf warp, and this will ultimately give me four scarves, and if I like them I can

  1. give them away
  2. add all four of them to my wardrobe
  3. sew all four together into a bigger cloth and make a garment out of them
  4. have a big ‘show and tell’ at my guild
  5. give them away
  6. donate them all to my church
  7. I’m running out of ideas
  8. OK, I could actually sell them.

My guild, the Jockey Hollow Weavers,  has a fabulous sale in November.  So far I haven’t participated because, gee, I refuse to sell my work.  So, depending on how these turn out, I just might actually have something to sell this placemats1year.  Stay tuned…

Meanwhile, the placemat exchange is coming down to the wire…

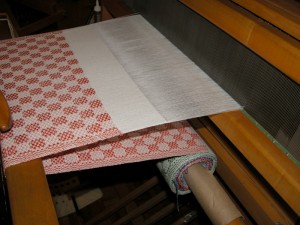
Score:  Mom 7, Bri 6

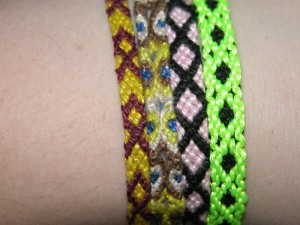
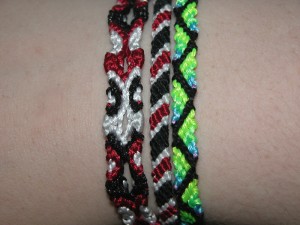
Bri came into the studio tonight, and sat down and did another mat.  The front beam is groaning under the weight of the 13 mats, it is a pretty small loom, and this is the one where the warp beam cracked, so I’m crossing my finger that the front beam holds as well.  After Bri finished her mat, she had about a half hour to kill while she was waiting to leave for the High School, the spring band/choral concert was tonight.  So she grabbed my camera, and shot some pictures of her latest obsession, finger braiding.  She is making all kinds of bracelets from floss, which she keeps in a box and whenever she gets bored, the box comes out and the braiding begins.  I had to share some of the patterns she has done, these adorn her wrists at the moment, and she had to photograph them on her wrists since she can’t get them off.

bri-fingerweavingbri-fingerweaving2So there you have it, a productive day for the two of us, and one of the best High School concerts I’ve ever attended.  I didn’t work on anything I was suppose to, but you know what?  I had fun…

One more note:

I did spend a couple hours this morning alpha testing the new Weavolution site.  It isn’t up for viewing yet, but this should be an awesome web connection for handweavers of all levels and disciplines, Tien Chiu is one of the principal designers for it, and coincidently her blog is one of my favorite must reads.  She talks about the site on her blog today, and the team was mentioned in the last Weavecast Podcast.  One of the features I’m playing with on this new site, is the ability to post a project, and the draft and all the specs.  I got to thinking how I should be doing that with the pieces I’ve designed and executed since I started this blog.  I’ve been thinking about that anyway, extracting all the entries for a particular piece into one document, with the draft and yarn sources, and providing it as a PDF in the extras section of my website.  But for now, I spent some time playing with the Weavolution site, some of the early bugs are getting fixed, as we find them, but it is yet another opportunity to spend your days reading about weaving and getting inspired to get something on that loom, or if you haven’t joined the ranks of handweavers in this country, this will surely inspire you.  I’ll keep you posted when Weavolution is finally launched…