Thanksgiving Adventures…

My husband and I, born of an era when music and art tried to make sense out of a senseless world, have always had a special fondness for a special Thanksgiving more than 40 years ago.  You know the one, it happened at a restaurant, when a couple of well meaning dinner guests tried to help their friend Alice clean out the old church that housed the restaurant, and found to their dismay the dump was closed on Thanksgiving.  It isn’t unusual for my husband to find some rock station on Thanksgiving day, play the 18 minute Arlo Guthrie musical feast and happily listen, singing along about the 8×10 color glossies and Group W bench.  We’ve seen Arlo Guthrie perform in concert many times over the years, and even took the kids and attended the 40th anniversary tour of Alice’s Restaurant Massacre at Carnegie Hall a couple of years ago.

So it was with great fondness that we started on our own Massacre, of the debris that has accumulated in our oversized two car garage that no car has parked in for the last four years.  I remember the date well, I had to move my mother in law out of her apartment in Connecticut,  and put her into a nursing home in my town in NJ, by myself, because my husband was working in India for 4 months.  I brought her belongings by the truck load and stuck them in my garage.  I eventually worked through all of her belongings, she died in 2006, but once I gave up my parking bay, I was never able to reclaim it.
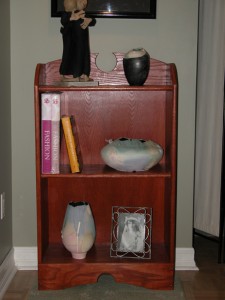
Brianna's latest wood project for school.

Fast forward, we have quite the woodworking equipment in the garage, under so much debris it is impossible to actually use it.   My daughter adores woodworking and is thrilled to discover a complete woodworking studio just within reach, but for a little cleaning….

So we set out to begin the messy task of cleaning out the trash and junk, and organizing the buckets of tools and bins, and of course, knowing the dump was closed on Thanksgiving, we waited until Friday.  And the dump was still closed.  So, my husband is out with the truck, dumping the worst of the recycling, and I am sitting in my studio where it is warm and happy, blogging.  I think that’s a good deal.

I haven’t felt well for the last couple days, too much discussion of swine flu and an over active imagination makes me think I’m already infected, but the symptoms are vague, and I’m probably just fighting off a cold.  I put away all the warping equipment, I’m finished winding white warps for dyeing, for now, and I’m really itching to just sit down and make something.  Something for me.  I am jealous of knitters who grab a ball of yarn and whip out something, the only equipment where I can do that easily is….

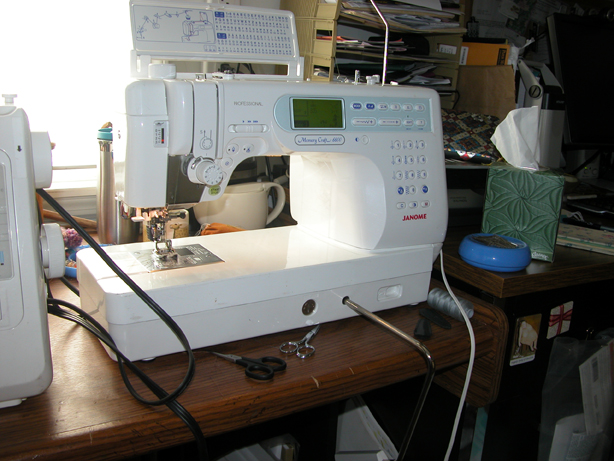
6600JanomeThe Sewing Machine…

It has sat idle too long and I needed to keep my fingers moving and just make something.  I subscribe to Burda World of Fashion Magazine, it comes monthly, (actually it is a holiday gift every year from my mom, that wonderful woman who taught me to sew), and I perused through the latest issue, and found a pattern for a simple skirt that had a bias fold over of cloth, and I looked up at the wool plaid skirt panels my husband brought me back from his trip to Ireland in 2008, and and an idea was born.

I blogged about these wool plaid panels from Avoca Handweavers, back in skirtpanelDecember of last year.  It was one of my first blog posts.
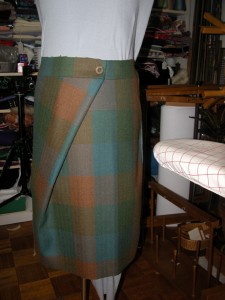
So, I traced off the pattern, basted it together, tried it on, and cut out the fabric.  By bedtime last night, I had the skirt mostly together, tried it on, needed to take it in a bit, course I’ll probably have to take it in a bit more over time, because, what was I thinking!…  Making a skirt the day after Thanksgiving is pretty lame…

But that didn’t stop me.  For insurance, I only basted the side seams together, and since this doesn’t have a zipper closing, taking it in is a breeze.

The skirt went together easily, and I remembered why of all the fiber techniques I do, I love sewing the best.  Handweaving gets you cool cloth to sew, but the machine and I are the best of friends.  I have a Janome 6600 Professional, which I absolutely adore, especially the quick basting stitch that bastes things together like hems, and pulls out in about 3 seconds.  This machine also has a dual feed foot built in so matching plaids is also a breeze.  And of course there is nothing like working with a gorgeous wool.
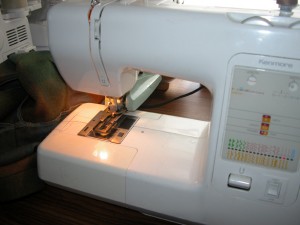
Kenmore
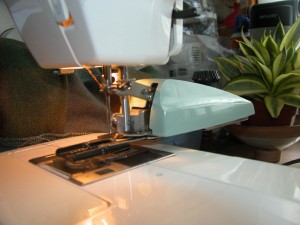
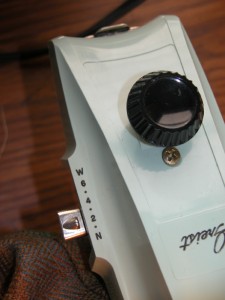
My trusty Kenmore short shank machine fits the old fashion Greist buttonholer.
Greist
The old fashion Greist buttonholer mounted on the back of the Kenmore.

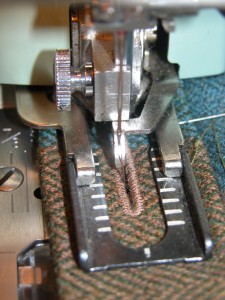
I got to the closure, which consists of three horizontal buttonholes in the waist band, which folds over itself, and secures with a couple of well placed buttons.  I am a buttonhole snob.  I admit it, ask anyone who has ever taken a class with me on Closures.  I have this very pricey top of the line machine from Janome that I adore, but for this task, out came my dusty trusty little Kenmore, about 15 years old (coincidentally made by Janome as well), and because it is a short shank machine, my very old Greist buttonholer will fit on the shank, I drop the feed dogs, pop in the correct buttonhole cam, and watch it make gorgeous perfect buttonholes every time.

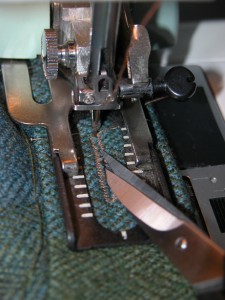
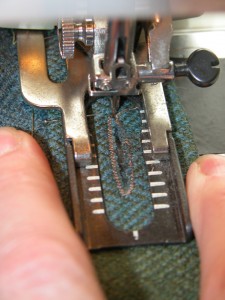
I’ve also gotten good at taking an extra step to make sure the buttonhole doesn’t look like a wound in the fabric.  I shot a sequence of making a buttonhole with the Greist buttonholer attachment, so I’ll let the photos do the talking…
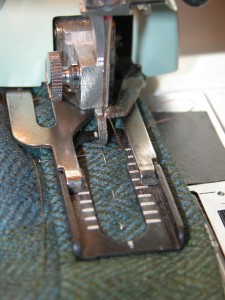
Adjust the buttonhole width to very narrow.
Lower the presser foot securely over the area where the buttonhole goes...
After the buttonhole is stitched, before removing the fabric from the machine, use a very sharp pair of little scissors and cut the buttonhole apart.
Very slightly spread the buttonhole lips apart while the presser foot is still in the down position.
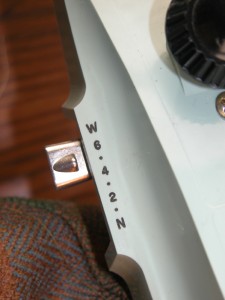
Increase the width of the buttonhole using the lever on the back of the unit.
Go around a second time with the slightly wider buttonhole, and it will cover the cut edge of the buttonhole.
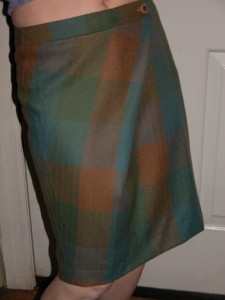
And a quick modeling of the almost finished skirt, just have to do the handwork.

Sandstone Layers Jacket Continued…

I spent the day knee deep in paperwork, it felt good to plow through the pile.  I took care of lots of small things, crossed off things on my to-do list.  That always cheers me.  The weather improved steadily throughout the day, leaving behind all the grey cold dreary rain.  The gardens are spectacular!  I am going to wage war this weekend on a particular ground hog who has figured out how to wedge his fat little body under my vegetable garden fence, once again eating all the lettuces.  I feel like Mr. McGregor!

I did get to make a bit of progress on the jacket however.  So I took lots of pictures!  I’m rather enjoying such detailed documentation of the process I’m going through for each of the garments I’ve done since I started blogging.  I would like to pull together all the written ‘threads’ for each garment and put them into a single document, but that’s going to take some time.

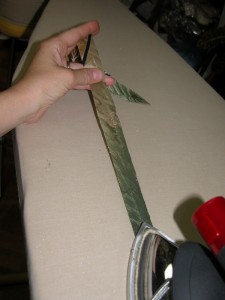
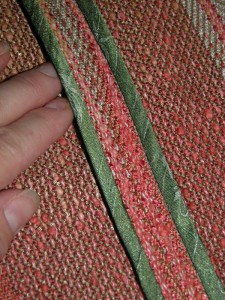
One of the difficulties I’m having is the slippery poly sari I’m using for the bias strips, torques when I apply it.  It is an occasional phenomenon that happens, I’m not exactly sure why, sometimes my students have their binding biastorque, but what I do know is that it seems to happen more with finer more slippery fabrics.  I’m taken off a few strips, and reapplied them.  I found that it is helping to take out some of the stretch of the bias strips first, with an iron, actually, that seems to help a lot.  So I carefully press each of the strips, pulling out some of the extra bias stretch.binding1

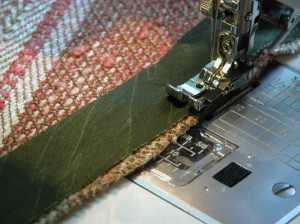
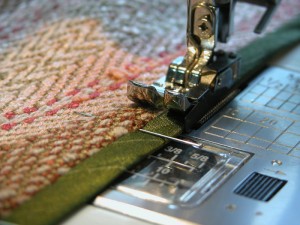
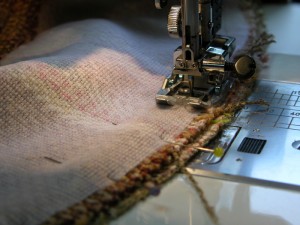
I found the the quarter inch edge foot, that came with my Janome 6600 machine, is a great tool for putting on accurate binding strips.  I set the binding back about an 1/8th” from the cut edge, to reduce bulk.

Two blogs ago, I showed a Hong Kong tutorial, so refer to that for all the steps, I just wanted to show here how I am adapting the materials and tools I have to work with for this project.

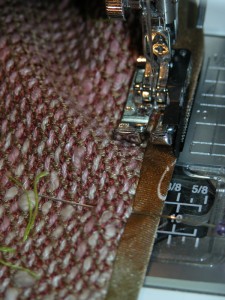
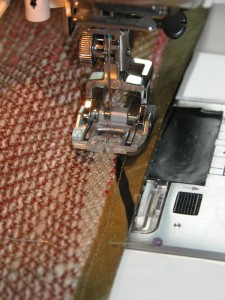
binding2binding3Once I wrap the binding around the edge of the garment, press and pin, I use the same foot to allow me to effortlessly and accurately stitch in the ditch.  I love this foot!

Once I attached the binding on the edges that will be sewn together for a seam, I put them right sides together, and using seama small piece of black electrical tape as a seam guide (mom taught me that trick back in the 60’s, I still use it!) I stitched the seam.  I am using my built in dual feed/even feed/walking foot, which is one of the greatest tools ever invented for a handweaver.  It evenly feeds both layers of fabric, so they don’t shift while sewing.  Although mine is built into the machine, you can purchase a separate walking foot attachment for most sewing machines, check with your dealer or try Nancy’s Notions.

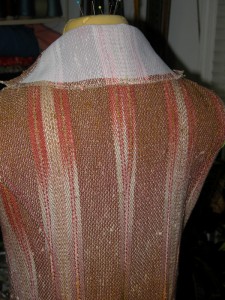
back1I constructed the undercollar, a big sweeping kind of thing, with a small collar stand attached to the back neck.  I learned this old tailoring trick, also back in the 60’s, and used it here to help the stand of the collar literally stand up straight.  I stitched parallel lines of stitching in rainbow fashion, following the curve of the collar stand, it is hard to see in the photograph, but there are small parallel lines of horizontal stitching all along the stand, about 3/16″ undercollarapart.  This gives so much better support to the stand of the collar, so it won’t collapse into the neck.

I’m loving the texture of this jacket, there is a lot of detail still to come.  I’m a little worried that the jacket will be so busy, with all the surface texture, and details, but only time will tell.

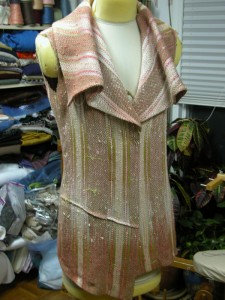
stitch_collarI stitched the upper collar/facing pieces together, finishing off the inside edge with another Hong Kong finish, and attached that to the garment front/under collar.  Another trick I learned in tailoring 101, was shifting the upper collar away from the under collar about 3/16″ to 1/4″ while stitching them together if both  were cut from the same pattern piece.  If the under collar isn’t slightly smaller than the upper collar, then it will roll out from the upper collar when worn and never lay smooth.  Some tailored jacket patterns actually provide a slightly smaller undercollar pattern jacketpiece, but in this case, they were cut from the same pattern.  So I shifted them when I sewed, and the upper collar fits much better.

I still have an enormous amount of work to do, lots of couching, and handwork, the pockets, belt tabs, sleeves, buttonholes, etc.  I’m planning to do handworked buttonholes, so stay tuned for that.  I’m enjoying this whole process of course, I’m always calm and centered when I’m in front of a sewing machine.

And the good news is the loom is fixed, and Bri can finish the last placemat, which is a good thing since they are due next Wednesday night.  And I am about 10 slides into the Website Success presentation.  I’m doing so much research and learning so much.  This is like writing a term paper for school!  And of course, the more I learn, the more I realize I don’t know…

The sewing machine is so much safer….

Wednesday Already?

Where did the last few days go?  A blur of holiday gatherings, family fun, outdoor gardening, and playing catch-up!

First, the crab fest.  This is for all of you out there who have never experienced a good old fashioned Maryland Crab Fest.  My mother’s entire family is from Maryland, and we grew up, attending family weddings and funerals, always followed by the crab fest.  It was an event!  I have fond memories of my Aunt Joy and my mom chasing crabs all over the kitchen trying to stuff them in a pot with Old Bay Seasoning  to get them steamed.  My sister, who now provides the crabs, buys them by the bushel, from a local merchant who steams them while you wait.

getting_started

the_mess

So here we are getting started!  Dump the crabs on a table covered with newspapers and dig in!

working_hard

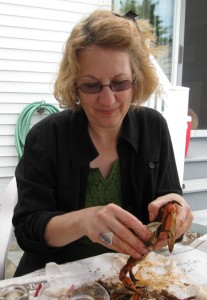
And here I am working hard!  Note:  I did NOT drink all that beer, and OK, it was a bad hair day, but I was “down” the shore, salt air and breezes, and hair isn’t important in a crab fest, you definitely don’t want it hanging in your face!

I managed to clean up my out of control studio, and catch up on many many emails, and follow up on some much needed correspondence.  The inbox on my desk is overflowing (my inbox for my email is out of control, but that’s another story), but that’s normal for the end of the month, as Friday is my bill paying day, all the paperwork for the month gets sorted and filed, and dealt with!  I hate bill paying days, but must admit, it is nice to see my inbox with nothing in it for about 24 hours.

I’m making slow progress on the jacket, sidetracked by some fun creative adventures, yesterday morning I judged the Middle School Invention Contest, along with some old friends of mine, retired teachers, and had a blast interviewing these 5th-8th grade would be inventors.  There are some pretty talented, outside of the box thinkers coming up in the world!

My neighbor’s daughter, who is graduating from HS, and going on to college for the arts, is interested in learning about garment construction, and engineering garments for the body.  I’m thrilled, since quite often I hear, “I love to design clothing, but don’t have a clue how to sew…”  As a matter of fact, that’s one of the biggest issues on the new Bravo TV replacement show for Project Runway, The Fashion Show.  Most of these designers can’t seem to sew.  One actually was quoted as saying, “I have people for that”.  Anyway, this lovely 18 year old neighbor, has attempted garments from non traditional materials for her AP Sculpture class, and does actually recognize the wisdom of having a bit of a background in garment construction and engineering.  It isn’t enough to know how to use a sewing machine.  Garment Construction is a bit like architecture, except the covering for the body has to move and perform and fit the structure (body) underneath in a way that a wall of windows and steel doesn’t.  Same idea, different application.  So my 18 year old neighbor spent some time in my studio yesterday afternoon learning some of the basics.

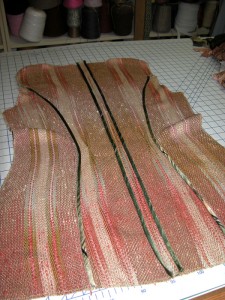
hong-konginside_backI’m playing around with the ways the Sandstone Layers Jacket needs to be finished, I’m happy with the Hong Kong seam finish for seams that are pressed out flat and open, like the center back seam.

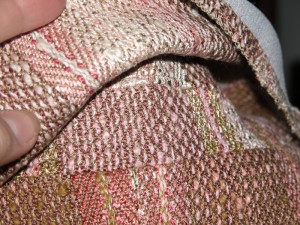
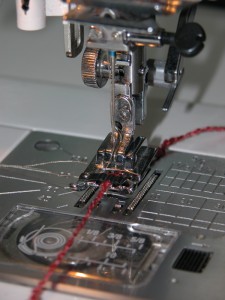
The side back seams are handled like a welt seam, where one layer of seam allowance is trimmed back, and the remainder of the two seam allowances are pressed to one side, finished off, and topstitched.  Except in this case, I used a partial Hong Kong finish to keep the look consistent, pressed to one side (so I actually had to do the Kong Kong finish upside down on the side back seams), and couched from the front.  Topstitching gets lost in a handwoven fabric, any tweedy fabric for that matter.  So I make more of a statement by using my cording or couching foot to feed a thicker yarn, preferably one of the weaving yarns used in the original fabric, and stitch a shallow zig-zag from the front to keep it in place.   I couched embroidery floss on the Arctic Sky Jacket if you remember.

couching_footThe couching foot shown here is on my Janome 6600 Professional.  I love this machine!

couching1And here is the finished seam from the  front!

It is cold and rainy here in the north east, so that leaves me with less garden guilt and more studio guilt!

A Great Diversion

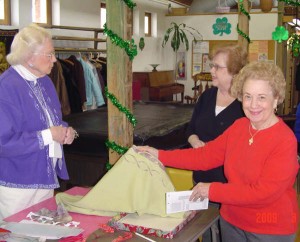
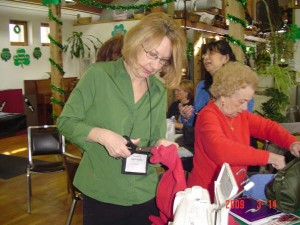
I packed up a long list of supplies to bring to the American Sewing Guild neighborhood chapter meeting this morning.  My local chapter is called the Clifton Clippers, which meets in, obviously, Clifton, NJ.  It is a growing group, the few meetings I have attended, there are always a handful of new people.

Unlike my weaving guilds, the sewing guild programs tend to be more hands on, bring a machine and make a project.  That’s really tough to do in the parameters of an average weaving guild meeting.  So I’m not use to packing up supplies right before a meeting, and I enjoyed poking through my studio looking for stuff on the list.

renie-helen-dorothyToday’s program featured ASG member Renie, a talented sewer quilter, who lead the group step by step in turning a sweatshirt into a decorative cardigan. That’s Renie in purple on the left.  I didn’t shop ahead of time, and purchase a new sweatshirt for the occasion, I just rooted through my closet and picked the two that didn’t have anything written on the front.  Works for me.

We were suppose to bring a half yard of coordinating fabric.  In this group, it is assumed that your fabric will be a cotton quilt fabric, but I’m not a quilter, and my stash consists of a lot of odd things, and lots of handwoven scraps.  I had a half yard piece of handwoven fabric, left from my production days, (that would be the 1980’s), poorly sett, plain weave, with lots of mixed warp yarns in various textures and colors, and a variegated rayon weft.  I really wasn’t sure what we were going to be doing with it, but I packed up my machine and stuff on the list, and hit the road.

The meeting was fun.  I love the companionship of others who think like me, are creative, I love show and tell, in any of my groups.  One woman turned a daughter’s wedding gown into a Christening gown for her daughter’s baby.  It was beautiful.  What a great idea.  And of course I showed off the dress I wore in the fashion show in California.

So the program started, and Renie carefully laid everything out step by step, she had a sweatshirt/cardigan on that was lovely, and had another one in various stages of development.  She explained the process and then turned us loose.  This guild is beginning to get use to me, only having handwoven fabric to play with.

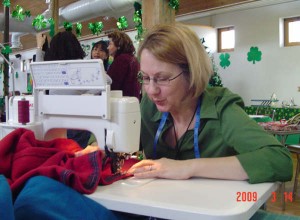
DarylCuttingDarylSewingWell, I had a blast.  Once I got the sweatshirt cut apart, and the bottom trim on, I packed up my things, to continue at home so I could use my own powerful iron, and I could concentrate.  And take pictures….  🙂

So, the first step was to remove the wrist bands and waist band.  Then after carefully measuring, I cut up the center front, instantly transforming the sweatshirt into a cardigan.  Renie showed a sweatshirt turned inside out, and I loved the feel of the inside of my favorite red sweatshirt, which I was cutting apart for this adventure, so I turned mine inside out as well.  So the outside now feels like soft cotton fleece.

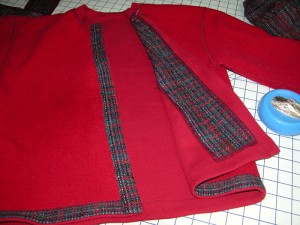
sweatshirt1Then I took my handwoven and cut 1 1/4″ strips off the selvedge, these I sewed to the bottom and fronts of the wrong side of the  jacket, and brought them around to the front, top stitching the selvedge into place.  Renie used quilt fabrics, which don’t have the same kind of selvedges as handwoven fabrics, so she left extra to turn under on her strips.sweatshirt2

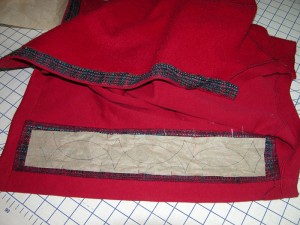
We were told to bring stencils if we had them, shows how much I know, I brought my fabric painting stencils, with fabric paint.  Duh… what they really meant was quilting stencils.  So I borrowed a pretty one from Renie, and traced the pattern onto the back of my materials list.  I brought it home, and expanded it to fill the space on either side of the center front.  I then finished off the edges of a wider strip of handwoven, and pinned it down on the back of one of the garment fronts, and then traced the quilting stencil pattern onto tissue paper.  The old fashion kind that tears away easily.  Renie could just draw the stencil onto the back of a quilt fabric, but that doesn’t work for a slubby multi-colored handwoven.  I placed the tissue drawing down on the top of the handwoven strip, which was cut just a bit wider than the stencil design, and pinned everything into place.

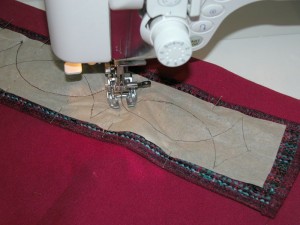
sweatshirt3I went to my trusty Janome 6600, God I love this machine, and carefully followed the stitching outline I drew on the tracing paper with a medium size stitch length.sweatshirt4

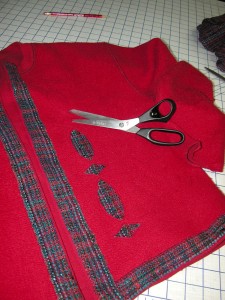
Once I finished the stitching, I tore away the tissue paper, and then from the right side of the jacket, I clipped away the sweatshirt fabric to reveal the handwoven underneath.  Obviously you have to be careful here, and it helps to have sharp scissors with really blunt tips.

sweatshirt5I worked on the second front, I was a woman possessed.  Forget any thoughts of cleaning, or cutting out my poor arctic sky jacket lining.  I wanted to finish this jacket.  It is my new favorite thing to slouch around in.  I’m calling it my studio sweater, for when I need something comfy to put around my shoulders while I’m working, my well worn sweatshirt is now a stylish jacket trimmed with handwoven.  I finished edging the sleeves, and Voilá!

I realized that this is an excellent thing to do with a surplus handwoven scarf.  The selvedges can be used for the edge trim, and the interior of the scarf can be the strip that peeks out of the cut away stencil design on the front.  I have a few extra scarves sitting around, and I’m thinking there are other sweatshirts that could use a transformation…

Of course I worked right through dinner, and that meant we had to go out, so I got to wear my new jacket to the pizza place.

So now I’m going to totally blow off the rest of the evening, and watch the episode I missed last weekend while I was away, of Desperate Housewives, on my computer.  Oh, and BTW, when I was exiting the subway Thursday night in NYC, I saw a poster on the wall advertising a new HBO series, starting on March 29, at 8pm, Alexander McCall Smith’s #1 Ladies Detective Agency Series.  So those of you who don’t watch television often like me (Desperate Housewives is the only thing I watch other than Project Runway when it is airing), and don’t get advertising for this kind of stuff, you might want to tune in, the books are terrific!

Lions and Tigers and Bills, Oh My!

I went to log onto my computer this morning, and some very weird stuff started to happen.  The screen sort of froze up in the half booted up stage, not a good thing.  Alt + Ctrl + Delete wouldn’t work, and I will say, I had a moment of complete panic.

Sidebar: I am married to an absolutely brilliant man.  He makes computer geeks look stupid.  To watch him work, trying to debug, find the problem, and craft a solution is to watch an absolute artist in technology.  When my husband isn’t traveling the world as a systems analyst, he usually works from home.  That would be down the hall.

The computer gods live in fear of my husband.  And I say this with humor, but it is a long standing joke in our household (with a computer system in almost every room), that when something goes wrong, my husband need only come and stand in the doorway, and all will instantly correct itself.  I understand this, I have the same rapport with the sewing machine gods.  We have a mutual understanding.  In a class, a student will be struggling with a machine, and usually I’ve only to sit down and all will work properly.  But I DON’T have that rapport with the computer gods.

Fortunately my husband was working from home today, and I wandered down the hall, trying to hide the complete panic in my voice.  I had shut everything down, and when he came in to the studio, and pushed the power button to boot everything up, all worked as it should.  Go figure….   I hate when he does that, but I’d be completely lost if he couldn’t…

So, I got on with my morning, which was spent in front of the computer, paying bills, doing paperwork, balancing checkbooks, entering bookkeeping figures in Microsoft Money, and doing all those distasteful tasks that are critical to a smoothly running business and household, but I’d much rather have been weaving.

Once that task was completed, I started packing for a one day workshop I’m taking tomorrow at the Jockey Hollow Weavers Guild, with Marie Ozmon.  First I should mention that a perk of belonging to the JHW, is a winter “Freebie” program, a one day program in late winter, for free, that gives you a little creative sunlight, something to get you out of your winter doldrums.  Well this program is right up my alley.  The title is Constructing Fabric Structure, Surface, and Texture.

So I pulled out some very large tote bags, and boy do I have a collection, between my years of conference attendance, and my husband, who has been on the local school board for more than 10 years, and attends the yearly school board convention, well, you haven’t seen tote bags until you’ve been to one of these conventions…

Anyway, I packed up some fabric, ribbons, beads, sewing supplies, my iron and ironing blanket, and my trusty Janome 6600 professional machine, along with a couple bolts of fusible interfacing, and lined up all the bags in the hall, along with my camera, which is why I don’t have a picture of this escapade…

Stay tuned…