Dear Janome Memory Craft 6600,
I see you sitting there watching me from wherever I am in the studio. I know you have that blank, sad, unused, unloved puppy face, looking forlorn because I haven’t spent any time with you in awhile, at least not any regular quality time. OK, yesterday’s repairs of the boy’s jeans and sweats didn’t count, you are so much more than just a sewing machine to be lugged out when a zipper breaks or a seam rips. I know I’m neglecting you and all you are capable of, and in fact I miss you too. I can assure you that you are my most favorite sewing machine I’ve ever owned, and I long to work on another project with you soon.
New Year’s resolutions are coming and I’m promising that I’m making an early one to always have a sewing project to work on, and I really really promise I won’t languish over the project for eight months like the last one. Take heart, there are six looms calling at me, but only one sewing machine, and that sad blank look you give me as I walk by is calling to me louder than the looms right now. Yes, I’m on deadline for an article, 8 yards of fabric needs to be woven off, and a project/kit has to be designed, and an article written with step by step photos, but I can pay attention to you too. It is good for both of our souls.
So my humble apologies for neglecting you, and I’m going to try to make things right by starting in on another project. But understand, before I can turn you on, I have to do the prep work. I know, you’ll patiently wait because if I don’t do the prep work, I’ll never really like the way the garment fits or the way the fabric cleans. But I worked hard all week long on the prep work and now I’m hoping to cut out the tunic this weekend, so soon I’ll turn you on and have your competent motor purring along like a contented cat.
With much love,
Daryl
PS, Really really I’m through the prep work, just read the tutorial below…
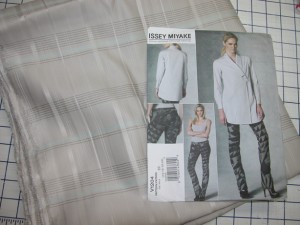 First, the project. I picked up three yards of a gorgeous cotton shirting fabric, a plaid of sorts with grey, white and aqua tones, when I was out in Boulder Colorado at Elfriede’s Fine Fabrics. And I pulled from my pattern stash, a very cool Issey Miyake Vogue Pattern. I
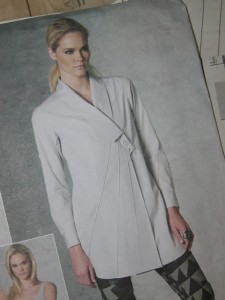 love Issey Miyake patterns, they are like 500 piece puzzles, everything ends up fitting together in such an origami-esque kind of way, but the construction is always challenging and fun. This particular pattern called for some really interesting pleating in diagonal ways across the garment, and it says right on the pattern envelope that it is unsuitable for plaids. But that never stopped me. I’m thinking this could be really really cool, or really really stupid. You just don’t know until you try. Sort of “Plaid Interrupted…”
This is V1204, and it is or was (I don’t know the current status) available in two size ranges. This is always a dilemma, since I am right in the middle of the 12-14 pattern range, and the AA size goes to a 12 and the EE size starts at 14.
In the end, I chose the EE size, even though the pattern ease was described as “Very Loose-fitting”, meaning there is an extra 8 inches of ease in a shirt over the actual bust measurement. I’m not sure why, probably because when I was ordering a bunch of patterns, I forgot to check the ease allowances. I like my clothing to fit well, and to follow my shape. I lived through the 80’s and 90’s when clothing was generic, boxy and one size fitted all. That isn’t me and that isn’t my personal aesthetic. And I don’t like very loose fitting styles. The photo on the front of the pattern envelope is really deceiving because that’s the way I want the garment/tunic to look, and there is no way that tunic is eight inches larger than the model. Then again, just making a size smaller could mean the shoulders are too tight.
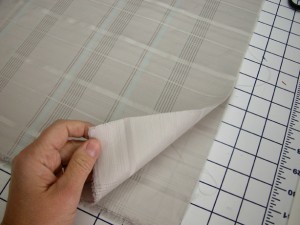 So first things first. Before I tackle the pattern decisions and adjustments, I need to get the fabric in to soak. First I check that the fabric is on grain. Meaning that the cut ends are thread perpendicular to the lengthwise grain, that a weft thread can be pulled straight across. This fabric was easy because it was a woven plaid. It was already cut on grain by the fabric store. I pre-shrink all my fabrics, and I am always met with such incredulous stares when I mention this to students in my sewing classes, “You mean you can’t just buy it at the fabric store and start cutting it out?” NO!
 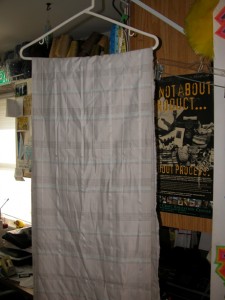 Except for wools, which I handle differently, I put almost all fabrics into a basin of very hot water, soak for 20 minutes and either roll in a towel to dry or spin off in the machine, depending on the fabric. The spin cycle can leave nasty wrinkles in the fabric. I chose to spin this cotton fabric, because there were three yards and I knew I could do a decent job pressing it later on.
Once hanging to dry I tackle the pattern decisions. By opening up the pattern pieces, I can find the little finished circumference indicators at the bust and hip and check them against my own measurements.
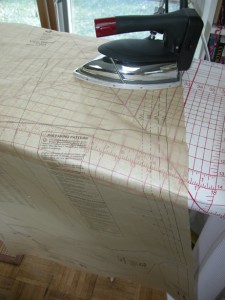 Before I do anything else, I take the pattern pieces out of the pattern envelope and I press the pieces with a dry iron. That removes any wrinkles and I’ll be more accurate when I trace off the pattern pieces I want. That’s right. I NEVER use the actual tissue as it comes out of the pattern envelope. I want to preserve the pattern in all of it’s sizes, kind of like playing around with a photo in Photoshop, I alway leave the original untouched and play around with a copy.
I always buy by my chest measurement, because you get a more accurate fit, and unfortunately the chest measurement is rarely included on the pattern. The bust circumference is not the way to measure, since all patterns are graded on a B cup, that is 1 1/4″ – 2″ difference between the chest and bust circumference, which I can assure you isn’t very much in the asset category at all.
Sidebar: after loosing a breast to cancer, I went for my prosthesis fitting and the fitter asked what size I wanted to be. I answered between 1 1/4″ and 2″ difference between the chest and bust circumference measurement. She thought I was completely crazy. My logic was I’d never have to adjust a cup/bust measurement in a commercial pattern ever again… 🙂 (I don’t recommend this method of body alteration, it really is easier to just alter the pattern, but hey, I didn’t chose to get breast cancer!)
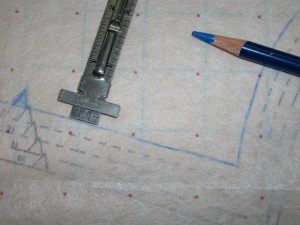
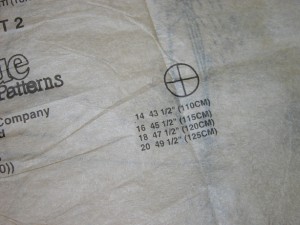 A Size 14 in commercial patterns calls for a 36″ bust circumference. If you subtract 2″, you’ll get the chest measurement. My chest (measured above the breast tissue tight under the arms) measures 34″, so a 14 should fit really well. Except that according to the little finished circumference guide printed on the pattern, which is described as “Very Loose Fitting” this tunic will be 43 1/2″ around. That calculates to 7 1/2″ of extra ease. And the front of this tunic has a huge overlap. I know I’m not going to be happy with the finished garment if I make the size 14. So I opted to trace the size 12 instead except, crap, I bought the 14-20 multi size pattern. No problem. This is where having the grading schematic comes in handy. If you look at the way a pattern is graded from size to size, there is a very clear proportionate schematic, and by following that schematic, you can trace a smaller or larger size by just increasing or decreasing by each of the increments drawn on the pattern.
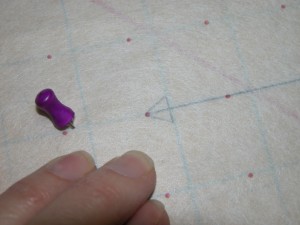 But I’m getting ahead of myself… I actually trace the tissue pattern using a product called Red Dot Tracer. It is made by HTC, and now I understand also available from Pellon, after many try and fail attempts getting the base material right. I haven’t tried the new Pellon version, but I will if HTC stops shipping for any reason (They do that frequently). It is available on my website, if you can’t find it in stores). I love this product, because I can trace what I want, use the red dots to make sure the pattern is perfectly on grain, and then sew it together as a first muslin. I can then decide if it is even worth going forward to the muslin stage. I match up the grainline of the pattern, with a row of red dots, and anchor it to a cardboard cutting board with push pins, lining up the grainline and row of dots with a gridline on the cutting board. OK, I’m really anal about this. But I do accurate work and each of these little details helps make the end product that much more precise and polished.
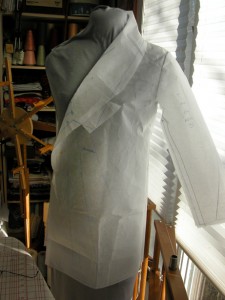 Now I carefully trace the patterns and the details I want, and in this case, I grade the pattern down from a 14 to a 12. Once I have all the pieces traced, I go to my trusty Janome and turn it on (see, I told you I’d be using you shortly…) and stitch together the main pattern pieces using a long machine basting stitch (the longest stitch your machine will do). I have a dress form and so my first stop is to try it on the form. This isn’t a really really fitted style, there are no darts, and even though the waist is too short for me, there doesn’t seem to be any reason to lengthen the torso since the garment fits straight down from under the arm, and the closure sits well above the waist.
The fit looked really good on my dress form. So I went into the bathroom and tried on the tunic pattern, and I think the fit is good. I didn’t get a photo because no one else was up yet to take a picture of me and I didn’t feel like combing my hair, and a lot of my fit assessment is based on how the pattern feels on anyway.
So the next step here would normally to go to a cheap fabric and make up a muslin in the basic pattern pieces. I know, I’m going to get letters, but I decided to skip this step. I’m reasonably confident I’m going to like the fit, call it experience, and though I might regret the decision not to make it up first in something else, I’m happy enough with how the pattern feels on, so I’m going to take a chance. But you didn’t hear that from me… I’ll let you know if I should have done a muslin first. Stay tuned…
Washing Fabric and ironing pattern: Funny how these things don’t seem to be taught any more. Just the other night, I slipped on my PJs and my husband was laughing at me because I had “floods” on. The PJ pants and the length of the sleeves of my commercially-made pajamas were too short after washing. I explained this is why you preshrink your fabric before cutting out your pattern, which commercial manufacturers don’t do these days… he had the deer-in-the-headlights look on his face and exclaimed, “that’s a new one, I never heard that you should to do that before,… Read more »
One of the first things I realized when I took the basic sewing class at FIT was that there is a LOT MORE to it than following a paper pattern! It took years for them to find a description of that course that would persuade people to take it before going on to the more advanced classes like tailoring! Students would comment that they “already know how to sew.” When I was there, they had finally settled on “Design-room techniques I” (-; and made the description make it sound a little more “technical.” They were quite right to insist, tho,… Read more »
Alas, my sewing machine is looking forlorn as well. I think that’s what the month of January is for. There’s nothing going on and it’s too cold outside, so it’s the perfect time to sew! (or weave, or knit, or embroider, or…. I need to get busy)
Can’t wait to start with my machine again. John just brought it back from it yearly checkup. Luckily I got it to my favorite repair shop in PA, (Pocono Sew and Vac), where Brad the technician does his magic. So once January hits, the machine will be in use again. Got to love your machines!
You sure picked a tough one, in plaid no less. If I remember corectly, the first garmet you made was a plaid!!! It warms my heart that pre-shrinking is the only way to be sure the finished product will always fit. Rule #1 in beginning sewing. Keep up your love of your machine. I love mine almost as much as I love your Bonus Dad.
Nope, that would have been my overachieving sister Marta. She made a pair of culottes in a green plaid. I chose the simpler floral design. No matching… 🙂
Iron the pattern and preshrink the material…absolutely. It was definately necessary in the mid 1950’s when Mom started me sewing and I still do it. (I know she is still keeping an eye on me saying “If you are going to do it, do it right”).
‘
Oh, Daryl. Thank you for putting in the absolute basics, too. While I did know about ironing the pattern & shrinking the cloth, I didn’t know about the gradations [& I’m not a standard size, having discovered this when trying to make a fitted 1840’s bodice]. The red dot material sounds like a wonderful tool. It goes on my want list! Can you recommend a good book on design & execution of patterns… rather like the class at FIT mentioned above? It is highly unlikely that I’ll ever make it to a college course on fashion design, but I do… Read more »
Addendum: Can you recommend a place to buy fine threads? I don’t have a resale #, although that is on my list of to dos & don’t really know what size yarns/threads to look for.
Among the undergarments I’m planning are corded cotton petticoats & fine, almost sheer, bits to tuck in deep V necks of the mid-19th C. I’ll probably pleat them, make them to the waist & put ties on to keep them in place over the corset.
Thank you so very much. Jennifer