…with apologies to J.M. Barrie
I was first introduced to the shaft loom in 1974, in college, in the textile department where I was an art student. Prior to that I worked on simple frame looms, in art classes in high school, but the idea that one could weave cloth really appealed to me and I loved the mechanics of the floor loom, it was love at first sight.
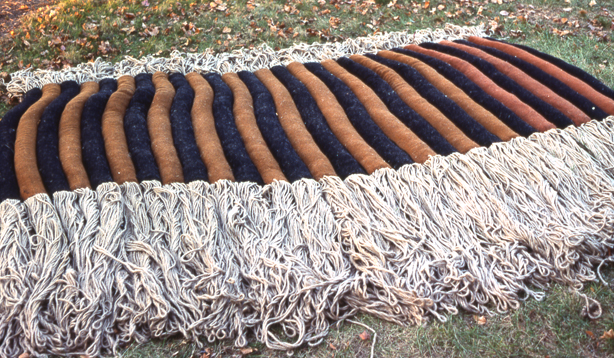 This was the early 1970’s and fiber as an art form had just exploded onto the art scene, and most of my early fiber education was indeed, using fiber as an expressive medium, not learning the fine craft of weaving. My early woven works were shoddy and poorly engineered, but still, undaunted, I plowed onward. I was already a competent sewer (yes I said sewer, not sewist, get over it…) and woven cloth was so right up my alley so to speak.
We had little resources for information at that time. I immediately bought the books recommended, which at that time amounted to Davison “the green book”, Atwater, Black, and of course for fiber as an art form, Regensteiner, and the college textbook, still in print and even revised, Shirley Held’s Handbook of the Fiber Arts. If the information we wanted wasn’t in one of those tomes, we didn’t know where else to look.
There were few guilds then, I’m not even sure I knew about guilds. There were probably plenty of weavers weaving rugs and towels, and household items, but I also didn’t have access to them, and largely plowed on valiantly on my own. I had some basic guidance on how to set up the loom, but to be really honest, I’m largely self taught. I learned by trial and error, by assuming that there was always a way and I was just too stupid to know what it was. No one ever told me you were suppose to change the reed in the beater depending on the size or grist of the yarn. I didn’t learn that until I was buying my first loom and Art Weitzenfeld of Tools of the Trade Looms asked me what size reed I wanted. I had no idea you got to choose, the looms at the college I attended had reeds in them, and you made the reed in the loom work for whatever you were doing. We had no shuttles, I learned how to make butterflies. I had no one to really ask for advice on any part of the weaving process, and so I just figured it out. And largely created some pretty resourceful ways of doing things. Which made me a much more creative and better teacher.
We all want knowledge and want to know how to do things the right way the first time around. I can’t imagine learning to weave in this day and age when any question I can think of, I merely type into a chat or forum on the internet and bang, there are instantly responses with all kinds of advice. We have become victims of the information age, where googling what you want to know is as simple as typing a question on a keyboard. No longer does a new weaver have to work in the dark and “figure it out”. I sort of miss those days in a way, because I had to really think and problem solve, there weren’t any magic answers popping up on the screen.
So when I’m faced with an ongoing issue, one I’m determined to resolve, I don’t automatically think to type it into the computer and see how others have solved it. That means of course, reinventing the wheel many times over, but that exercise is the stuff that makes resourceful people that can think outside the box. Take my blog post on figuring out that Spray Starch will quiet a cranky sticky mohair warp. Many of you wrote to say you’d been doing that for years, and some even extended that to hairspray and other assorted methods for doing the same thing. All responses are always appreciated, but there is just something about that Ah Ha moment when you figure something out for yourself that no one can take away from you. Like looking up the solution for the Rubik’s Cube on the internet instead of figuring it out for yourself. There is no comparison.
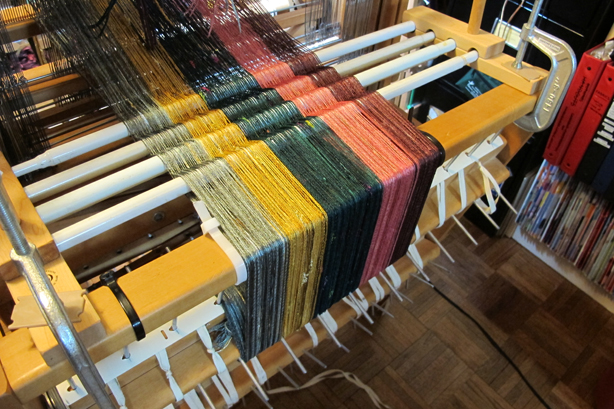
And so I have this ongoing situation that I’ve been trying to fine tune for the longest time. I’m putting mixed fibers (types and sizes) all onto a sectional beam using a chain warp using very tight tension on each individual thread. The warp is 12 yards long, not normally an issue, but I’ve found, even as I perfect the technique to achieve perfect tension throughout the 12 yards, that I still occasionally get a few of the very fine slippery rayons that dig down into the warp stack on the warp beam, and cause minor tension issues. The sectional beam on this particular loom is 1/3 yard in circumference, which means that there are probably 35 revolutions to put the 12 yards on this beam.
I realize that those of you following my blog who are not weavers, I’ve just lost you, and I’m not going to try to explain in detail, just enjoy the photos and know that I figured out something that makes me really proud and happy, a sort of personal “Yes!” and that’s really the point here.
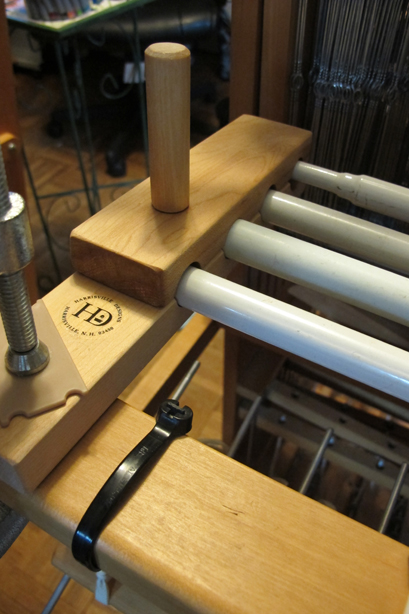
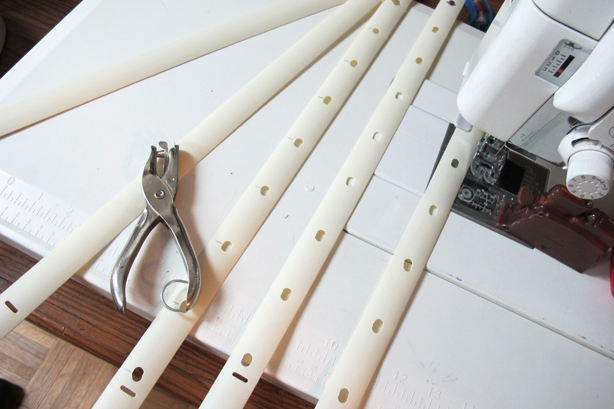
Because of the scale of the loom, a small 25″ Tools of the Trade floor loom, I’m finding that the stack of 35 revolutions or so of warp threads around the sectional beam to be a bit unwieldy, I had to figure out a way of evening out any issues after about every four yards. I had in the past used flat sticks, rubber banded together, straddling the long rows of pegs, but they built up too quickly. Of course you can’t put packing on a sectional beam, but one afternoon last week, while digging through my magic barrel of stick things and other assorted long weaving equipment, I came across a bunch of mini blind strips.
I pulled out a basic hole punch and tried it. I could easily punch holes in these things, and I could make a template and punch a bunch of holes across each strip and they would act like levelers every four yards or so. I am just so proud of myself. So here is the process, step by step of setting up this little loom, with 12 yards of mixed rayons, cottons and silks, of various sizes, and then adding a section for supplemental warps on a second beam.
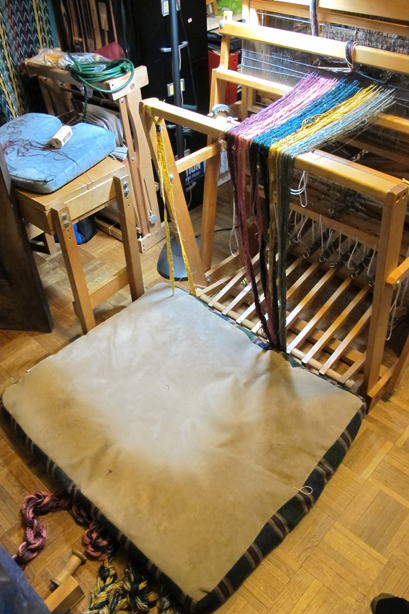
First I used my new best friend, the Harrisville Designs warp tensioner. I fudged by using some tent poles I found in the garage since the actual tensioning dowels hadn’t arrived yet (note, I used my gift certificate I won from Fiber Celebration 2013 towards a set of four tensioning dowels for all three of my loom widths). I use to just use a bunch of lease sticks in the back, but found these little devices to be ingenious.
Then I added a bit more drag on the warp bundles, by tossing the dog’s bed on top of them. I don’t do the weighted water bottle thing. Sorry. Good thing the dog decided to sleep behind the loom and not on her bed…

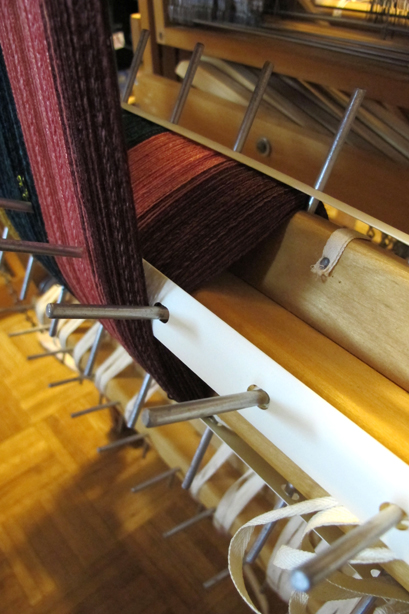
As I wound, I keept the warp threads perfectly in line with the pegs on the sectional beam, using a cable tie on either side of the warp on the back beam. (see photo above)
I punched holes in a few mini blind strips, so when I had four yards or so on the back beam, I just slipped the strips over the pegs and kept going. Oh the cleverness of me…
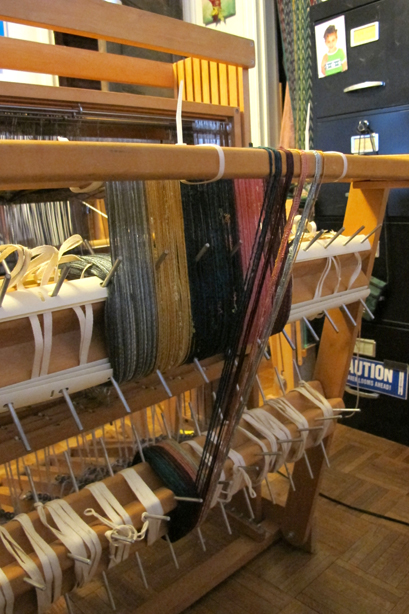
And now I add the additional supplemental warp yarns, placing them on a second warp beam, and I’m ready to weave. There is something very self satisfying about figuring it out all by yourself, and though I’m sure half of you have already figured something like this out on your own, I’m walking around with a smile, and a confidence that you can’t get by just typing the question into a weaving forum.

Stay tuned…
Ingenious!! Congratulations!
And I love your colors!
I think I will give that Harrisville tensioner a closer look, might be helpful.
I have been weaving for 29 years now, but sectional warping still escapes me. I have all the expensive equipment to do it, but it just doesn’t compute… Funny how the way you learn to warp sticks with you!
Good for you!! I am smiling too!
This is mainly how I have learned how to weave but still a very beginner.
Thank you and keep smiling
😉 Right on!
Hmmm, Daryl, I love sectional warping but I am lost as to what you are doing? (and after not following the Theo weaving I know you can explain) Do you put the entire warp on all at once and then add the supplementary warp? tyty
Alice Ann, I’m putting a twelve yard chain warp on a loom with a sectional beam. I need to control the supplemental warp threads under different tension, so once I beam the main warp, I beam the second warp onto the second warp beam. Boy was that a mouth full… 🙂 They were both sleyed and threaded at the same time. Just beamed separately.
Your pictures are a help along with explaining what your are doing. I have learned so much from your blog…
That is brilliant!
I want to say………..Bloody Hell! Ok, I said it. Always wondered what I would do if I had something other than rug warp or cottolin on that beam. I had thought about using blinds on the regular beam but this is brilliant! thanks so much.
SUPER. THANKS!
So interesting–I put on about 30 yards at a time for rugs, and just pulled out some blind slats to do the same thing. I know LeClerc makes some thingies for this, but I also have pegs like you, not metal loops that their things are designed for. Yeah! So glad they work!
I’m with you, Daryl, on the working-it-out-yourself. The college course I did was distance learning and the focus when we were ‘in residence’ was on design – the weaving was basically all done at home on your own. Even in these internet days (we did have our own mutual support network using a Yahoo group) when there was a deadline looming and a technical problem, you just had to find a way to make it happen! Nothing like pressure as an incentive… and it is so satisfying when you reach a solution 🙂
I love your descriptions. I’m trying to learn weaving on a sectional but using a warping board. I get the idea of the warping board but can’t sort how to get it onto the beam……so I’m building patience and measuring each 10 string section and tying on. Boy there are a lot to untangle. I hope this works