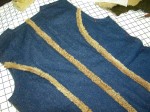
I’m chugging along on the silk denim with shearling jacket, and I took a series of photos to illustrate how I’m piecing the shearling and then mounting the silk denim onto it, followed by how I stitch the seams. If you aren’t into sewing garments, this will not be an entertaining blog post, so you can just skip and wait for the next one. If you are interested in the construction process, I’ve made the images small, there are lots of them, just click for a larger view.
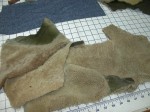
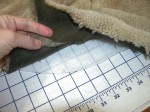
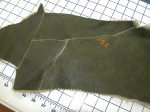
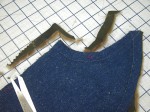
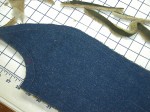
First I took each pattern section and laid the shearling scraps on top of the pattern, overlapping so the entire piece was covered with usable shearling. Then I cut through the two layers of shearling where they overlapped to get a clean butt joint. I secured these joints on the shearling side with magic tape so they wouldn’t shift. I cut the shearling just a little bigger than the edges of the pattern.
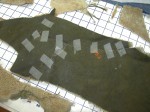
I flipped the shearling garment section over and taped the skin side of the shearling where the butt joints occurred. Don’t forget to remove the tape from the shearling side before you stitch! (I know this from personal experience. Twice. Don’t ask…)
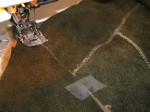
I used a zig zag stitch on my machine to join the butt edges together. I kept the skin side up, so the feed dogs wouldn’t drag on the leather skin, but the reason this worked so easily is I used my built in dual feed foot, part of the Janome Professional 6600 machine, and I can’t tell you how important that foot was in doing all this work. The shearling sections glided through the machine effortlessly. I also used a #18 needle.
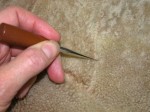
Once the shearling is pieced, I take a sharp tool like an awl, and scratch the shearling at the butt joints so the pile comes up and fills the gap. The seam isn’t invisible but I like the aesthetic and I’m thrilled that all these pieces are being used up.
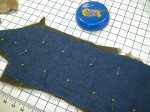
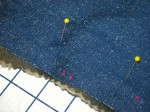
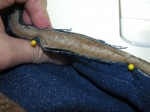
With skin side up, I mount wrong sides together, the shearling and the silk denim, and carefully pin the perimeter with heavy duty quilter’s pins. They are extra long and will pierce the shearling and hold it in place. I make sure the shearling extends beyond the denim and that any tailor’s tacks are completely visible.
I carefully stitch the two layers together using a basting stitch on the machine. Again, the built in dual feed foot is a joy. Once anchored to the silk denim, I trim away any excess shearling, so the denim and the shearling are exactly the same size. If there is a dart, I stitch it first in the denim, and then cut the dart out of the shearling and zig zag the dart edges together to create shape. This pattern had a dart at the back shoulder.
Now I pin the adjacent sections wrong sides together. This takes tremendous strength to get the pins to hold the two layers without shifting. I do my best, but know I’ll be pulling the pins and shifting and re-positioning all along the way as I actually stitch.
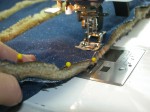
Now I fit that thick stack of stuff under the presser foot of my Janome machine, and again, I don’t think this would be possible on a machine that didn’t have an additional lift for the presser foot. My machine foot lifts so high I can stick my hand under it, which is almost the size of this stack.
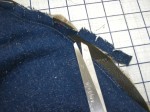
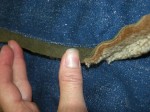
Using a long stitch, and a heavy needle (#18), I stitch the two layers together. If there are any skipped stitches, I changed the needle. You can imagine what a beating these needles are taking. Once stitched, I trim the denim seam allowance close to the stitching. That allows me to open out the shearling and reduce bulk. I carefully trim each of the shearling seam allowances down to 3/8″ of an inch.
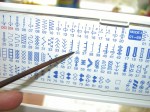
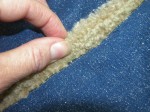
The final step is to stitch down the shearling seam allowances. I select an appliqué stitch and adjust the stitch width and length to be a little longer and wider than the programmed defaults. Again, with my magic dual feed foot, I carefully appliqué the shearling seam allowances down both sides of the seam.
So far I’m really happy with how this is coming together. I will say though, that there may be better ways to do all of these steps, this is what seems to work for my equipment, my skill level, my intended outcome and my patience. I figured all this out by sampling, since I know not what I’m doing, especially with shearling. That’s the fun of it all for me, steering the ship into uncharted waters, there is always a way out, I just have to think a lot harder when I don’t know where I’m going.
Stay tuned…






Thank you for sharing this story – the right equipment and tools meet talent, persistence and a brilliant mind! Awesome.
VERY interesting! You are an adventurer.
Brilliant! Excellent tutorial.
Ditto to all of the above. You are so inspiring Daryl!
why you not cutting shearling from the back side of materials? which can reduce the floss fallen during cutting.
Thanks for this, Daryl. You explained it so simply, and that’s really helpful.