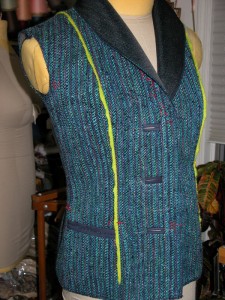
I’d like to be able to do a photo shoot of all the new work I’ve done over the last few months, before I leave next week for Iowa. So it makes sense to focus on finishing the Sandstone Layers Jacket, since I’m so close. I spent all day yesterday working on it, in between last minute conference details for NEWS (New England Weavers Seminar) and for the Midwest Conference next week. It’s those little details that can drive you nuts, and end up taking the entire day. But from my lengthy experience in traveling to guilds and conferences, it is the details that can make all the difference between a success and a disaster. There are so many things that can go wrong, especially if there is an airline involved, and those things that involve an airline are completely out of my control. But what is in my control, is my responsibility, and I’m pretty good with the details. The hardest part here is keeping all the conferences straight, and remembering who I’ve emailed what to!
On to the jacket…
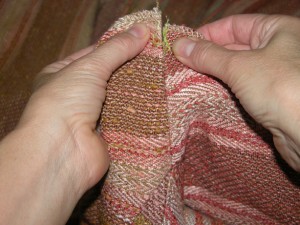 I took apart the shoulder, as far into the neck as I could. This pattern called for a back shoulder with considerable ease, and I was able to remove most of the excess ease, and that allowed me room to trim the back of the armscye (armhole opening on the jacket). So, first I restitched the shoulder seam, with the excess back shoulder extending beyond the front.
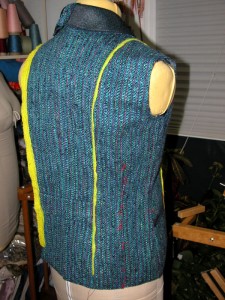
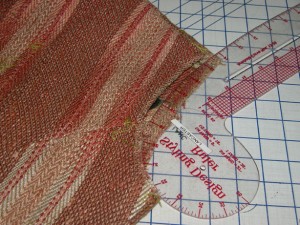 You can see in the photo on the right how broad the back armhole was cut, so I recut the back armhole to reduce the width across the back of the garment.
Once I reset in the sleeves, I tried the jacket on and with a couple of bathroom mirrors, I was able to get a clean view of the back armhole and it looked so much better. Sorry, I couldn’t hold the mirror and take a photo too!
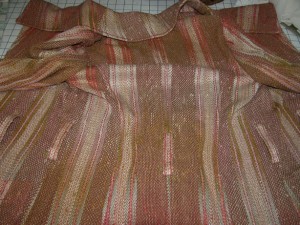 The next step was the belt loops. I got these pinned on, but had a real time getting them stitched on, they were so thick, I busted a number of #16 needles, (my #18’s seemed to have disappeared, hmmmm…….) Usually I blame my 19 year old son when things in the house disappear, they usually reappear in his room months later, but I can’t blame the disappearance of size 18 sewing machine needles on a 19 year old…
I ended up sewing the tucked under top and bottom of the belt loop to the jacket, the belt loops were long enough to get the machine foot underneath the loop and zigzag in place.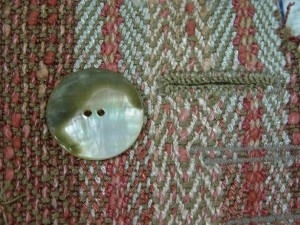
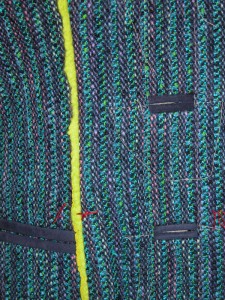
That leaves the buttonholes, which I saved for last. I didn’t want to do a fussy bound buttonhole on this jacket, there are too many details as it is, and this is a drapey sort of casual jacket to begin with. I was hoping to do handworked buttonholes, using a machine made one as a sturdy base for the buttonhole, because handwoven fabric can be too ravelly to support a handworked one. I spent about an hour figuring out how to do a machine worked buttonhole in my Janome 6600, usually I just use the old fashioned Grist Buttonholer Attachment on one of my other machines, but I wanted to see what this Janome could do. The size of the stitching of the buttonhole is very narrow (see gray buttonholes below in the photo right), but the ease of doing one that matches the button length is pretty convenient. Actually this works well as a base for a handworked buttonhole, since the stitching is narrower than one from the old fashioned Grist Attachment. I took a cone of the same yarn I used for the weft, and did a hand worked buttonhole over the machine made buttonhole, after I cut it open. I am a real fanatic on this , having been taught tailoring when I was 12, I have a really hard time with a regular machine made buttonhole on outerwear, the cut raw edge looks like a wound to me in an otherwise gorgeous garment. It is one of the things I point out when I do my infamous fashion show tours of “inside” the garments, at handweaving conferences.
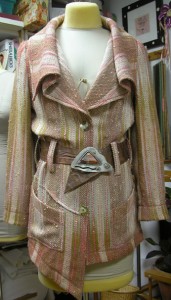 I still have to actually bite the bullet and put in the buttonholes, (this part is really scary because if I don’t like what’s happening, ripping out a machine made buttonhole is virtually impossible…) But the jacket is really coming together. I like it, and am thinking of what to put on the bottom, I have a commercial skirt that I’ve been wanting to recut to a short above the knee pencil skirt, so the mind is off onto another project before I even finish this one, which is as it should be…
I leave you with this wonderful quote from a good friend and weaving buddy, Ruby Leslie from Vermont…
“Either it’s a good time, or it’s a good story!”
I’ll be chaperoning a cruise around Manhattan tonight, well into the late hours, with a bunch of newly graduated high school students, so the above motto most likely will be really appropriate tomorrow morning…

