So here is the second part of yesterday’s progress report. It isn’t unusual for me to have a couple of projects going at the same time. It is rare that I meet one of those unusual people that works on one project and sees it through to the end before starting on another.
And it is exhibit deadline season. Of course I have more than one iron in the fire…
You may remember this photo from a couple of blog posts past…
 I took four 9 1/2″ wide scarves from a warp I did probably last spring. I played around with them to see if I could turn them into a dress. I loved the very 60’s silhouette, and made a muslin, which I couldn’t show because I sent it off to Threads Magazine for a column I was writing.
The scarves worked as woven, but they presented a couple of problems when reworked for a garment. First off were the very long floats formed by the supplemental ribbons. No problem for a scarf. Very problematic for a dress. And the width, the scarves were only 9 1/2″ wide. If my hips were a mere 36″ around, which I can assure you they aren’t, I could have probably just stitched them together with narrow seam allowances and called it a day. But I had only four scarves and wider hips…
And the fabric itself is a warp face slippery, I mean winter ice storm slippery rayon and tencel. Not completely stable, and very very ravely.
Of course, being the clothing guru, I was not willing to let any of that stop me. I’ve seen much more challenging fabrics come through my workshops.. 🙂
I will say though, I dragged my feet on this one. I measured about 60 times, over the course of a week, because once I made that cut into a scarf, there was no turning back. I’m sure you identify.
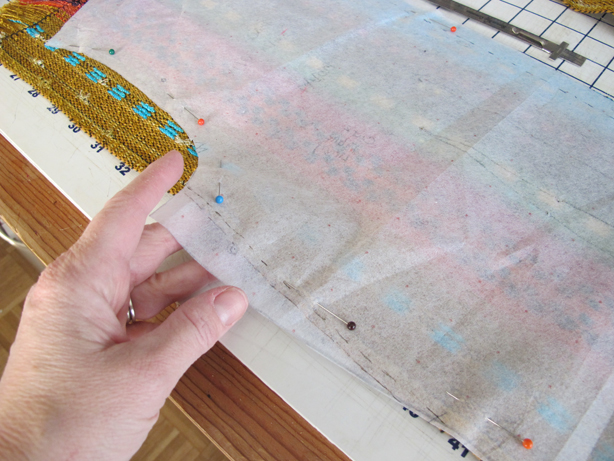
The first issue was to address the problem with my wider than the four scarves together hips. You can’t see it because the pattern is the same color as the table mat, but the hips actually extend way beyond the scarf, almost off the table.
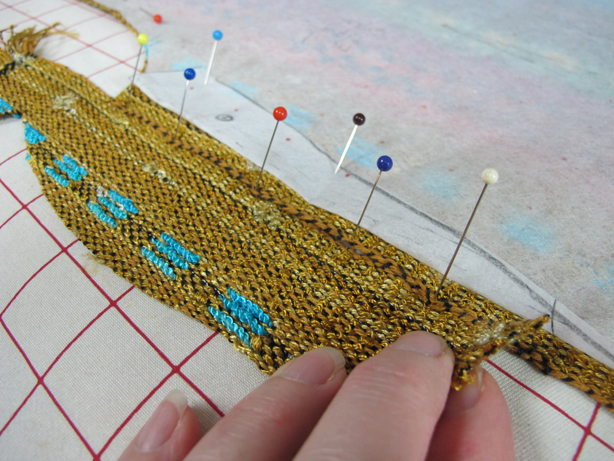
In addition, the underarm side seam needed extra as well. So I resorted to my old standby, butt selvedges, and used the cutout from the armhole for the additional piece needed on the underarm seam, and some of the lower part of the scarf for the side seam. I decided not to actually create a seam, since it was so close to the actual side seam, I thought it would be way too lumpy with all those seam allowances.
I carefully joined the selvedges together as invisibly as I could but the problem of the long floats stared me right in the face…
Once spliced, I could cut out the garment with the full width of the pattern.
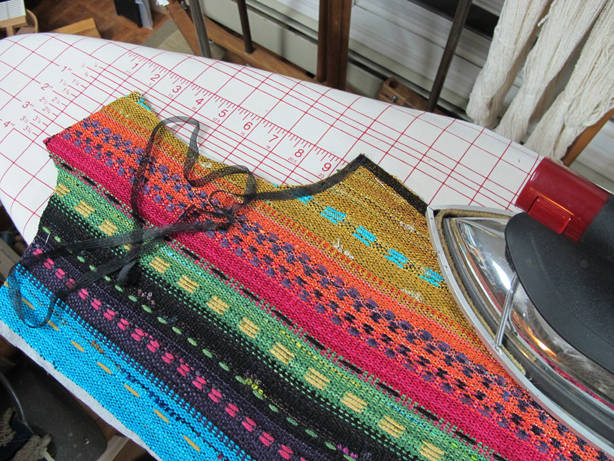
I thought about and actually tried fusing a narrow crosswise strip of fusible knit interfacing around the perimeter of the garment sections. This helped the very ravely rayon problem, but not the long float problem, and honestly, the more I handled the fabric, the more unstable I knew it was, and I’d never be happy with the finished dress, especially if it did get into an exhibit. It would need a lining and more detailed finishing than the fabric could support.
So in the end, I opted to fuse the entire back of the garment with the inserted textured weft interfacing I usually resort to for this purpose. I wasn’t sure it wouldn’t make the fabric firmer or more stable than I wanted, but I crossed my fingers and hoped for the best.
Then I transferred the markings to the garment sections, with running tailor’s tacks, so I could sew in the darts. I left the back seam allowance on the selvedge, but marked the seam line as well, since the back seam is actually curved, but I wanted to take advantage of the finished edge. By marking the seamline for the center back with a running tailor’s tack, I had a guide for stitching on an invisible zipper.
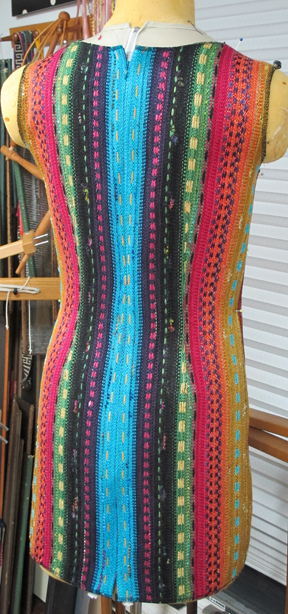
The back zipper is in, and so are the back darts, and I pinned the back onto the dressform and squealed in delight. How cool is this…
Stay tuned…


OH MY, it’s beautiful, Daryl!
Wow! It is beautiful! You are amazingly talented and creative!Good to see you today-not enough time to talk though!
How fabulous! You are just so very talented and have so many years experience, it shows. This is a knock your socks off dress. It will look awesome on you, even if you have wider (hahaha) hips!!!!
Very, Very cool!
Wow, just wow. This is gorgeous. I admire your skill and vision.
Gorgeous!!!
Way cool!! You’re such an inspiration, and a very generous teacher!
a runway garment
wow, this is very weaverish…
Weaverly!!! It is going to be a masterpiece and just what we have come to expect from you. Great job!
Very nice….sleek…. no gown issue/rear view at all. Looks good. Linear. Verticle. Still not convinced on the hemline design . To my eye it makes a very abrupt stop.
Amazingly cool! Loved how you ‘solved’ the extra-needed fabric.
That is SO cool! I’m so glad I met you and now get to learn amazing things from you. I turned 50 last month and was looking for something interesting for the second 1/2 of my life. I think weaving is going to win! Thank you for the gift!
A lovely piece. It’s going to look positively swanky on!
YUMMI!!!
This is gorgeous! I loved the scarves when you first showed them, and now to see them in a dress is very inspiring. I’m pretty comfortable with the weaving part, but very hesitant with choosing colors and designing.
Very helpful.
Can you tell me what dress form you are using. It looks very stable.
I’ve just stared looking for a dress form. Can you recommend one?
Thanks
Sherri, I’m using the Uniquely You Dress Form.
http://www.allbrands.com/products/3900-uniquely-you-pinable-foam-best-dress-form-customiz