I spent the day knee deep in paperwork, it felt good to plow through the pile. I took care of lots of small things, crossed off things on my to-do list. That always cheers me. The weather improved steadily throughout the day, leaving behind all the grey cold dreary rain. The gardens are spectacular! I am going to wage war this weekend on a particular ground hog who has figured out how to wedge his fat little body under my vegetable garden fence, once again eating all the lettuces. I feel like Mr. McGregor!
I did get to make a bit of progress on the jacket however. So I took lots of pictures! I’m rather enjoying such detailed documentation of the process I’m going through for each of the garments I’ve done since I started blogging. I would like to pull together all the written ‘threads’ for each garment and put them into a single document, but that’s going to take some time.
One of the difficulties I’m having is the slippery poly sari I’m using for the bias strips, torques when I apply it. It is an occasional phenomenon that happens, I’m not exactly sure why, sometimes my students have their binding 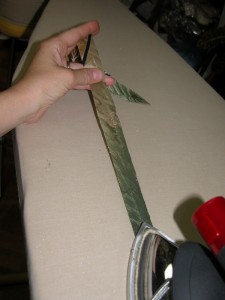 torque, but what I do know is that it seems to happen more with finer more slippery fabrics. I’m taken off a few strips, and reapplied them. I found that it is helping to take out some of the stretch of the bias strips first, with an iron, actually, that seems to help a lot. So I carefully press each of the strips, pulling out some of the extra bias stretch.
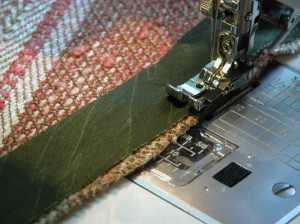
I found the the quarter inch edge foot, that came with my Janome 6600 machine, is a great tool for putting on accurate binding strips. I set the binding back about an 1/8th” from the cut edge, to reduce bulk.
Two blogs ago, I showed a Hong Kong tutorial, so refer to that for all the steps, I just wanted to show here how I am adapting the materials and tools I have to work with for this project.
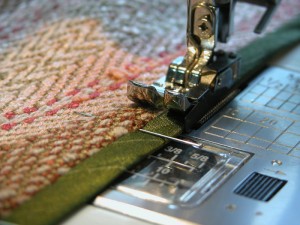
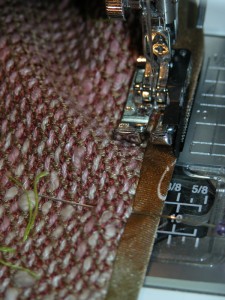 Once I wrap the binding around the edge of the garment, press and pin, I use the same foot to allow me to effortlessly and accurately stitch in the ditch. I love this foot!
Once I attached the binding on the edges that will be sewn together for a seam, I put them right sides together, and using 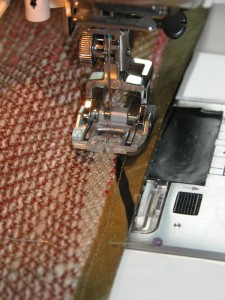 a small piece of black electrical tape as a seam guide (mom taught me that trick back in the 60’s, I still use it!) I stitched the seam. I am using my built in dual feed/even feed/walking foot, which is one of the greatest tools ever invented for a handweaver. It evenly feeds both layers of fabric, so they don’t shift while sewing. Although mine is built into the machine, you can purchase a separate walking foot attachment for most sewing machines, check with your dealer or try Nancy’s Notions.
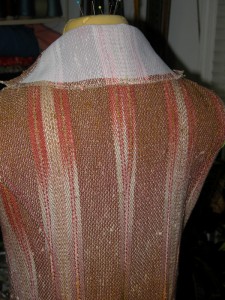 I constructed the undercollar, a big sweeping kind of thing, with a small collar stand attached to the back neck. I learned this old tailoring trick, also back in the 60’s, and used it here to help the stand of the collar literally stand up straight. I stitched parallel lines of stitching in rainbow fashion, following the curve of the collar stand, it is hard to see in the photograph, but there are small parallel lines of horizontal stitching all along the stand, about 3/16″
 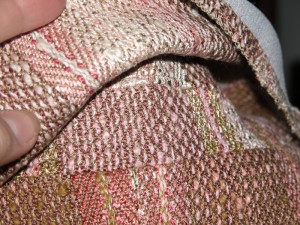 apart. This gives so much better support to the stand of the collar, so it won’t collapse into the neck.
I’m loving the texture of this jacket, there is a lot of detail still to come. I’m a little worried that the jacket will be so busy, with all the surface texture, and details, but only time will tell.
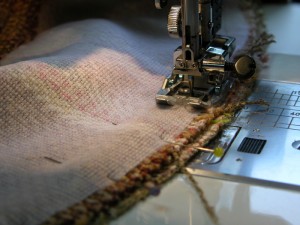 I stitched the upper collar/facing pieces together, finishing off the inside edge with another Hong Kong finish, and attached that to the garment front/under collar. Another trick I learned in tailoring 101, was shifting the upper collar away from the under collar about 3/16″ to 1/4″ while stitching them together if both were cut from the same pattern piece. If the under collar isn’t slightly smaller than the upper collar, then it will roll out from the upper collar when worn and never lay smooth. Some tailored jacket patterns actually provide a slightly smaller undercollar pattern
 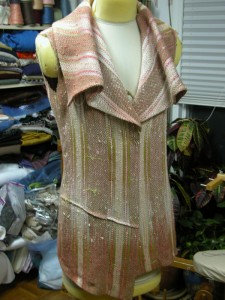 piece, but in this case, they were cut from the same pattern. So I shifted them when I sewed, and the upper collar fits much better.
I still have an enormous amount of work to do, lots of couching, and handwork, the pockets, belt tabs, sleeves, buttonholes, etc. I’m planning to do handworked buttonholes, so stay tuned for that. I’m enjoying this whole process of course, I’m always calm and centered when I’m in front of a sewing machine.
And the good news is the loom is fixed, and Bri can finish the last placemat, which is a good thing since they are due next Wednesday night. And I am about 10 slides into the Website Success presentation. I’m doing so much research and learning so much. This is like writing a term paper for school! And of course, the more I learn, the more I realize I don’t know…
The sewing machine is so much safer….
[…] computer, so I can’t actually show you the finish, but I think you can find it in one of my previous blogs. I also taught them to make piping, and I love to stuff the piping with soft Lopi yarn, every […]