I was able to make a lot of progress today on the piece I started yesterday. I made so much progress, I’m 2/3 of the way through. So I’d like to think that I’ll get it off the loom tomorrow, but who knows, life keeps taking all sorts of twists and turns…
I’ll describe how I did the piece, if you aren’t a handweaver and are reading this, it will go right over your head I’m sure, but bear with me, I always get really interested people whenever I lecture on the Theo Moorman technique, and I’m doing this a slightly different way, with a pick-up. First the draft:
![]()
I am threading the first and second shaft with gray 10/2 cotton, and shafts three and four are threaded with gray polyester sewing thread. So the ground fabric is a plain weave with shafts one and two, and the thin tie-down threads are on shafts three and four.
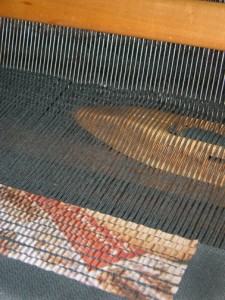 First I lift shaft 1 and 3, and weave across with the 10/2 cotton in the shuttle.
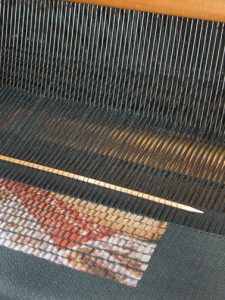 Then I drop shaft one, and insert a pick-up stick, which is an 1/8″ dowel that I shaved the ends on to make it pointy. The pick-up stick goes under the threads on shaft 3, the sewing thread, picking up only the threads I want to hold up through the next four rows. That way, the tie-down threads will weave into the background on the sides where the silk strips won’t be woven in. I release shaft 3.
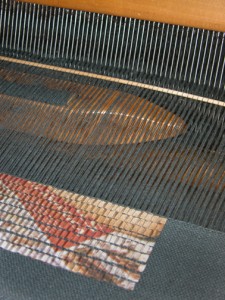 I lift shafts 2 and 4, and before I weave the next shot, I push the pick-up stick up against the reed. That lifts the tie-down threads from shaft 3 up and keeps them out of the way. I weave across with my cotton weft. I beat the weft in place, which moves the pick-up stick back to the fell line (last row of weaving) and then release shafts 2 and 4.
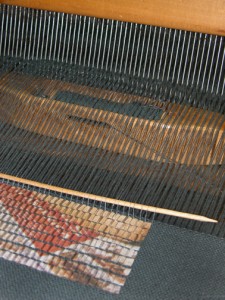
I lift shafts 1 and 3, and weave a shot of weft across, the pick-up stick remains at the fell line.
Then I repeat the previous step, lifting shafts 2 and 4, pushing the pickup stick against the reed, weave a shot of weft, and beat into place. The pick-up stick moves back to the fell line.
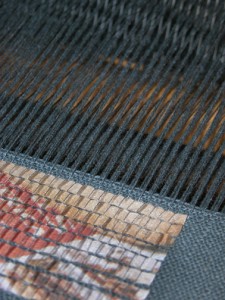 One more shot of weft, with shafts 1 and 3 lifted, for a total of five shots, it is important to weave an odd number of shots, once the strip is placed, the next row will raise the opposite set of tie-down threads.
The piece should look like this, remove the pick up stick, and lower shaft 1. All that remains raised, are the tie-down threads on shaft 3.
I carefully take my silk strip (see the blog from yesterday for information on this part of the story), and place it under the raised tie-down threads.
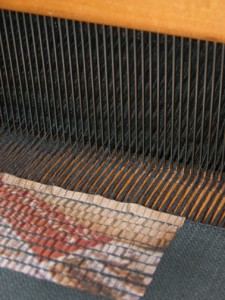 I beat that strip gently into place, and change the shed to raise shafts 2 and 4, and start the process all over again, but this time shafts 2 and 4 lead, with the pick-up stick placed under the tie-down threads on shaft 4. You eventually get into a rhythm.
I could really use a boat shuttle with a lower profile, I’ve seen them around, made for the Structo Looms I think. My weaving buddy Sally had a couple at a meeting once, and I thought they would make weaving on a table loom so much more efficient. But for now, since I mostly do yardage on large floor looms, this is what I have to work with and I just scoot it across the shallow shed, until it gets to the other side. If I wanted speed, I’d use the floor loom. An advantage of the table loom is that shafts stay up by themselves while you are manipulating the silk strip. Speed isn’t so important here.
It is late and bedtime is looking like a pretty great concept…
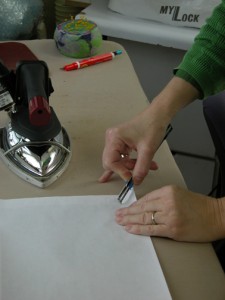 So I brought my table loom over to the cutting table , which is really convenient because I can stand and cut the strips as I weave them in. The second or third blog I wrote back in December described the process and gave the
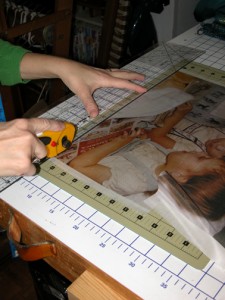
 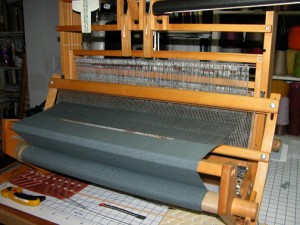 In the first photo, I found if I score the paper backing with a sharp ruler edge, I can get it started easier than fumbling with the corner. In the second photo, I am peeling the paper backing off the silk. In the third photo, I am
 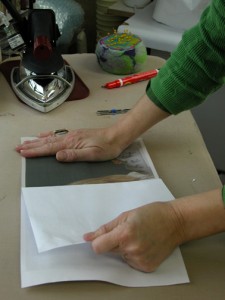 cutting the strips of silk, I cut them about 3/16″. You can see there are two big sections that make up the image. The last photo is of the table loom, you can see I have two strips woven in already. I’ll describe more about the weaving process later. I figured out a way to do a pick up of the tie down threads so only the ones I need are actually held out, the rest on the side get woven into the ground.
 photograph, it is only fair she gets this one once I have exhibited it.