A tale of two pockets…

Perseverance.  It is a wonderful thing.

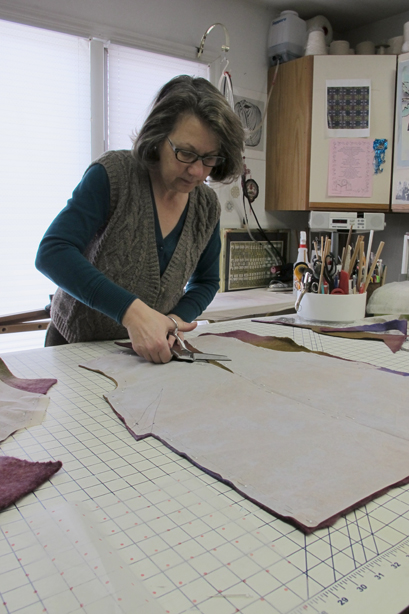
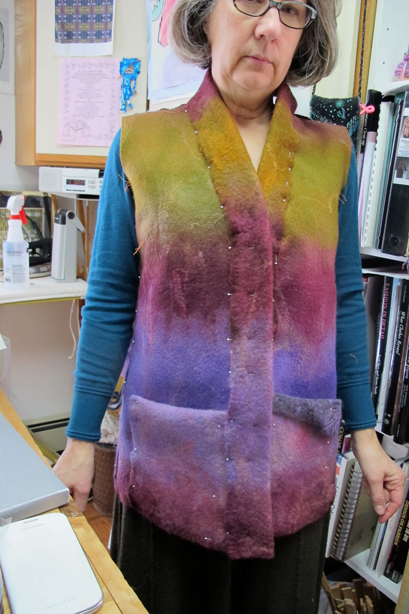
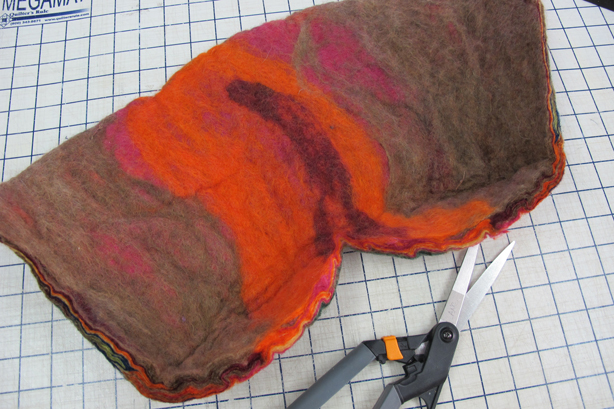
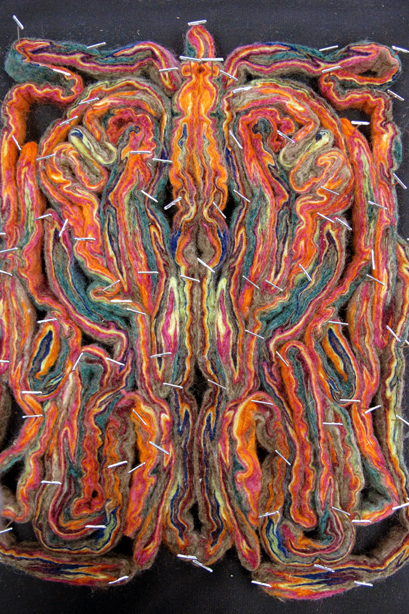
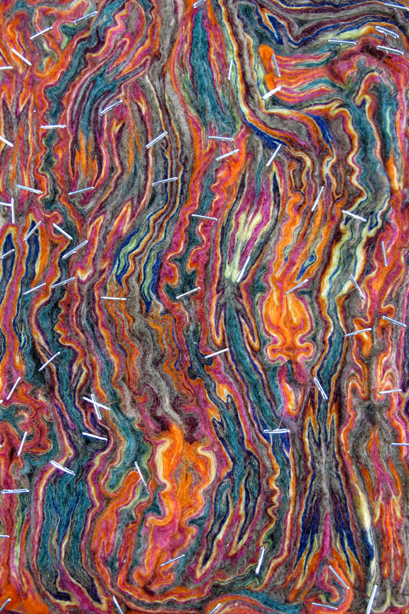
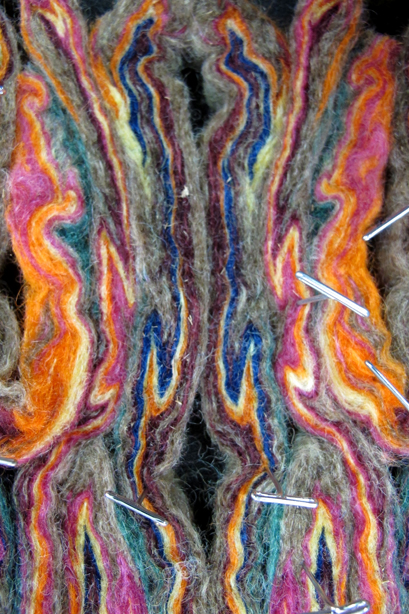
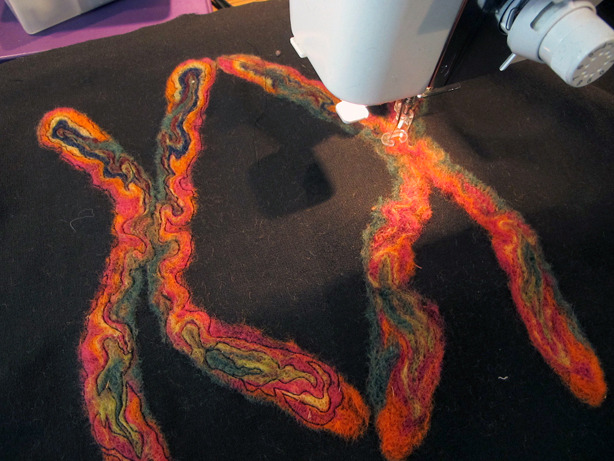
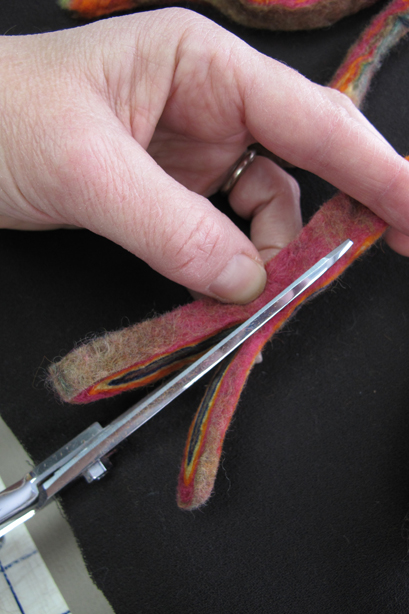
So last Wednesday I bit the bullet, mostly because I had my lovely intern Jen here and I wanted her to see me in action.  I finally took the felt panels that have been pinned to my dressform for weeks, and cut them out.  I have no problem cutting handwoven fabric.  I’ve chopped into thousands of yards of fabric.  But cutting this felt was painful.

Jacket1

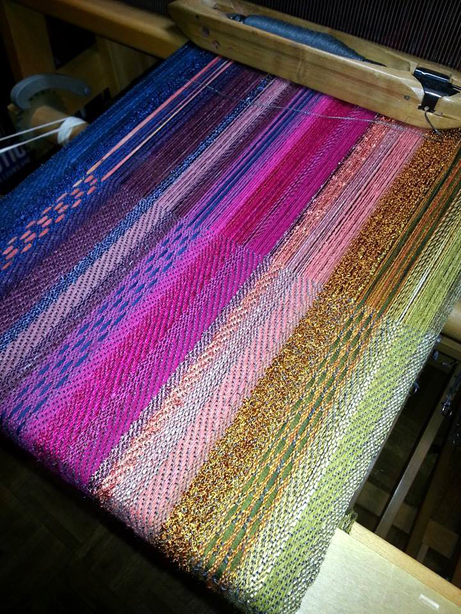
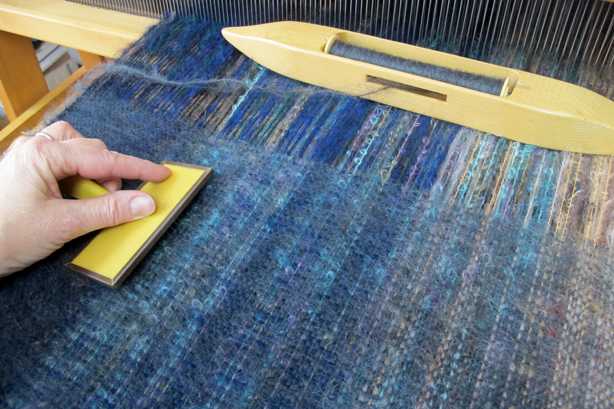
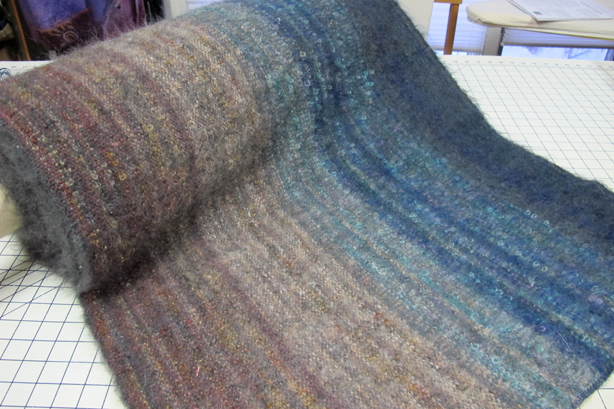
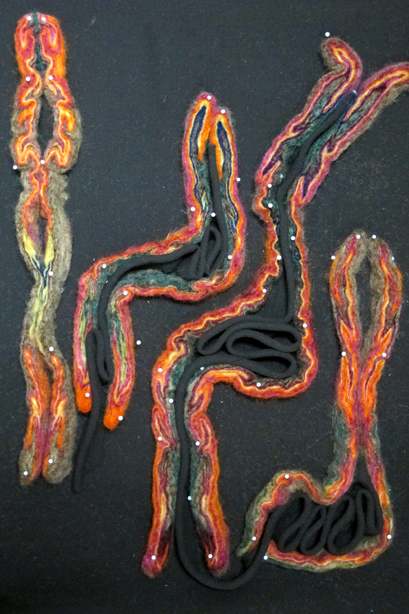
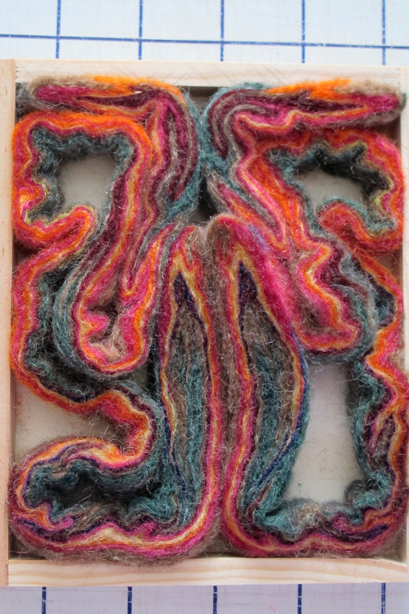
For those just tuning in, you can read about felting the panels here.

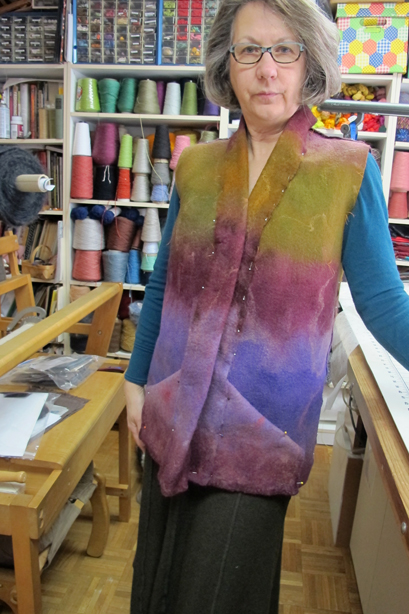
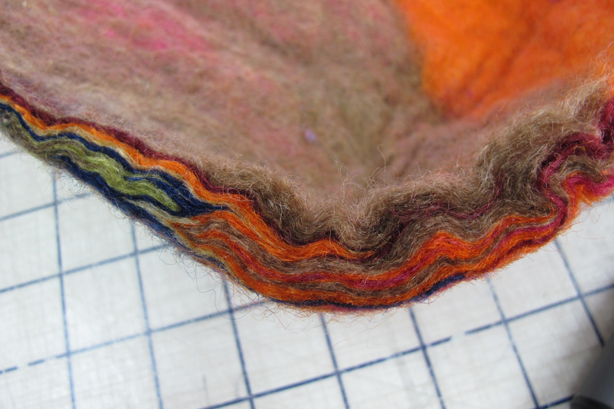
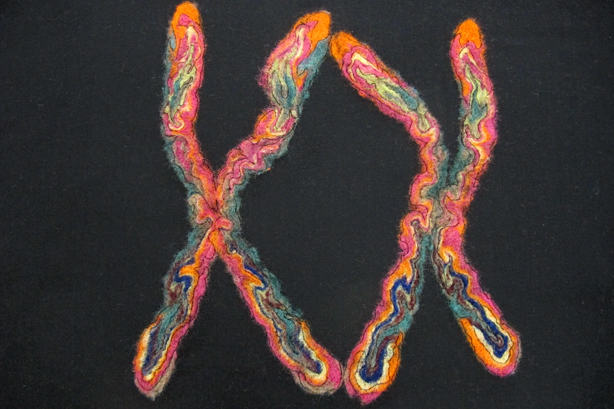
Anyway, I wanted to take advantage of the natural edge of the felt, so no finishing of hems and I could actually overlap seams.  There would still be a cut edge on the inside but I’d deal with that later.  The layout was tricky.

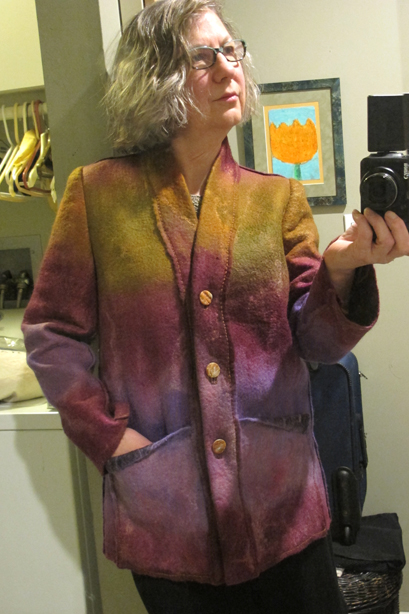
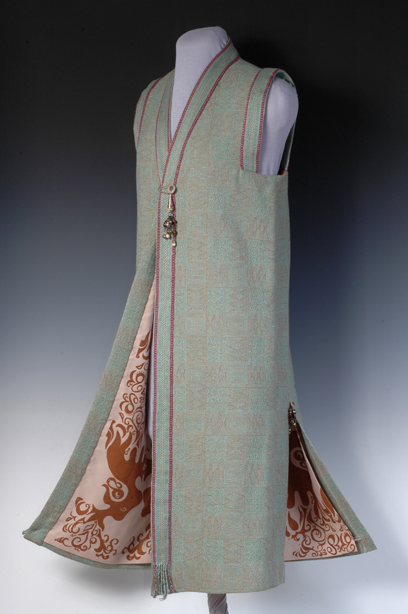
The whole point of this felted jacket was to make a sample of my now infamous Daryl Jacket, the jacket pattern I use for all my garment construction classes.  I teach a lot of five day intensives around the country, see the list here, (check out the one in Asheville, NC in May, it is gorgeous there and we have such a blast)  and it is highly likely that I’ll have at least one felter in the class, and since everyone who starts garment construction classes with me gets to make a Daryl Jacket, it made sense to have a sample. (Note: Garment construction classes are open to anyone who wants to sew clothing, whether you weave, felt or just like to buy cloth from the fabric store.  All levels are welcome, even beginners)

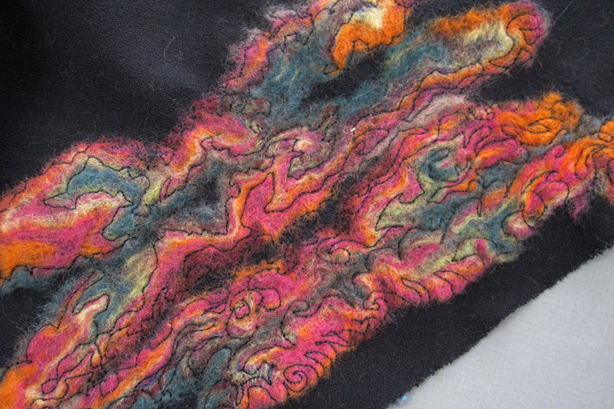
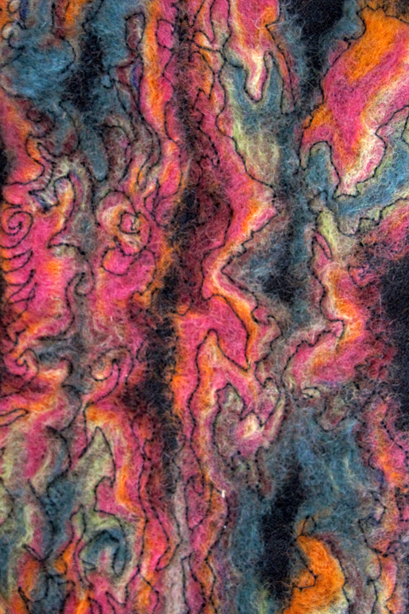
Did I enjoy making felt panels?  Only the first one.  Along about panel three I almost quit.  I am not a felter.  I don’t want to be a felter.  But damn I had the best time sewing these felted panels because I could do the coolest edge and seam finishes that I couldn’t do with regular woven fabric.  So I’m rethinking my dislike of felting…

I digress…

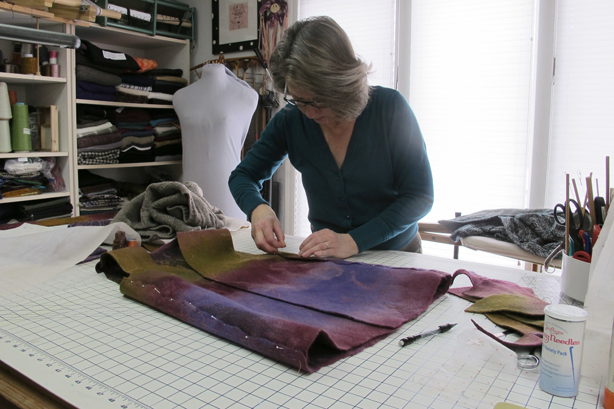
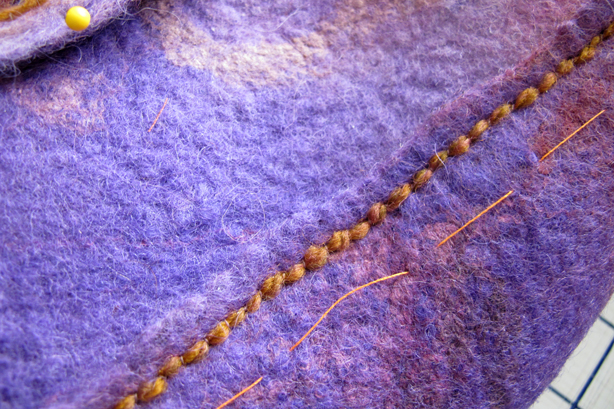
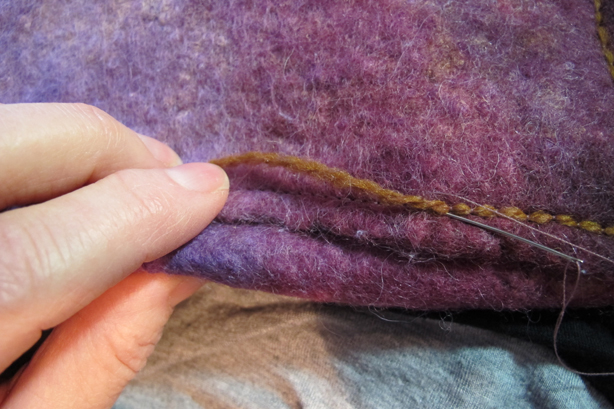
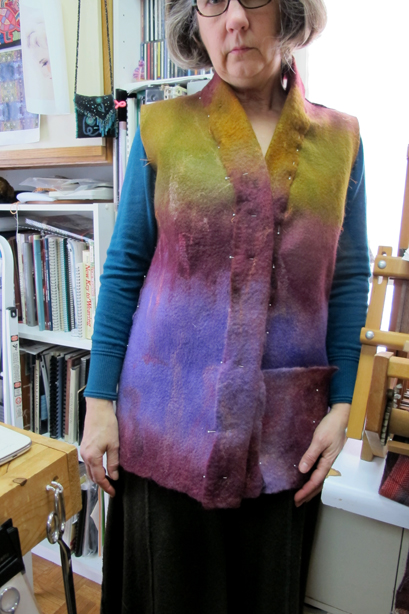
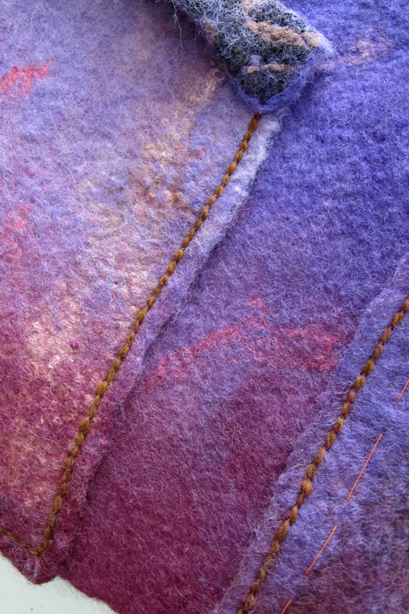
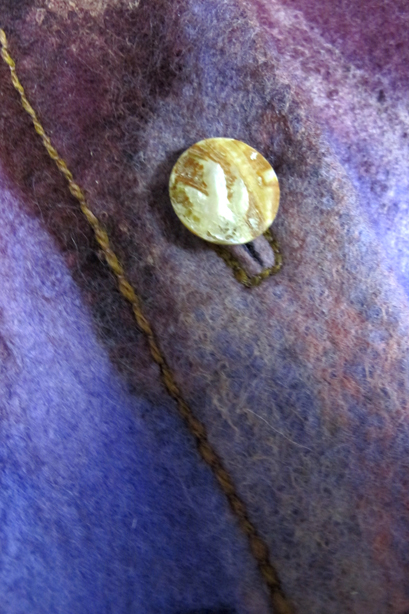
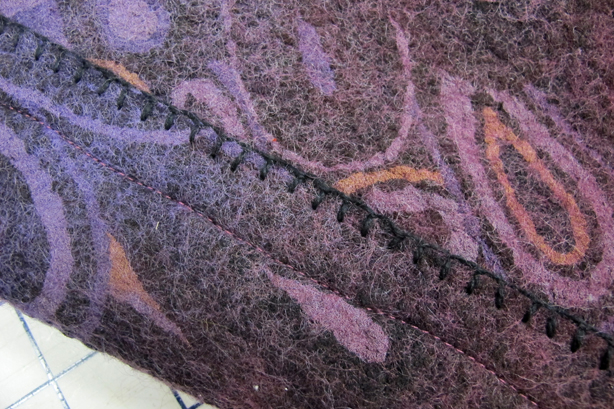
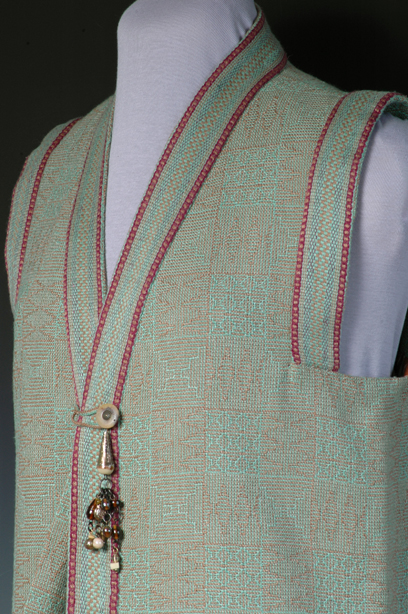
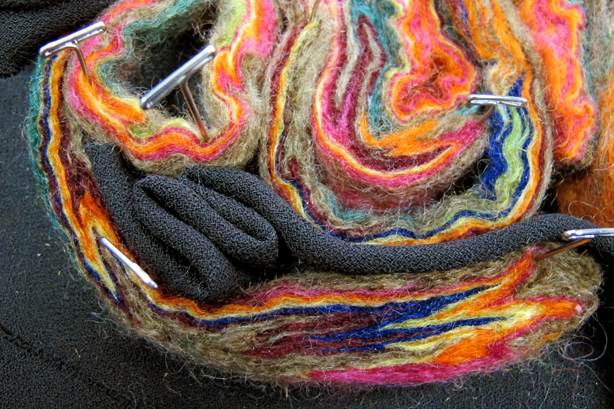
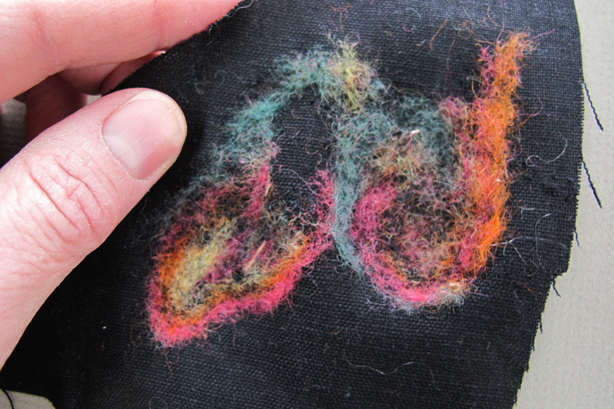
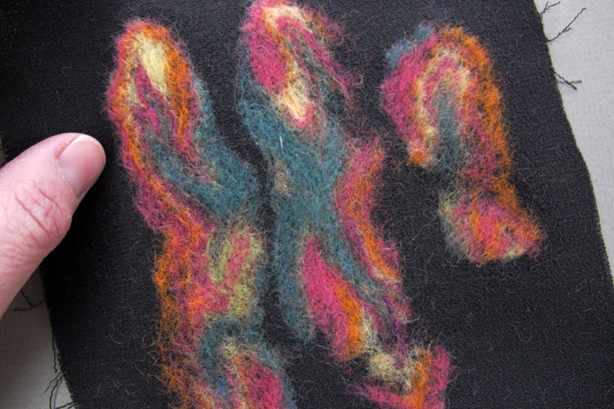
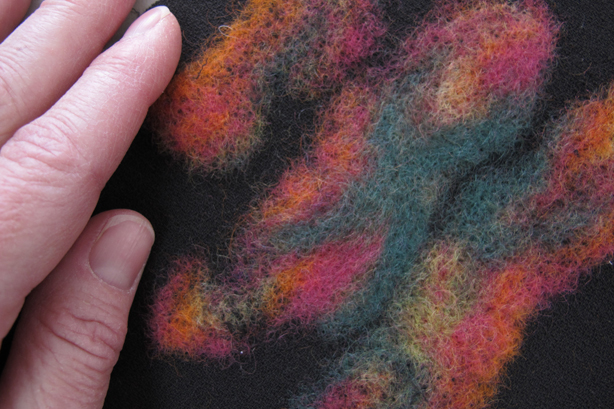
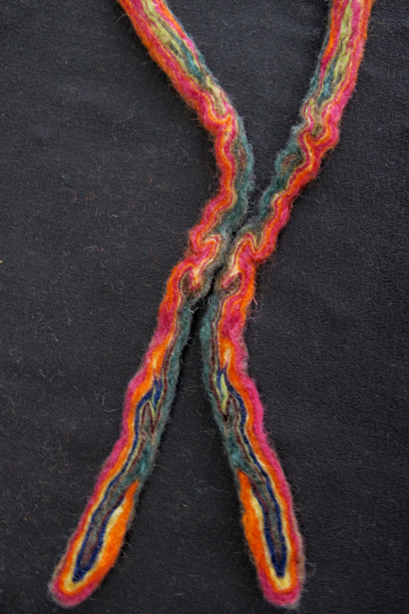
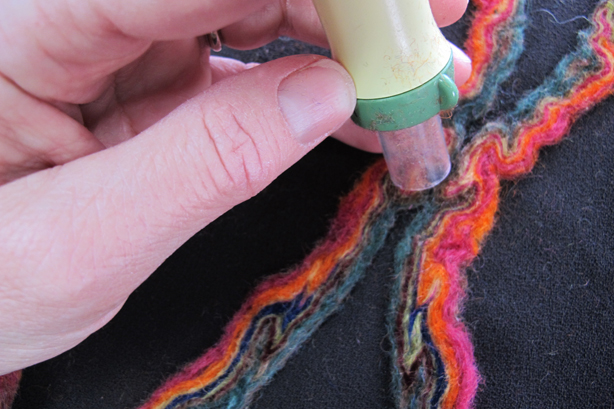
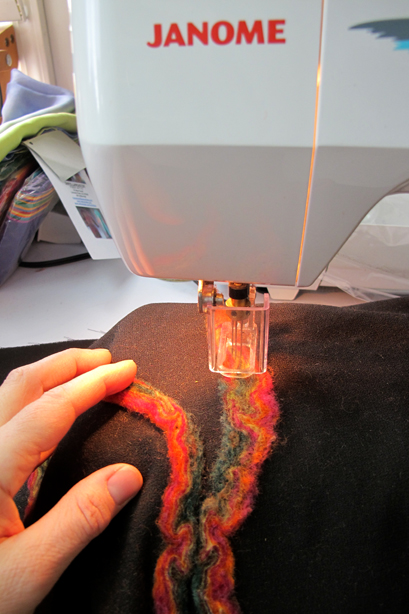
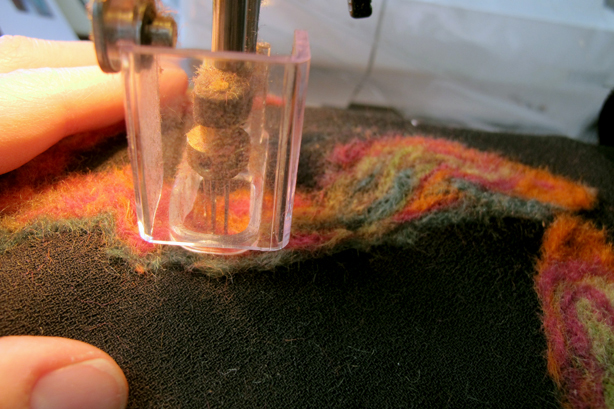
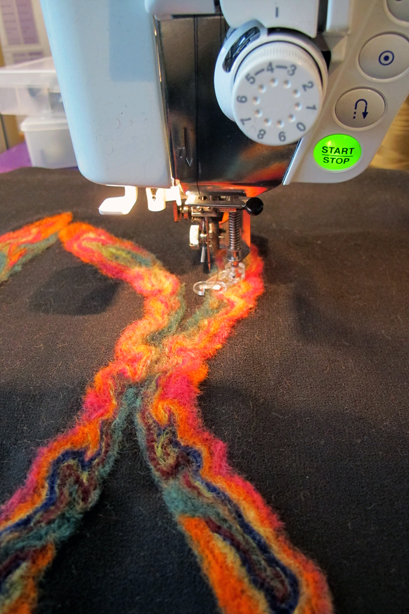
I sewed the fronts and backs together, first with a machine stitch and then hand couching a handspun yarn to cover the machine thread.  I spun the two ply yarn from the leftover fibers I didn’t use for the felted panels.  Pretty cool.

Jacket2Couching2Couching1

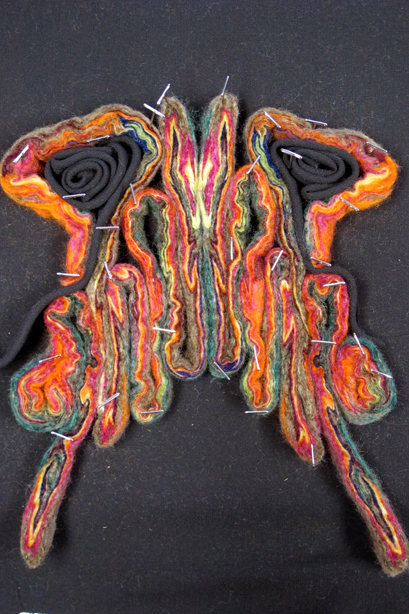
Then came the pockets.  The problem with the pockets is that I saved them for last during the felting process.  And the huge ball of roving I had purchased with this lovely periwinkle blue turned out to not have any periwinkle blue down inside.  So scraping together bits and scraps I was able to make two pockets but I didn’t like them at all.  They were too light.

I tried to fold them down.

Pocket4

I tried to fold them a different way.

Pocket6

I tried going without pockets.  Since this is a class sample and it is pretty cool to be able to just make a pocket with finished edges and attach to the jacket, I thought it was important that they be there.  Plus I hate jackets without pockets.  I’m like that.  I also tried turning the pocket so the burgundy color was dominant.

Pocket5

I tried to see what would happen if I just couched the heck out of them with the handspun yarn.

Pocket7

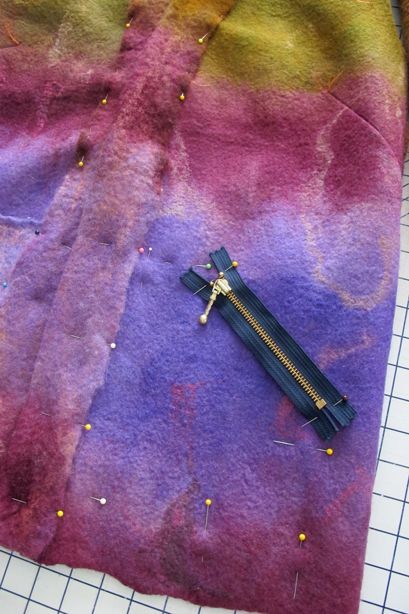
I even tried a zipper with the pocket behind it.

Pocket8

I slept on the situation and then Friday morning I woke up and tossed both pockets in the washer and dryer on hot.  They shrunk a lot more. Then I left for the weekend to visit old friends in the Berkshires.  Had a fantastic time by the way.  Got to visit with my daughter as well.  She crocheted a sweater and didn’t do a gauge check first.  It doesn’t fit her.  But I could squeeze into it.  Score!

BriannaCrochetedSweater

Monday morning I made a decision.  I put the now smaller pockets on the front of the jacket, couched them on and turned the upper outside edge down, just a bit, to help give them a little shape.  Just the tip of the inside shows.

Pocket10CouchingPocket

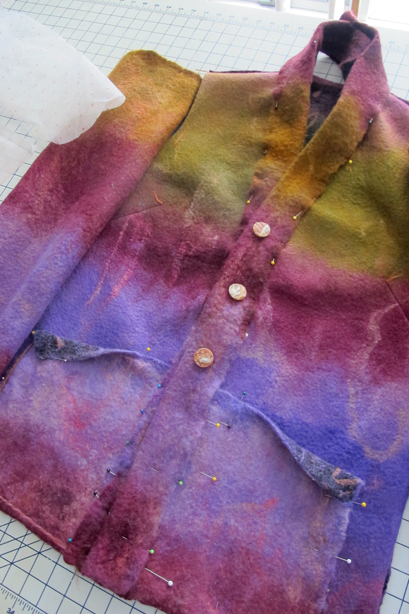
And so I carefully constructed the rest of the jacket, adding the sleeves, trying the jacket on every 45 seconds to check the fit and see if it worked.

Jacket

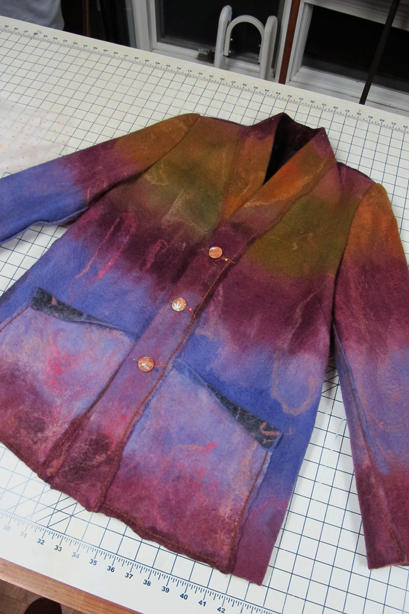
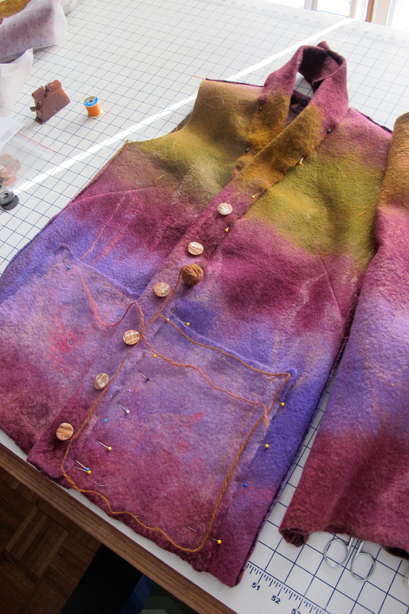
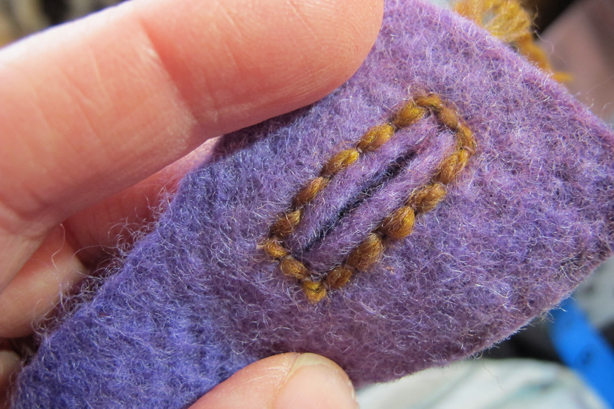
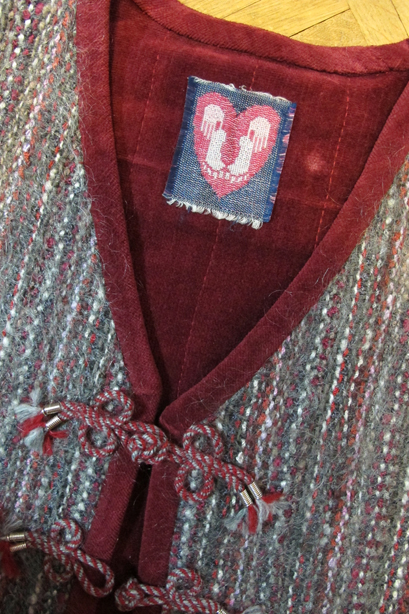
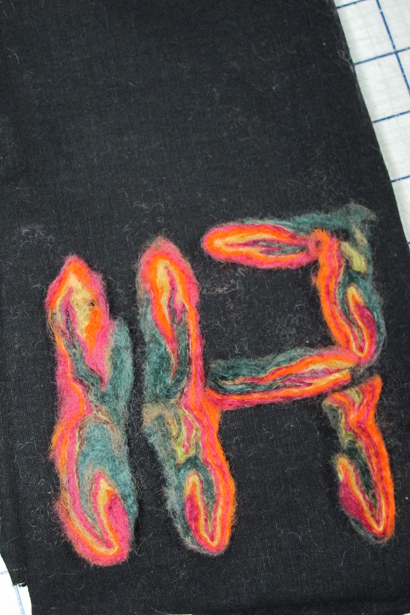
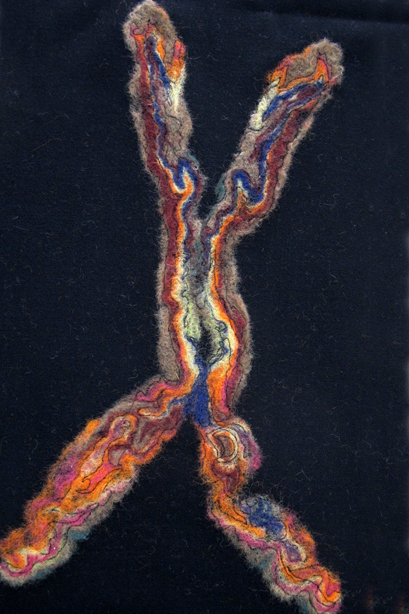
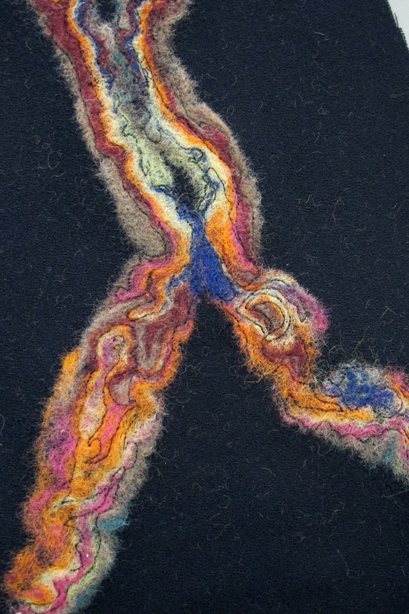
Meanwhile I had to figure out buttonholes.  Since you can just slice into felt and it doesn’t ravel, this was a no brainer, and couching around the buttonholes seemed like the logical thing to do.  I love them.  I could write a whole blog post on the button issue, but I’m happy with what I settled on, three abalone buttons from Tender Button in NYC.

Buttonhole1Buttonhole2

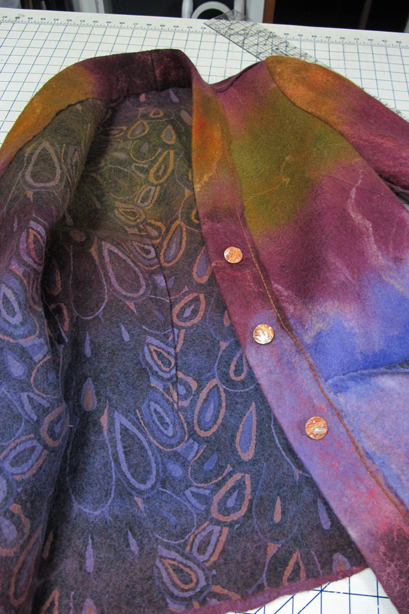
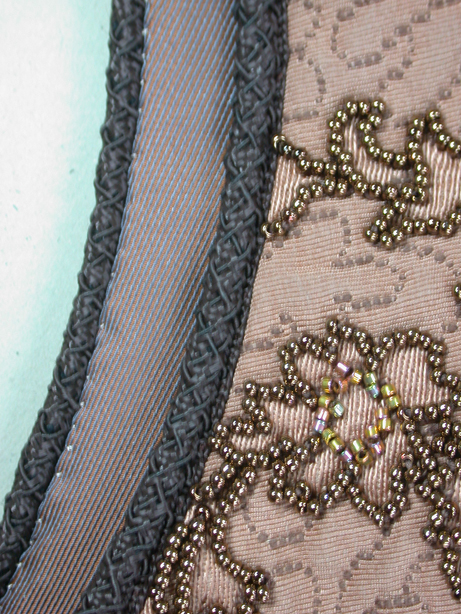
The inside of course is this wild print silk chiffon I picked up at Thai Silks last February, while I was teaching in California.  And I used Merino yarn to create a finished edge with a blanket stitch on the inside seams.

JacketDetail3JacketDetail2

And now I not only have a Daryl Jacket in felt, I actually adore it and can’t wait for this stupid winter to be over and be able to wear a cool spring jacket.  It snowed again today.  I can’t…

Jacket3

Stay tuned…


Lucky me…

02/22/2002

I will never forget this date.  The fact that I’m born on the 22nd (of May) and so was my husband (of March) doesn’t escape me.  Numerologists would have a field day with this.  22 has always been my lucky number.  It is the number my husband and I always play when we play roulette or games of chance.

February 22, 2002 was the day I was diagnosed with breast cancer.  That was 12 years ago.

Obviously I lived to tell the tale.

Each year on  my anniversary, (which is Saturday, so I’m posting this a couple days early since we will be away visiting old friends) I think of the change from BC to AC, before cancer to after cancer, because that’s what happens with a diagnosis like this, everything forms in your mind of how you thought  and did things before you had cancer and then about how you did after cancer.  Each year on my anniversary  I usually acknowledge it in some way in this blog, though I will say that over the years, the fact that I had breast cancer is more and more of a short chapter in my life’s book, and not anything that really defines me.  But in a way it really does.

I’ve been thinking a lot about the year of my diagnosis, remembering the details as best I can, and thinking about how they have shaped who I have become, both personally and professionally.  A couple of conversations have brought that year front and center, one because a fellow weaver is going through a similar diagnosis and is using  me as a sounding board for choices that aren’t what most physicians would recommend.  The other conversation happened via Facebook, with another weaver, who was reading some of my early articles for Handwoven Magazine.

I started writing for Handwoven Magazine December of 2000, after meeting Madelyn van der Hoogt, the editor at Convergence Cincinnati. Within the year, she asked me to be the features editor for the magazine.  She loved the way I wrote, and my huge knowledge base, and we agreed up front that I wouldn’t write projects (we called them PaaG’s/ Project at a Glance) which to this day I still avoid, but rather I’d write general focus features depending on what the theme of the issue was, and so I wrote for 35 issues straight for the magazine.  I think that works out to seven years.  So if you have a back issue of Handwoven Magazine, from December 2000 – around 2007, you’ll see some form of article from me.  Madelyn was the most fantastic person I’ve ever worked for, giving me a long leash and positive feedback and I did some of my best writing for them.  It is why this blog started, because I needed to continue the creative outlet of writing after my relationship ended. (In case you were curious, the relationship ended when the magazine was sold to a new publishing house and my elimination was purely financial).

But that isn’t what this post is about.  This is about being one of the lucky ones.  Not because I had cancer, and not because I lived, but because through it all I had the gift of being able to create something with my hands and that’s what got me through all those dark days of treatment, and painful memories, it isn’t about what I experienced, it is what I did with those experiences.

There are so many positive things I remember about those months of treatment, the support from friends and family was huge, and the support from the weaving community at large was even more embracing.  Madelyn gave me an amazing voice within the magazine of those months right after my diagnosis, as a matter of fact, the week I came home from my mastectomy, drain still in my chest wall, she asked for a photo shoot of me for an article they were writing in the magazine about all the key players/editors/writers.  It was one of the best therapies imaginable, because I had to get up, put makeup on do something with my hair, and act like a human being with a mission, I could not, for that afternoon of that photo shoot, act like I felt.

I came across the photos from that shoot earlier this year. (The stack of cling peaches is an inside joke from an End Notes Column I wrote for the Handwoven Issue September/October 2001)

Peaches

I remember coming home from one of my chemo treatments, and there were many, walking into my studio and looking at my stash and thinking, horrified, what if I were to die and not actually ever weave or sew any of this stuff I’ve spent a lifetime accumulating?  The best gift of that afternoon  of shock and horror of thinking I might not live to see my precious stash become something, was the complete lack of fear to be able to just dive into the stacks head first because really, what was the worst that could happen?  I wouldn’t produce a prize winning piece?  No, the worst that would happen is I wouldn’t ever get to enjoy my treasures beyond dusting them on the shelf.  Each cone of yarn and each cut of fabric would be a journey I’d never get to take. And that would be sad.

I remember pulling yarn off the shelf and looking at it in a new way.  I remember rearranging the yarn, and seeing the relationships that I never saw before.  And so, because I could, because it is a calming and healing thing to do when you have a gift of being able to produce something with your hands, I came home from that chemotherapy treatment and warped a loom.  I created a vest, a long vest, and then Madelyn wrote and asked for me to write a feature piece on design, for the now infamous Design Issue, September/October 2002.  I was still going through chemo when I wrote that article, and I occasionally hear from weaver’s that it is still their favorite article I ever wrote and would I please autograph the issue.

The article is called Designing from the Stash.  One day I will recreate the article and post it in the extra’s on my website, which I can do, I just can’t use images that are property of Handwoven.  At the moment all my archives seem to be inaccessible, but I know I have back ups of back ups, and one day I’ll sit down and write out all my words of wisdom, but for now, know you can look it up on page 36-39 of Handwoven Magazine September/ October 2oo2, Issue 111 or click here.

Handwoven111Handwoven111Article

The article centers around working from within the stash, challenging yourself to use what you have, giving you permission to buy when the time is right, adding to the stash, but figuring out what you already have and making good use of it.  The end result of that article was this vest.  Or more correctly, the end result of this vest was that article.

EvolutionFrontEvolutionDetail

My weaving friend Ginnie and I were chatting about this vest not two weeks ago.  I’ve been on a mission to move a lot of my early work out of the back of the closet/attic and into the hands of people who will appreciate it, through the guild sale,  Peters Valley store, and other venues.  I’ve been asked if this vest is for sale, and I’ve never once ever wanted to put a price tag on it because, though I don’t wear it anymore, this piece represents a time in my life and a place in my life I need to always remember.  The lining came from yardage I silk screened in college; textile paint on polyester, the pencil registration lines are still there, and I had exactly enough to make it work for this vest.  That lining fabric had been in my stash since 1977. And it was the first time I wove inkle loom trim for a garment.  The fabric itself was woven from two cones of yarn I hadn’t really ever noticed on the shelf, mill ends, in an eight shaft shadow weave.

BeadedVestI can’t imagine how my year of treatment would have gone had I not been able to sew or weave or even knit through out the process.  I brought an inkle loom with me for chemo, as well as a vest I’d been working on for a number of years, beaded, two beads at a time.  I remember knocking the tray of beads off the arm rest of the chemo lounge chair and having them go all over the floor and getting down on my hands and knees, IV pole in tow, picking up all the little copper seed beads from the linoleum.  I remember doing hand work on a garment while I sat in that lounge chair, every couple of weeks, as my blood cell count cooperated, and having a chemo nurse say to me, “I wish I could do something creative with my hands”.  I thought about that for a long time afterward.  This nurse saves people’s lives.  Every day.  Chemo nurses are up there with the saints.  Yet this one was jealous of what I could do with my hands.

That year of treatment ended the following March (3/03/03) when I went back into surgery to remove the port implanted in my chest wall for easy access for the chemo drugs. (This allowed my hands to be free during treatment).  I brought kumihimo on a disk to occupy myself while waiting for surgery.  The interaction between me and the surgical nurse was hilarious and I wrote another End Notes Column for Handwoven Magazine, that you can read here.  I used the kumihimo for a vest closure and took the beautiful Lillian Whipple woven image from one of the cards I received from weavers all over the country, of hands and feet and a heart, and placed it in the back neck of the vest.  That’s another piece I won’t part with.

VestDetail

I am one of the lucky ones.  I have the gift that no matter what happens to me, I can reorient myself in time and space by walking into my studio and diving into something that lets all the dark yucky stuff stay out in the hallway for however long I’m surrounded by color and yarns and cloth and tools and magazines/books/patterns full of ideas.  Ginnie and I talked about how important that gift is, even during the darkest of days.  Some of my best work has come from working through the tragedies of my life and having a visual voice in which to express who and what I’m about.

And so that chapter in my life was 12 years ago, but I continue to make stuff, to play with what life brings my way, both the good and the bad, and I know that there is little in life that gives me as such satisfaction as what comes out of my hands.  Because  unlike everything else in my life, my studio and the contents are about the only thing I’ve any control over, and the one thing in my life I can always count on.

Stay tuned…


Plan B…

Or maybe it is C or D, I’ve lost track.

But I’m getting ahead of myself.  It has been a busy snowbound week here in NJ.

I threaded the scarf warp.

Scarves1

I beamed the scarf warp.

Scarves2

I put the supplemental warps on the lower warp beam.

Scarves3

I started weaving the scarf warp.  Can I  say what a breath of fresh air all the color in this scarf brings to such gray miserable weather?

Scarves4

Meanwhile…

I finally just sat down one day over the weekend and wove off the mohair yardage that has been taking up valuable loom space for more than a year.  It was a twelve yard warp and I’ve netted about 10 yards.  I carefully brushed the warp before I advanced each section of cloth.

Mohair1

Within a couple of hours the knots came creeping up over the back beam.

Mohair2

The fabric is washed and dried and rolled and even though the photo looks fuzzy, that’s actually the fabric, it is hazy and gorgeous to touch and puffy and light and I absolutely can’t wait to sew it up.  Worth the wait.

Mohair3

Meanwhile…

In anticipation of my trip to Florida next month for the Florida Tropical Weaver’s Conference, more because I want to think about Florida with all this raging snow up here in the northeast, I have to start prepping and planning for the workshop I’m teaching there, called Weave a Memory.  Participants will bring photos and I’ll scan them into the computer, adjust in Photoshop and print on fabric, which will then be cut into strips and rewoven back together in an inlay technique. I plan to fly down with one of my little Stucto’s set up for a demo, however I needed this particular Structo for the beginning weaving class I taught last month.  So I keep a spare castle threaded specifically for the Theo Moorman inlay technique I use, with warp wound onto spools, and I keep that stored for when I need the loom for a class like Weave a Memory.  I pulled the old castle from the Structo, and replaced it with the one that was pre-threaded with 14/2 linen.  I slipped the warped spools onto the hex beam after removing the apron I made for it, and then just had to sley the reed.  I printed a photo I’ve wanted to do for awhile, a shot of my son as a baby surrounded by our three dogs. It is printed on treated cotton artist’s canvas.  It was the Christmas card image for his first Christmas.  So that is underway.

WeaveMemory2WeaveMemory1

Meanwhile…

All the large works I’ve done in this technique have either been sold or given to family members or are in frames too large to get in my baggage to Florida.  So I need to weave a large piece that can be rolled up and taken with me next month.  I found this small color study I did in a college color studies class back in 1974.  I’ve always loved the image, made from inlaid pieces of Color-Aid paper, and even though the professor thought it was conventional in the color usage, she said it was well balanced and handled and nicely done.  I got a B.

StillLife

I scanned it into the computer and spent a lot of hours a few months ago, digitally repairing the missing pieces of Color-Aid that had fallen off and disappeared.  I cleaned up edges and then enlarged this little 6″ still life into a 20″ still life.  I split the image into three sections and printed them on 8 1/2″ rolls of treated cotton Percale.  Once it is cut into strips, you’d never know it was actually printed in three panels.

StillLife1

I got the table loom ready to go, I keep this one threaded as well for this technique.  I started cutting the first panel into strips, one at a time.  I started weaving the strips back together.  This is the first time I’ve used cotton, and I’m not sure the colors are as rich as I’d like, but we will see when it is all finished.

StillLife2StillLife3


Meanwhile…

In my quest to empty looms, (I’ve only got one of my shaft looms left to clear), I’m conscious of the naked loom syndrome, so I want at least a couple with something fun on them, something colorful, so when I’m in the mood to weave, there is actually something to weave.  It isn’t good to have naked looms.  I’ve got the scarf warp well underway, but there was this beautiful warp that has been artfully draped over my 36″ loom since dye day at the guild last August.  I really wanted to get that yardage going.

Fabric1

I spent a number of hours writing a draft, a simple combination of twill and plain weave, using most of both of the warps, one a rayon slub and the other a rayon/silk from Silk City, the old Contessa.  They are very different and will create different surfaces on the cloth.  To make the cloth a bit wider, I decided to add an additional commercial element and this dark green rayon novelty jumped off the shelf at me.  I had my trusty intern wind me a warp of 196 ends.

Fabric2

I got her started on sleying the reed, and this was pretty complicated.  There are three ends in each dent, and she had to pay close attention to what was happening while carefully combining the three warps.  I worked with her so there were no mistakes and took over when it was time to leave.  I finished it up this morning and really really wanted to see it threaded.

Fabric3Fabric4

That’s when the trouble started.

Actually threading the loom wasn’t bad, I had to pay attention but everything was going swimmingly well until I started really looking at the draft I was using.  Something wasn’t right.  I blew up the drawdown and studied it closely and found there were a couple of transitions that I just wasn’t happy with.  I’ve circled the problem areas.

Draft1

I went back to the computer and worked for another couple hours, there are two issues to work around, one is that this warp is already sleyed in the reed, and there is no way I’m taking 700+ ends from three different ten yard warps and pulling them out, and the other is I spent a lot of time working out the original draft using Fibonacci numbers.  I wanted to maintain that.  So the color sequence and spacing had to stay the same.  Only the threading could change.  Because of the Fibonacci numbers, the draft can’t technically mirror itself unless I add an additional thread in the middle of each repeat, and I don’t have any more to add, and I’m not changing the layout in the reed, so I reworked the transition of the twill and plain weave areas and ended up with a double thread in the dead center of each repeat, which could actually be kind of cool.  Or not.  Only one way to find out.  Thread it and weave it and hope for the best.

Draft2

So now I have to rethread about about 200 ends that are already threaded, but that’s only a few hours of work and I’ll tackle that tomorrow.  I like the transitions better between structures, they are tighter and cleaner.  And I used a broken twill transition between the larger twill areas and their dark green borders.

Stay tuned…


Don’t Cry for Me…

I of course am self employed.  My “office” is my studio which is about 40 feet from my bedroom on the second floor.  My morning commute consists of walking downstairs to the kitchen, making a large mug of tea, grabbing some home made granola and goat yogurt, and plodding back upstairs with the tea to begin checking emails and working on projects in the studio.

Notice I didn’t even mention getting dressed.  Why bother?  My jammies are really comfortable when crawling around my studio.  Saves on laundry.

So today, we had yet another snow day.  Sigh.  Nothing horrid, just a lot of ice and yucky stuff, but on top of what we got Monday, it is getting pretty clogged out there.  NJ does know how to get rid of snow, but local municipalities are starting to run out of money.  No one saw this many storms when writing last year’s budget.

Anyway, all over facebook, schools are closed, offices are closed, my daughter’s college in MA was closed,  my intern couldn’t make it in, roads were reportedly awful. I wouldn’t know.  I never went outside.  I don’t get snow days.  I just wander down the hall 40 feet and I’m at work.

This could be really really wonderful or really really awful depending on your perspective.  My poor husband works in the office attached to the bedroom, his commute is something like 20 feet.  He spent the whole day on exhausting conference calls.  I think he wished there had been a snow day for him.  I did what any self respecting fiber person would do to counter the grey icy mess outside, I dug out all the small balls of leftover hand dyed yarn I’ve squirreled away from my various scarf runs on the loom.

Scarves1


I wanted to try a different type of scarf than I usually weave, based on the yardage I did for Convergence Long Beach yardage exhibit.

Yardage


I lined up the colors I thought would work together into some kind of gradation.

Scarves2

I wound a pair of ten yard warps, each half the width of the 10″ scarves.  They would come together in the middle at the bright pink.

Scarves3Scarves4

I went to the loom, and sleyed the reed, adding the supplemental warps on top of everything else…  It was a bright and colorful day!

Scarves5Scarves6Scarves7

Meanwhile…

I cut the Crimp Cloth I wove off the loom, finally, and began pulling all the shibori threads while watching the Super Bowl Sunday night.  (I only lasted until 9pm when Downton Abbey came on…)  I continued pulling all day Monday.

CrimpCloth1

Monday night, I steamed the fabric while I made dinner.  Thanks for all those who responded to my cry for help on Facebook when I discovered in my notes that there was no mention of how long to steam the fabric.

CrimpCloth2CrimpCloth3

After letting the coil dry overnight, I carefully removed all the shibori pull threads and got a really really cool crimped cloth.  There are about three yards there, and I can’t wait to figure out what to make with it.  I’m on brain overload…

CrimpCloth4CrimpCloth5

And finally, I uncovered my big loom, sat down and started to weave off the mohair yardage that has been on there way more than a year.  It wove like fuzzy butter, (Ok that’s not a good visual) but spraying the back of the warp behind the heddles with good old fashioned spray starch kept the mohair from sticking and I just emptied one bobbin after another.  I’m hoping to weave  most of it tomorrow so I can get to threading the scarves and I’m getting close to thinking about actually sewing the felted panels into a jacket.

MohairYardageMohairYardageDetail

I’ll take a snow day anyday.  I just keep on working…  (But I do have to acknowledge here that my wonderful husband who works down the hall, and my son who lives in the basement, have been the ones to go outside and tirelessly shovel and clear snow.  I’m sure I’d feel much differently if I was out there wrecking my back with all this very heavy wet stuff. )

In case you were wondering, I did manage to dodge storms yesterday and meet with my critique group.  They loved the new Chromosome series of felted artworks, and really encouraged me to keep at it.  I came home yesterday afternoon really really pumped.

Felt33

A shout out to my wonderful son who turned 24 today.  It has been a roller coaster of a ride but totally worth it.  You turned out pretty well.

EricBirth

Stay tuned…

The Evolution Of An Artwork…

Grab a cup of coffee, it’s going to be a long one…

I wouldn’t usually do this to you dear readers, but I’ve been working on something for awhile, and it was important to me to put all the strings in one place, and my blog made the most sense. And it is a good way for me to follow my creative process, so you can scroll through the pretty pictures and wait for a shorter post at another time, or bear with me while I tell the story.  You’ve been warned.

This all started when I got a fleece a couple of years ago, from a farmer friend, at a guild meeting.  The fleece was free, but because of a particularly rainy spring, the window of time to shear was narrow, and even after postponing a date to shear, my friend ended up with a bunch of slightly damp fleeces and was giving them away at a guild meeting.  Anyone who has sheep knows you can’t store damp fleeces, they mold quickly.  It was too big to freeze, so after learning to dye wool in a crockpot, each morning I grabbed whatever would fit in the crockpot of the very dirty damp fleece, and tossed in some vinegar and Cushing powdered dye, whatever color I grabbed, and I cleaned/dyed the fleece in batches over the course of a week or two.

I had obtained by this point, a well used Pat Green electric drum carder and proceeded to card up some of the fleece I had cleaned/dyed and used some of that fleece for a couple of felted art pieces.  The rest of the batts floated around the studio as I moved crap from surface to surface and one day I got tired of moving the batts around and stacked them up, wrapped them around one of my trash cans, threw a stocking over the whole mess, and proceeded to felt it up.

Felt02Felt03


The end result wasn’t a particularly pleasing vessel, it was sort of thick and lumpy, but it did serve its purpose, to get rid of all the batts, and to create additional storage, indeed you can puts lots of things into a vessel this size.

Felt4

So I moved the vessel and its contents around the studio trying to get crap out of the way, obviously this didn’t help the situation at all. In a bit of frustration, and because I got curious, I started to cut up the vessel, into thin strips, mostly to flatten it out, but what was inside was magic.  And each cut produced a set of strips that were mirror images of each other.

Felt05Felt06Felt07Felt08

I began to blog last fall, about playing each morning, as a design exercise, arranging the strips.

Felt09Felt10Felt11

I had a critique from some respected fiber artists who thought packing all the strips together seemed to be altogether way too much, and that maybe leaving space, playing on negative space, or adding additional elements might give the eye some relief.

Felt12Felt13Felt14

I played some more with defining space.

Felt15Felt16


Then I went into the city last December with my lovely friend Carol Westfall who is coincidentally my former college textile professor from the 70’s, and we did an exhausting round of exhibits and galleries.  She takes me to places I don’t normally think to check out, indeed I also took her down to the Brooklyn Museum to see the Gaultier exhibit which completely wowed her, but I digress…  Carol had me stop, more for lunch at their fabulous cafe than anything else, at the Asia Society where they were having an exhibit called Iran Modern, a look back over the evolution of modern art in Iran from the 60’s onward.  I was blown away by many of the pieces, but what really struck me was the part in the exhibit called Calligraphy and Modernism.  Especially the part circled below. Click on the photo to get a larger image.

IranModernAsiaSocietyExhibit1

I loved the idea of using marks that make words, in languages other than my own, purely as tools for visual expression but non- textual meaning.  I came home and picked up one of the strips and trimmed it down so it was pretty flat, and started laying pieces on a small square of linen.

Felt17

Attaching them was going to be interesting, and since we are working with wool here, why not try to needle felt them into the cloth.  I have a needle felting embellisher machine from Janome, purchased at the Michigan Convergence back in 2006, because that was the tool to have back in 2006.  I’m sure you can pick one up used on eBay really cheap!  I dug it out, and played around with how the short cut pieces of wool would adhere and what they would adhere to.  Linen didn’t work well, but wool crepe, scraps from a skirt I was making last Fall, seemed to do the job.

Felt19Felt20

I was even torn which side I liked more.

Felt21

I cut up a couple more strips, this time longer ones, to see where I could go with this, and when I laid the mirrored pair of strips on the cloth, they fell into what, if my high school biology class class memories serve me, looked suspiciously like a pair of chromosomes.  This was pretty awesome.  I Googled “Chromosome Images” and got all sorts of really cool stuff.  And unlike marks from languages I have no relationship to, I have lots to say about chromosomes and their combinations especially having a daughter in college studying pre-Vet/animal science and taking such delights as micro-biology and organic chemistry.  And one of her passions is of course genetics and reproduction.  I am fascinated by the whole science of chromosomes and the X and Y of the whole thing and I began to run amok.

Felt22

First though, I had to try out my technique on the larger piece. I used a hand needle felting tool to anchor the longer strips in place…

Felt23

Then I switched over to the embellisher to carefully needle felt the strips into the wool crepe.  I did try adding a backing and seeing if I could punch through both layers but I didn’t get the effect I was going for.

Felt24Felt25

I needed an additional element, mostly the felted strips looked like 2006 craft projects coming from the early days of embellisher hoopla.  Even though they were pretty, they lacked definition and as I looked through some of the Google images of chromosomes, I found that in fact, they aren’t little pairs of sticks lined up side by side, they are really very squiggly things, and so I slipped over to my sewing machine, put in the free form embroidery foot,  dropped the feed dogs and away I went.

Felt26Felt27

My first attempts (second image pair on the left) were over the top, I embroidered just to embroider and didn’t pay attention to what was actually happening with the stacked layers of felt, shaved and turned sideways.  So I carefully tried to mimic what I saw, and the effect was beautiful.

Felt28Felt29


What I loved about this whole thing was the process, I never set out to end up here, but just mulled over and thought of what if, and then acted on it over the course of a couple years.  I love this idea, and I have lots of pairs to work with, and I took a deep breath and pulled out one of the four small black 5mm felt rectangles I bought last December when I was in Germany at a very high end felt store.

Felt33

I loved the look of this on black felt, though I could have gotten away with 3mm, the 5mm was just a little too thick, it is what I bought, however, the felt, though completely compatible with the needle felted chromosomes, got full of lint quickly and the surface doesn’t look clean.  I’ll have to play with that…

I grabbed the remaining scrap of dark brown wool crepe, to try a pair of X Chromosomes, as a gift for my daughter who inspired this direction, and really really liked the effect.  I have some black wool crepe, thanks Nancy W. and three remaining rectangles of 5mm black felt and am anxious to play some more.  (Any of you out there know a good source in the US for 3 or 5 mm sheets of black merino?)

Felt31Felt32

I will be, weather permitting, since it is snowing a bunch here in Post Super Bowl NJ, heading out tomorrow for another critique session with a group of fiber artists.  I am curious what they have to say, but regardless, I’m feeling really solid about this direction and loving the results and can see building a complete body of work for my days when I’m not Daryl the garment maker but Daryl the fiber artist…

Stay tuned…